

I applied the “USAF” and the stars and bars decals to the bottom of the wings. The “USAF” is one of those thin black decals like I have applied earlier in the build. So far it is adhering well to the wing. The stars and bars decal is thick like the Thunderbird scallop decals so it should adhere as well as the others have. Note that I’ve also applied the first of the scallop decals to the underside of the horizontal stabilizers. You can also see the openings for the air brakes that I used when attaching the wings.
With the air brake parts not yet attached I took the opportunity to check the balance of the model. I press fit the landing gear and checked to see if the nose wheel stayed on the ground. It did, but if I touched the tail it immediately went to the ground and stayed there. If I pushed the nose back down it would stay on its wheels. Obviously the balance was on a knife edge. I removed the landing gear and mixed up a bit of 5-minute epoxy to coat 4 BB’s. I carefully dropped them through the air brake hole towards the nose. Then the model was placed on its belly with the nose slightly down. After letting the epoxy fully cure, I put the landing gear back and did a another balance check. This time if I pushed the tail down and then released the model it would go right back on its gear as it should.
With the wings attached and the balance corrected, I installed the air brake parts.

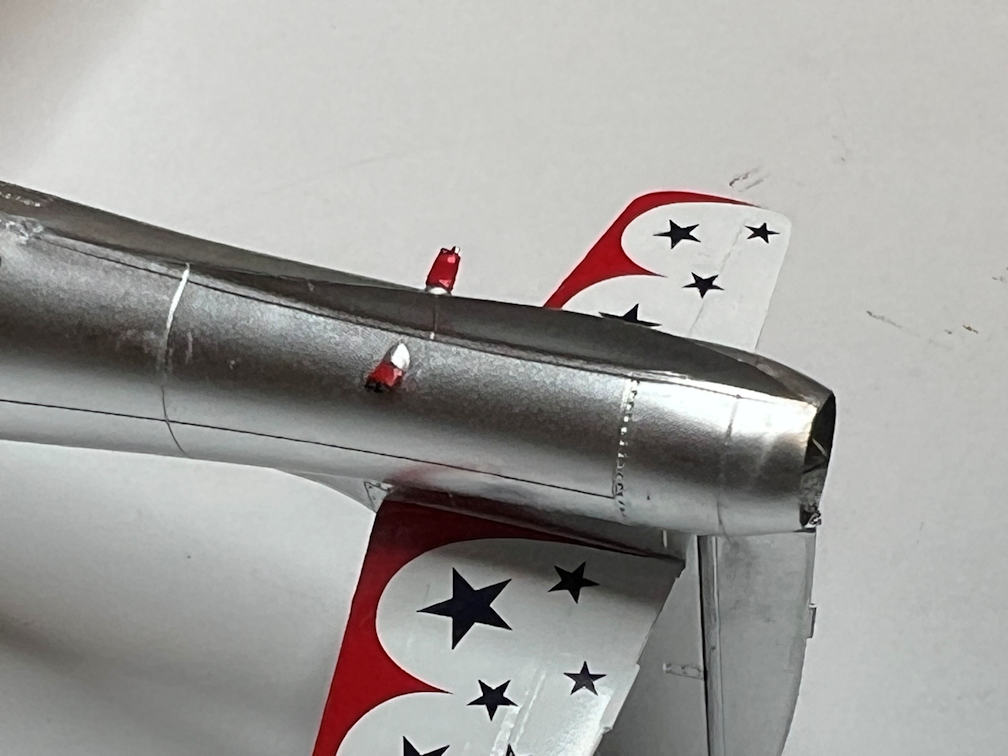
While working on the underside I attached the fuel dump ports with Plasti-Zap CA. They were painted with X-7 Red and X-18 Semi-gloss Black on the tips. These parts are very small, about a third of a grain of rice. Due to their size I was handling them with tweezers. The first one went on perfectly on the first try. I picked up the second one and as I was about to put it in place, I heard a snap and the part was no longer in the tweezers! I thought I had heard something hit the instruction sheet at the corner of the table and I hoped that maybe I’d be lucky and it bounced off the instructions and stayed on the table. If it hit the floor, it would be gone forever. The floor is carpeted and a part that small will simply disappear, never to be found again. I searched the table for several minutes with no luck. I sat back in my chair and tried to think calm thoughts. After a couple of minutes I restarted the search concentrating on the side of the table where the instructions were but a little further away. That area was covered with a bunch of random modeling tools and various bits from the last model build. I carefully moved each one to look under it. Finally, I found it hiding behind some old brushes and pencils. I put it back in the tweezers and applied a bit more Plasti-Zap and carefully touched it to its intended place.
I next installed the gun sight.

I painted the frame of the cockpit canopy with X-11 Chrome Silver. The yellow tape is on the part to give better visibility of the frame molded into the canopy. It also helped me hold the part while I was painting the frame. The next thing to do with the canopy is put all the thin white decals over the indicated places, but that will have to wait until the silver cures.

I touched up the anti-glare panel.

Then proceeded to add more of the Thunderbird scallops. This time with both the tops of the horizontal stabilizers and the vertical stabilizer.

While those decals were setting I was browsing through some Thunderbird research and found a couple of photos that showed that the early 1953 scheme did not have the fuel dumps red. They were instead natural metal like the rest of the plane. They didn’t paint them red until later in 1953. So, to be true to the version I’m building I got the X-11 Chrome Silver and repainted the fuel dumps.
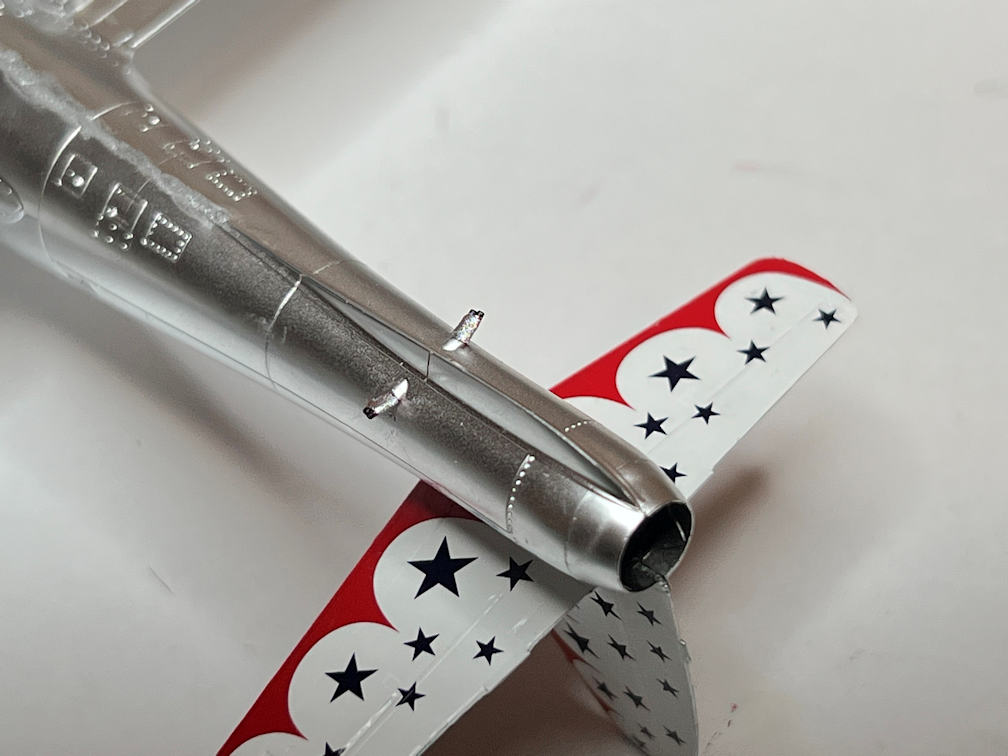
To finish off the tail decals I added the one blue star at the top edge of the rudder and also the tail number of this plane.

That’s if for now. The next update should finish this model. Thanks for looking. Don’t forget to hit the subscribe button at the bottom of the page if you haven’t already.
