
I haven’t worked on any flying rockets lately, and with the possibility that I might be able to get vaccinated in the next few months, I thought I should work on a new high power rocket. I went through my collection of kits and picked an old kit that I bought from a fellow club member many years ago. It’s a kit by Vaughn Brothers Rocketry. They started in the mid to late 1990’s and folded sometime in the early 2000’s.
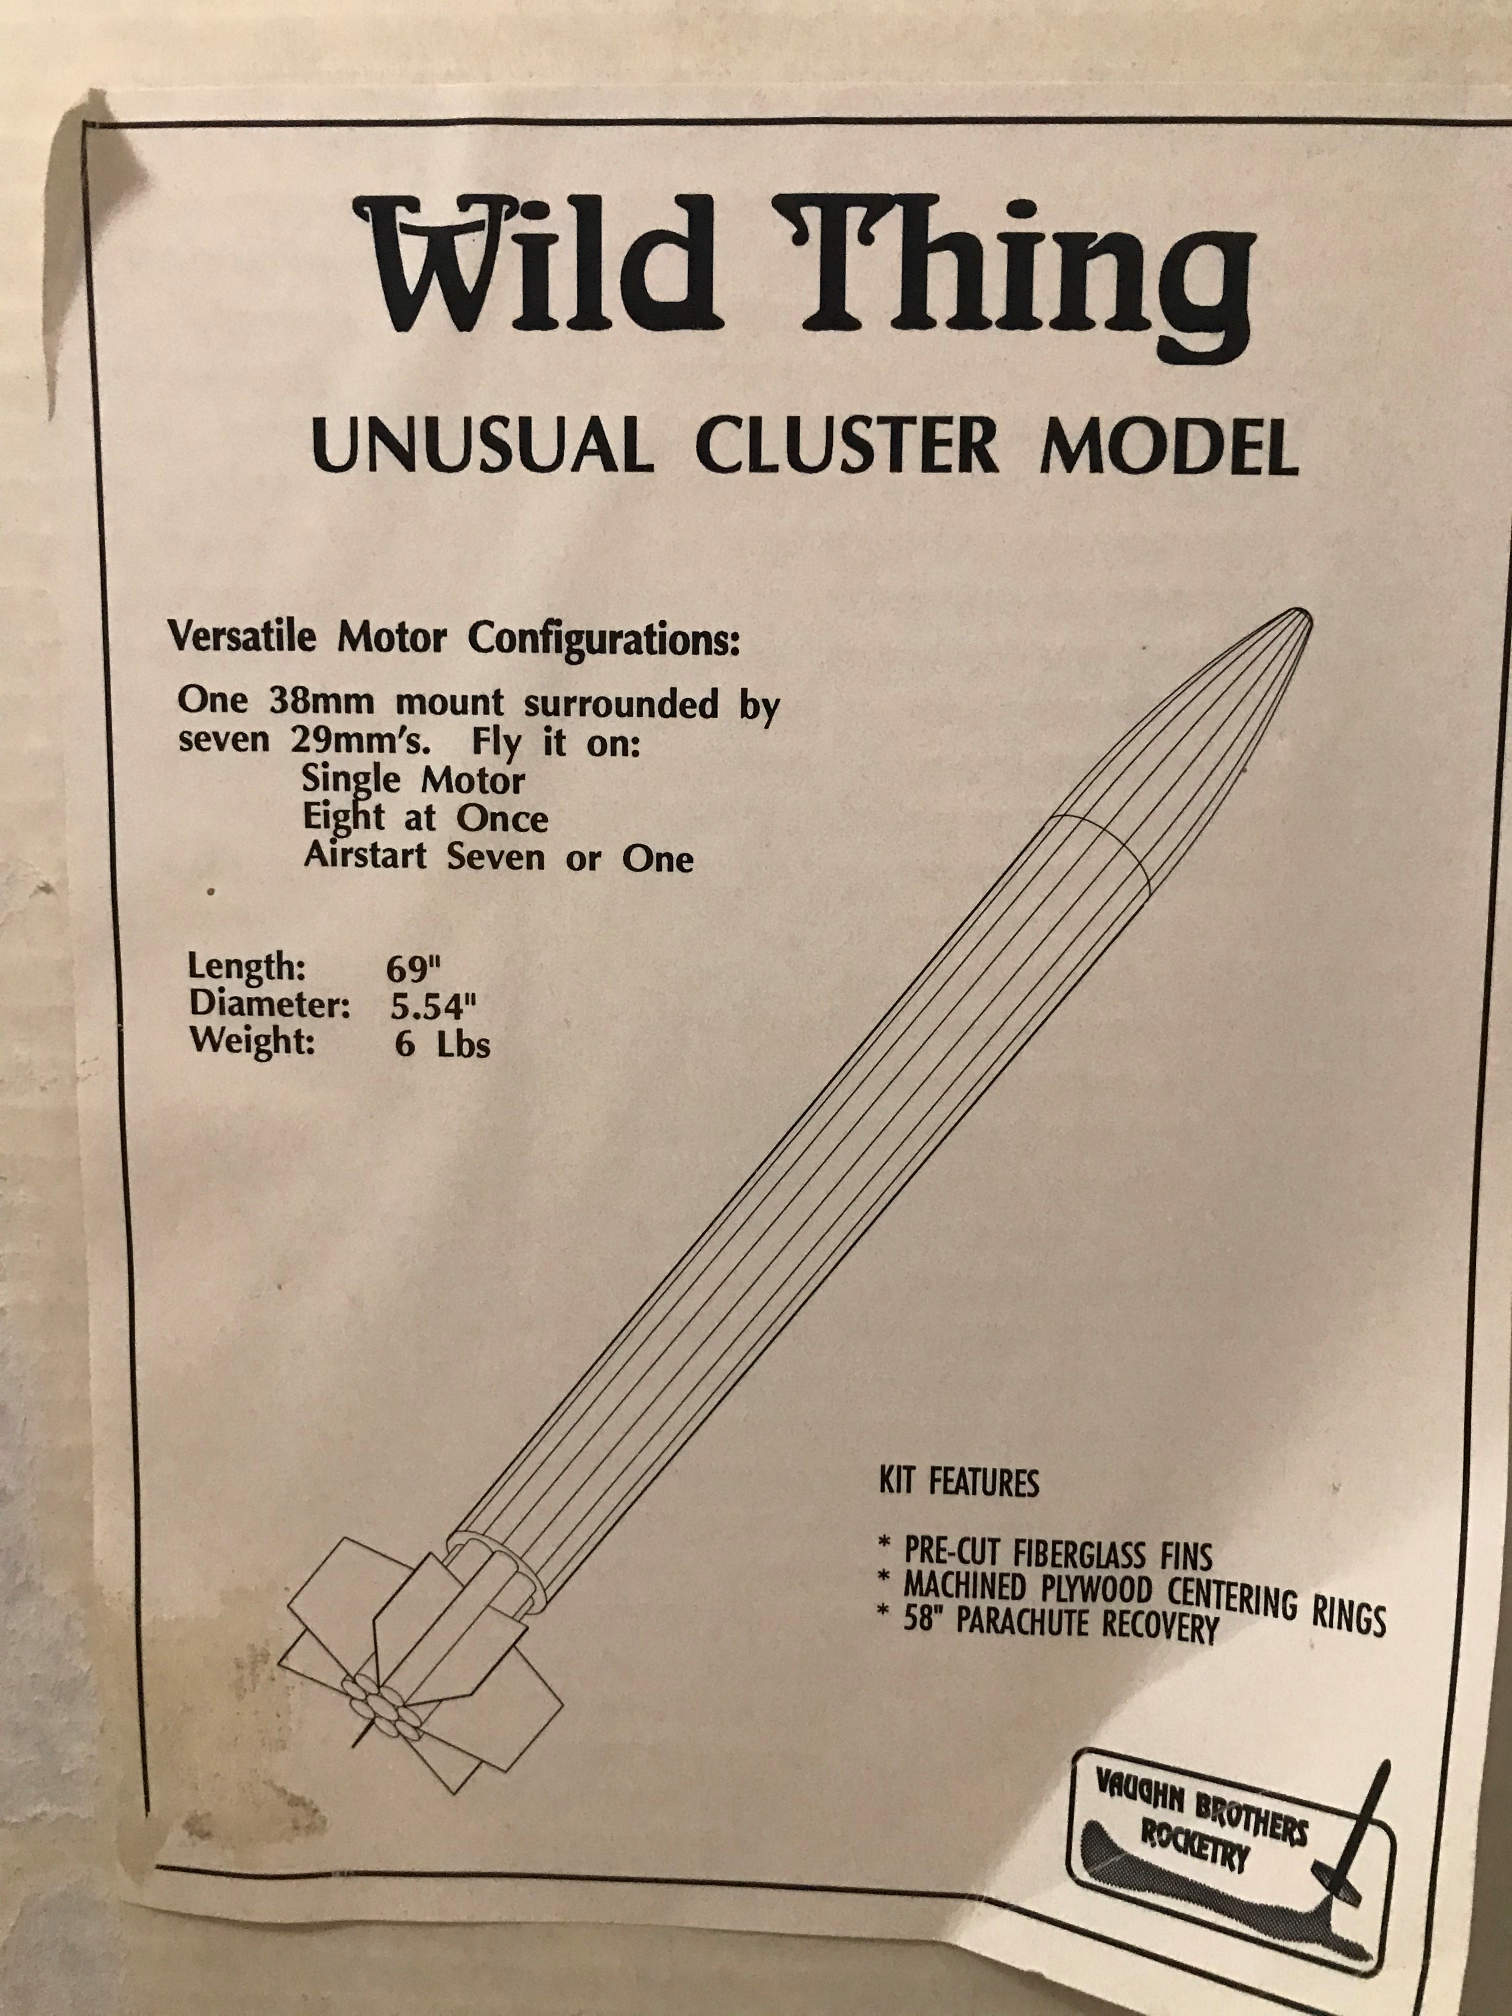
It is an interesting design. It has a central 38mm motor tube surrounded by seven 29mm motor tubes. It is designed to be flown on the single 38mm motor or a cluster of 29mm motors or both. The thoughts of flying a cluster intrigued me. But with safety considerations, it seemed that the safest way to fly the cluster would be to airstart the 29mm motors after the 38mm got it into the air. But, these days you really need a controller that can sense tilt so you don’t start the outboard motors if you are not near vertical. Plus, the 29mm motor tubes are mounted flush to the 38mm motor tube. That leaves little room for positive motor retention. I’ve pondered those problems on and off for a couple of years, and I have finally decided that I just don’t want the complexity and multiple points of failure beyond what a normal rocket has.
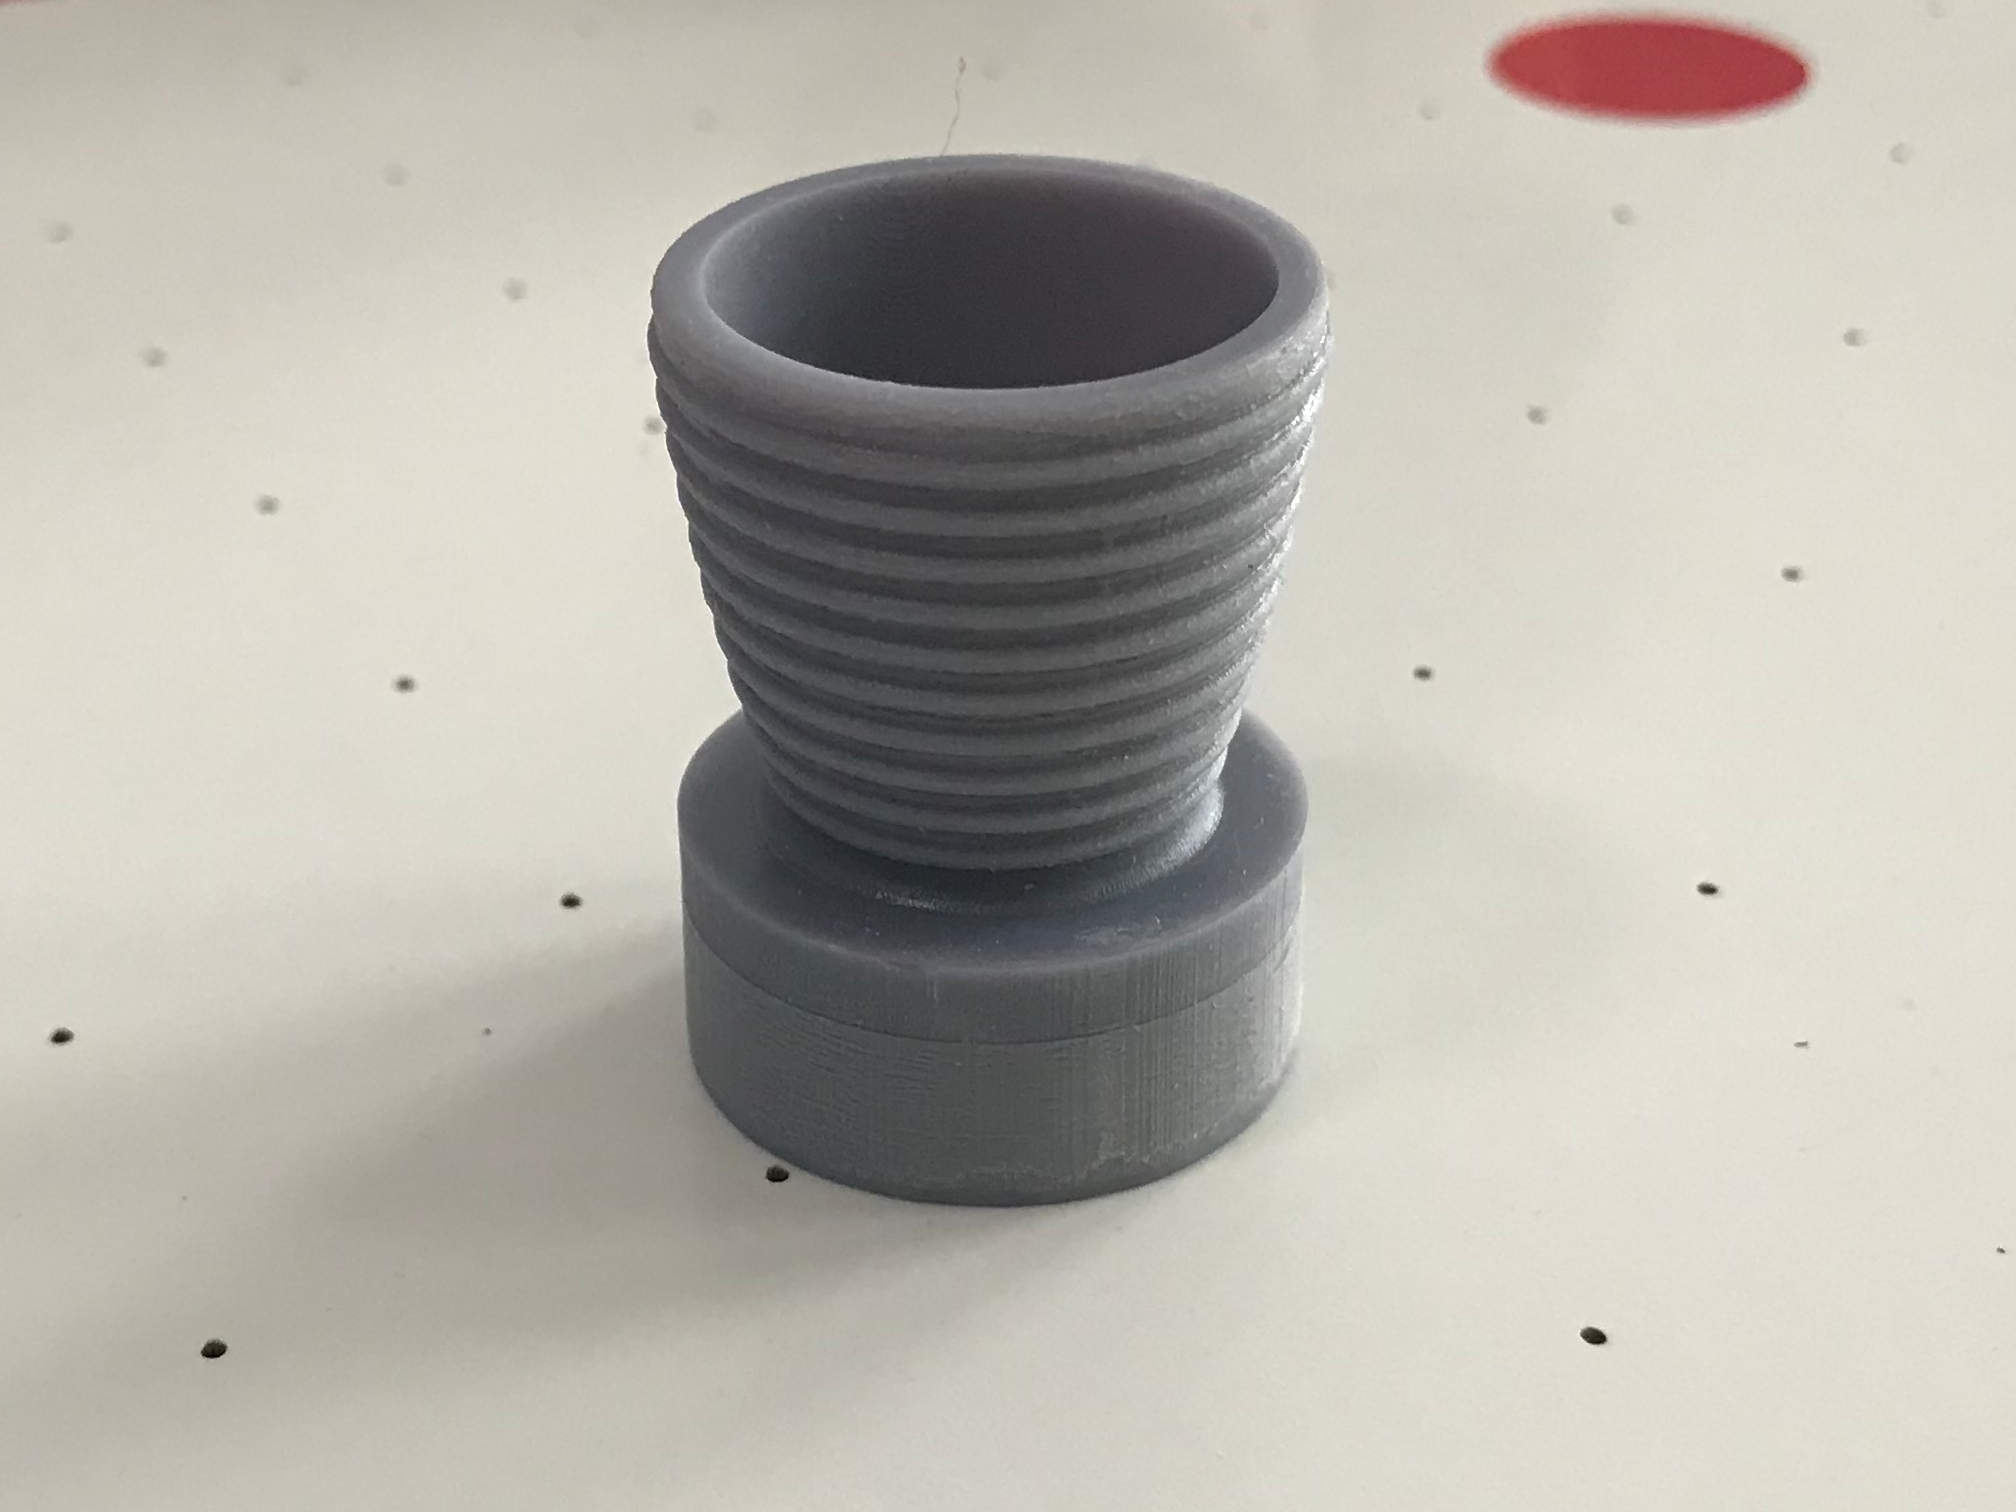
This left me with what to do about the outer tubes. Enter my new 3D printer. I have designed a false rocket nozzle that will fit in the 29mm tube and surround and hide the central 38mm Slimline motor retainer. I’ll print 7 copies of that and install them in the rocket. That should give the rocket a nice interesting look and solve the cluster ignition problem.
So with that major problem out of the way, on to the build.
Here are the parts in the kit.
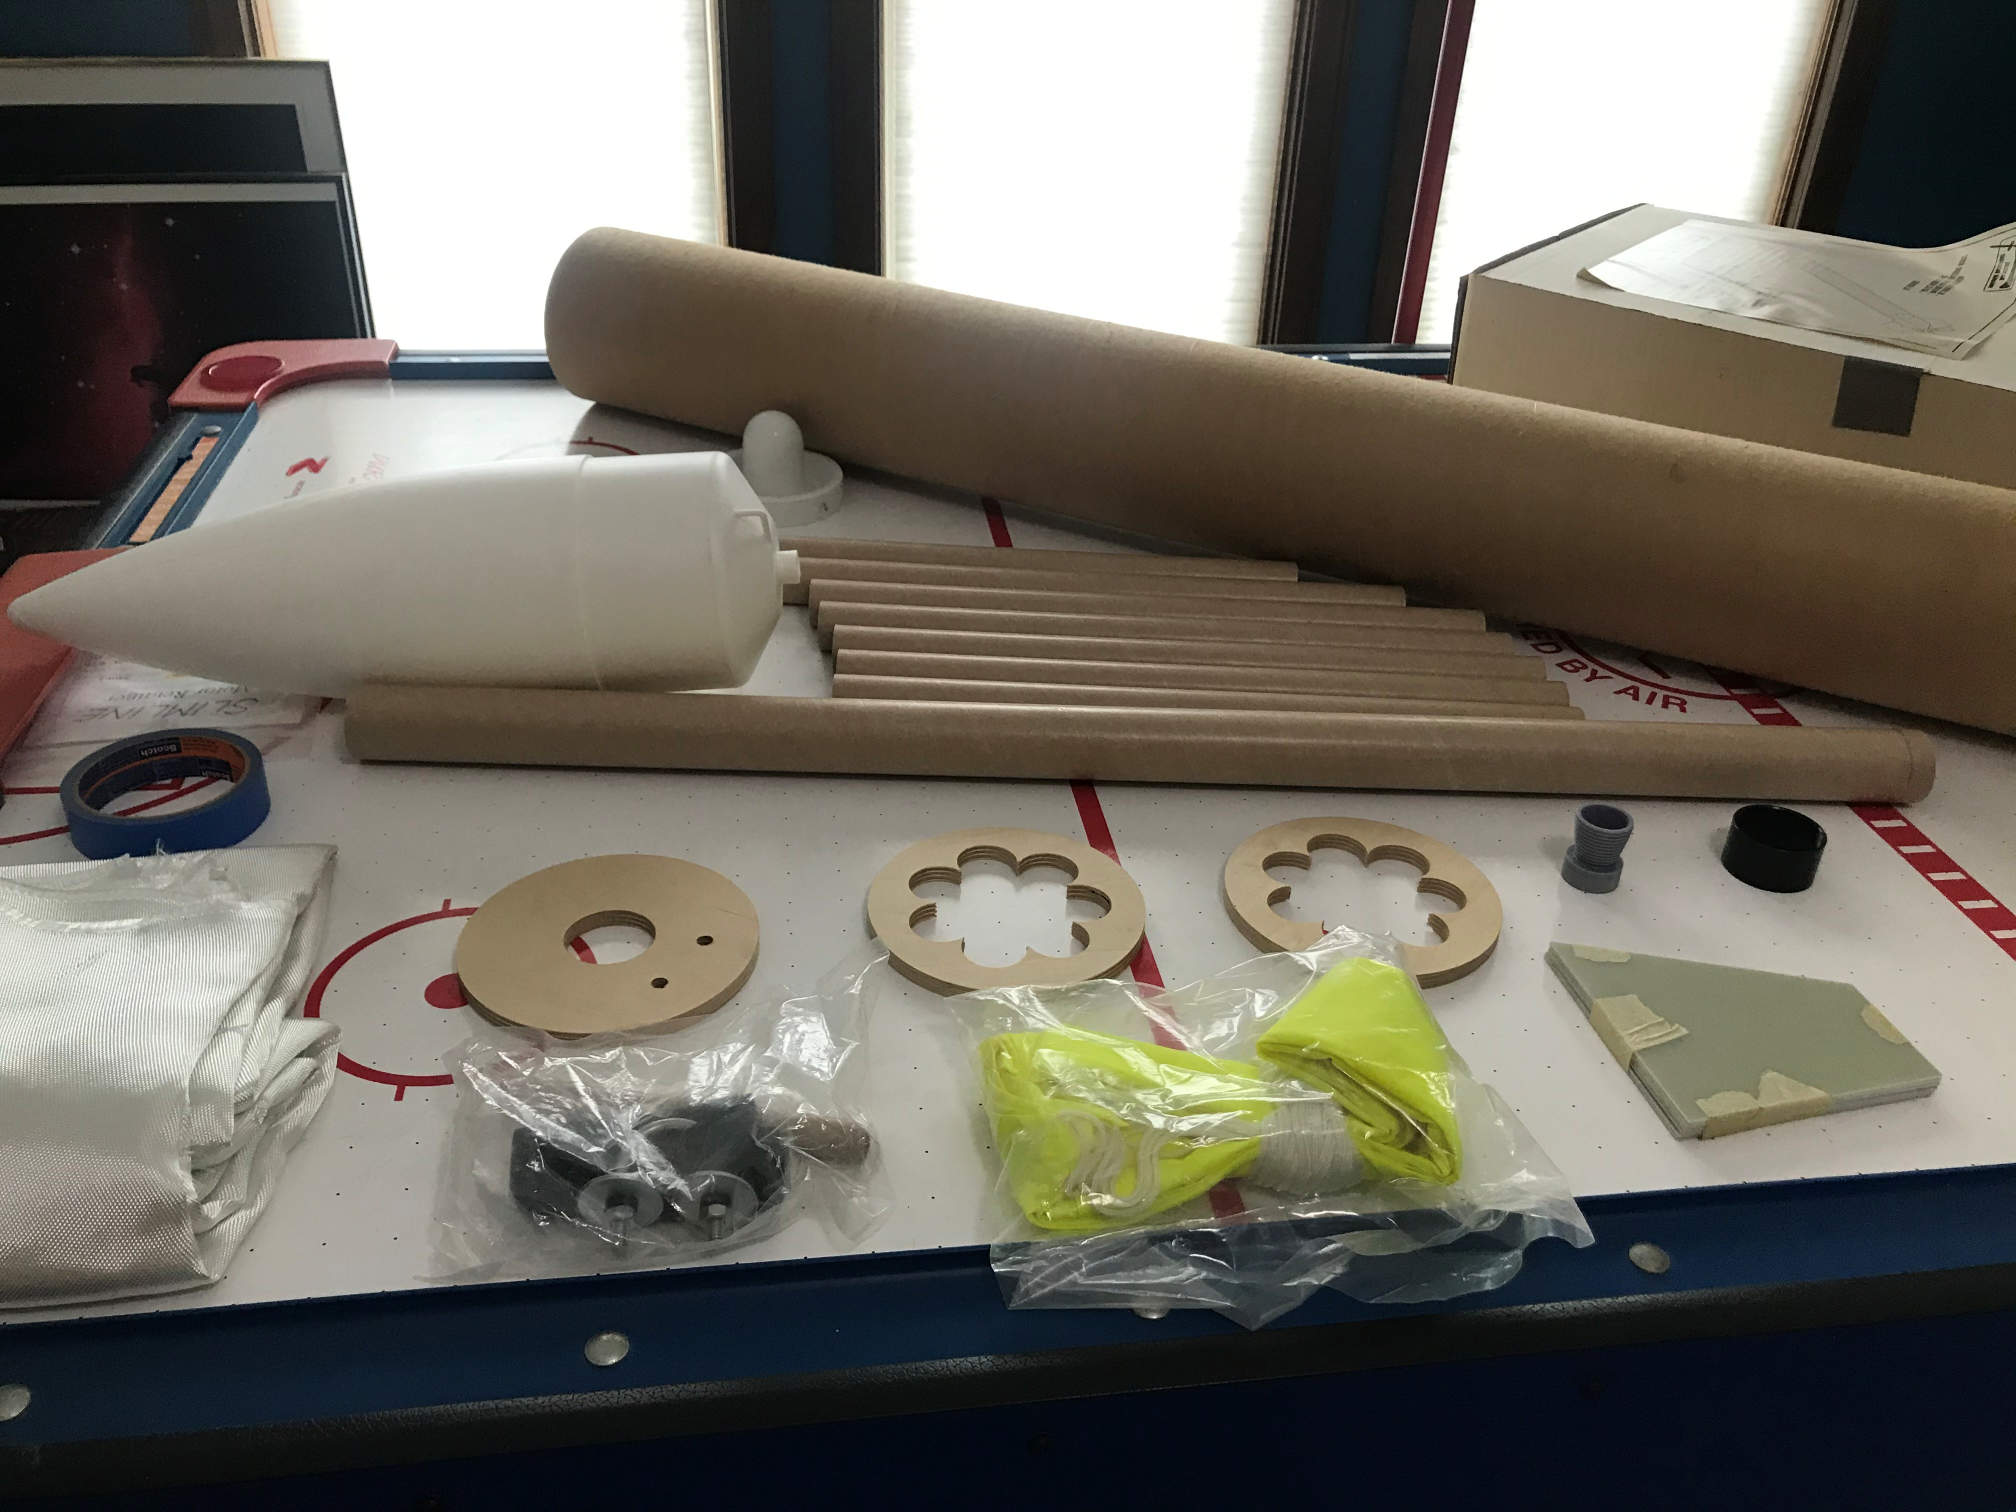
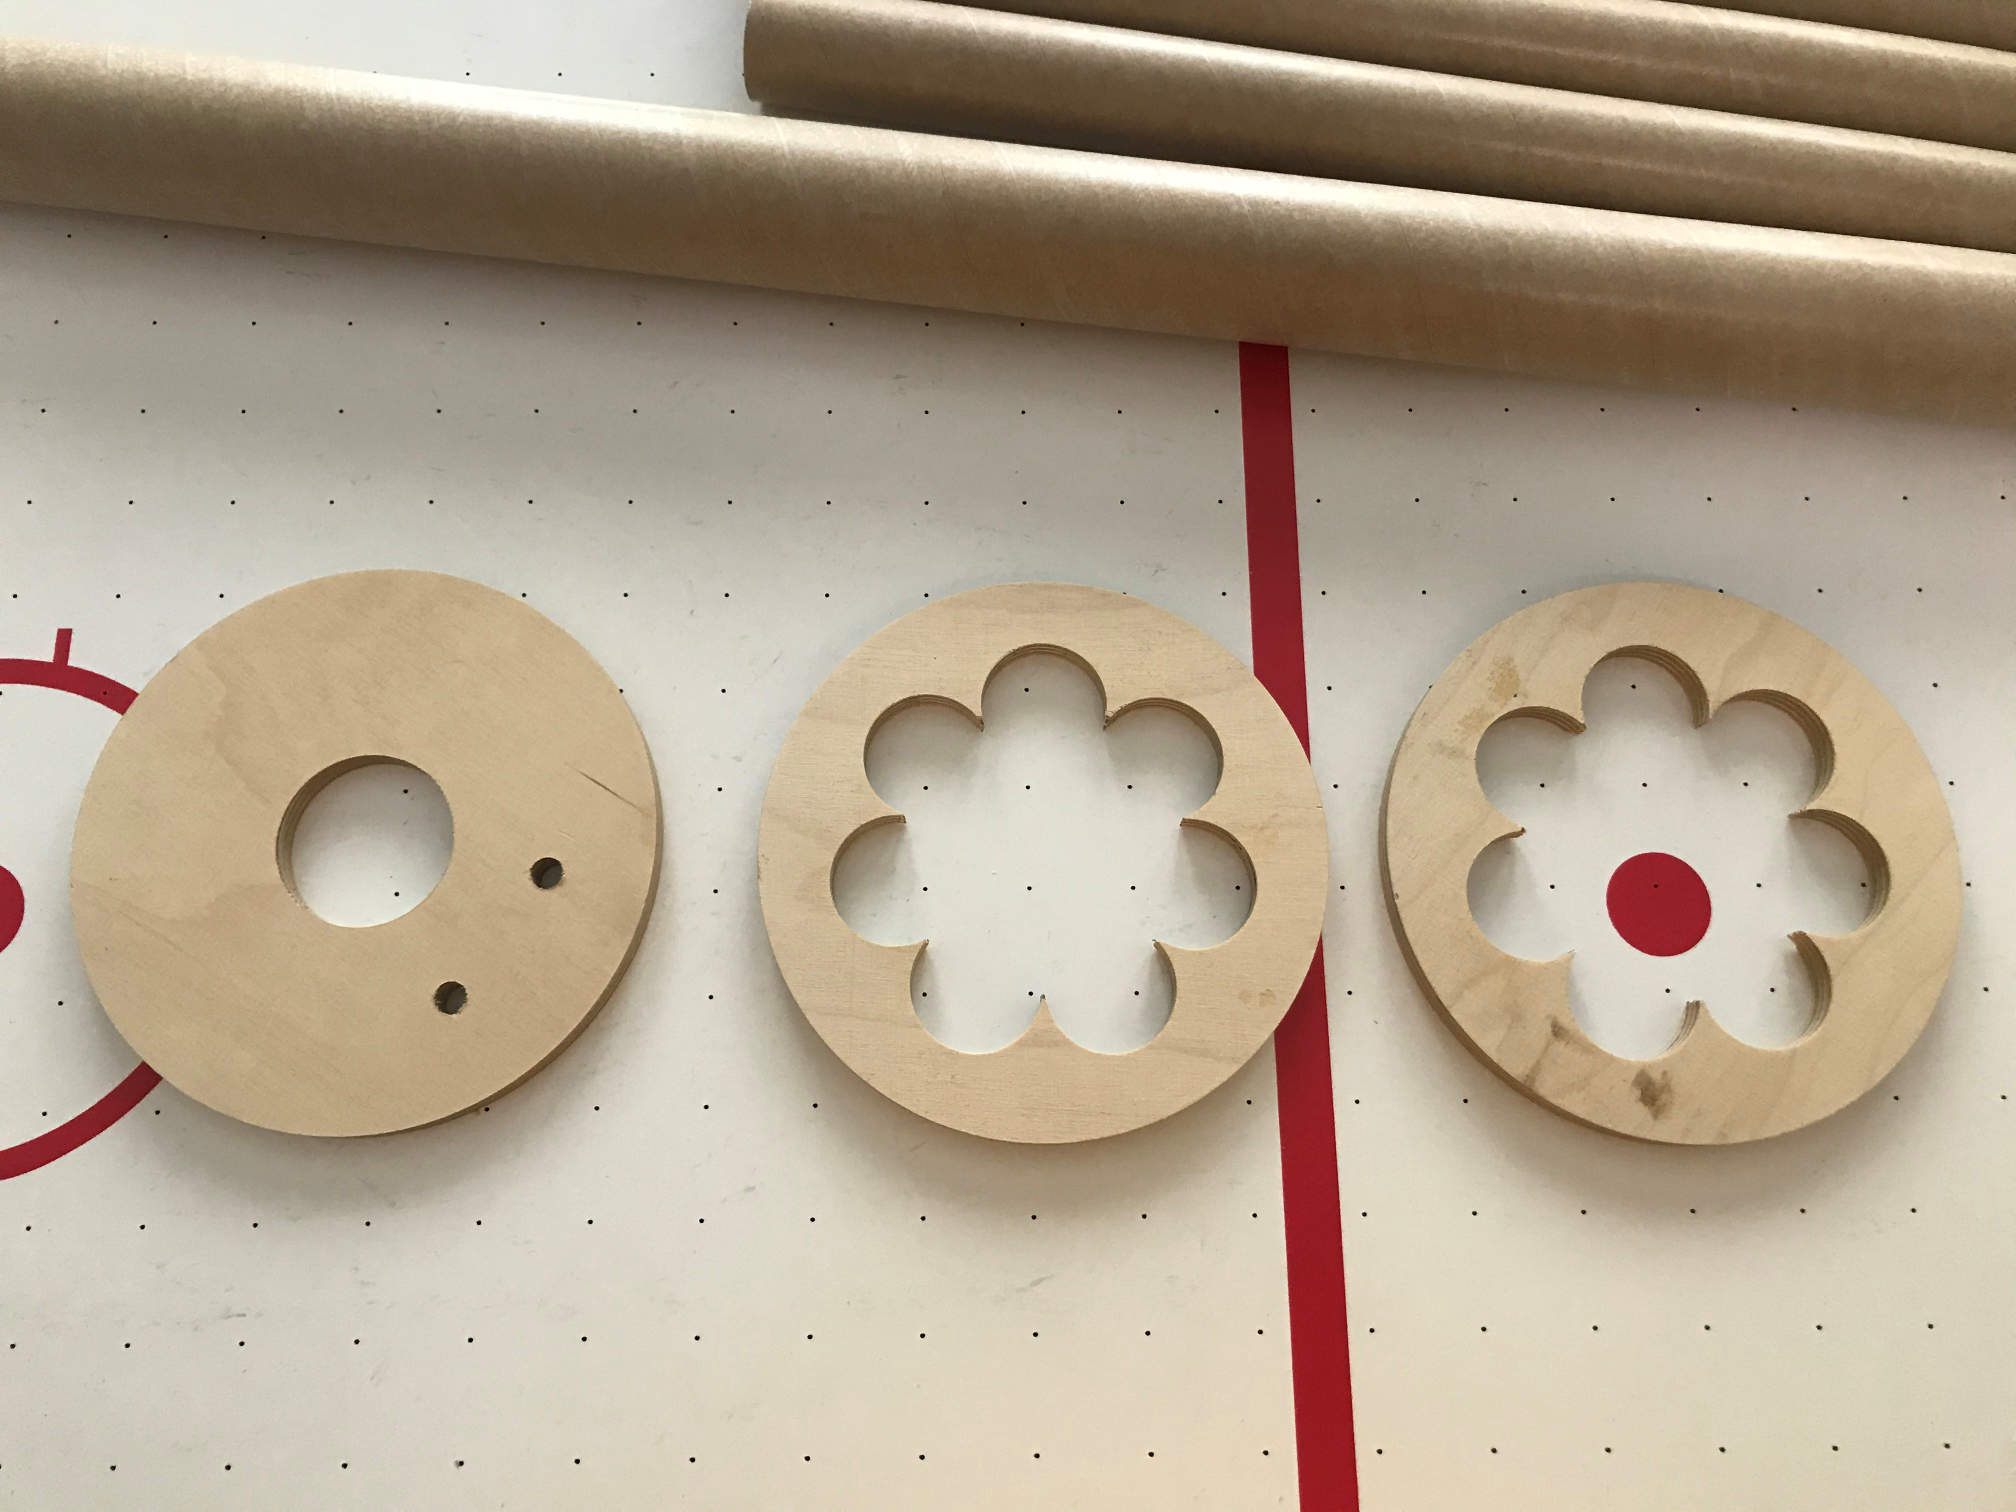
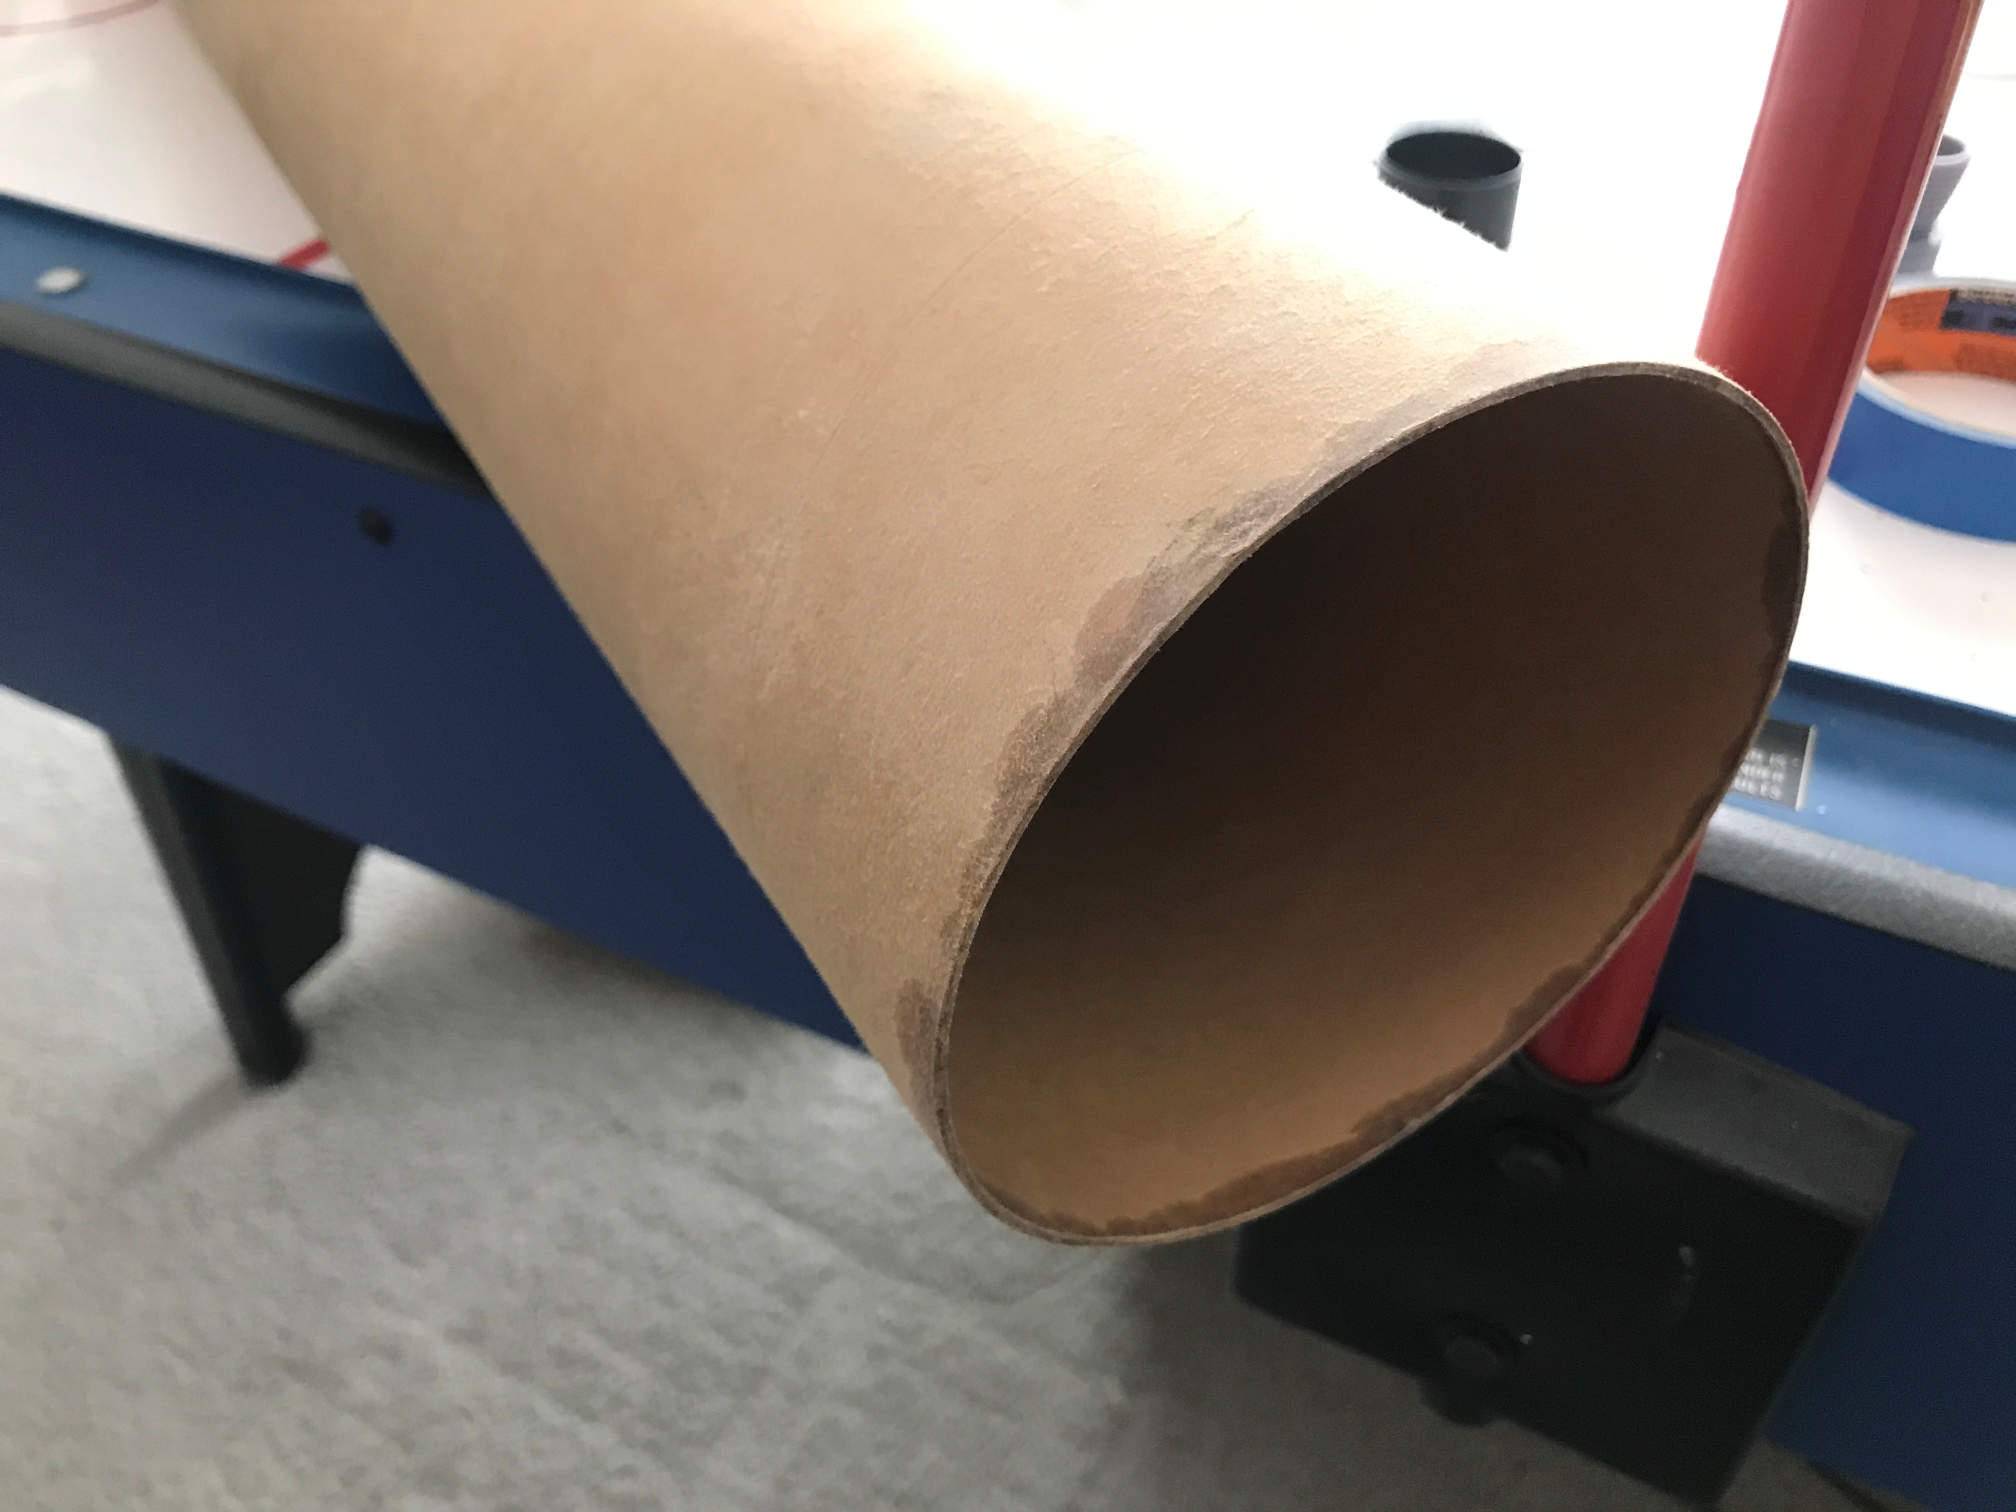
Mike, the club member that sold me the kit, had already peeled the main body tube and he even threw in the fiberglass for it. Here is a close up of the centering rings for the motor mounts. You can see how all the tubes are going to be very close together.
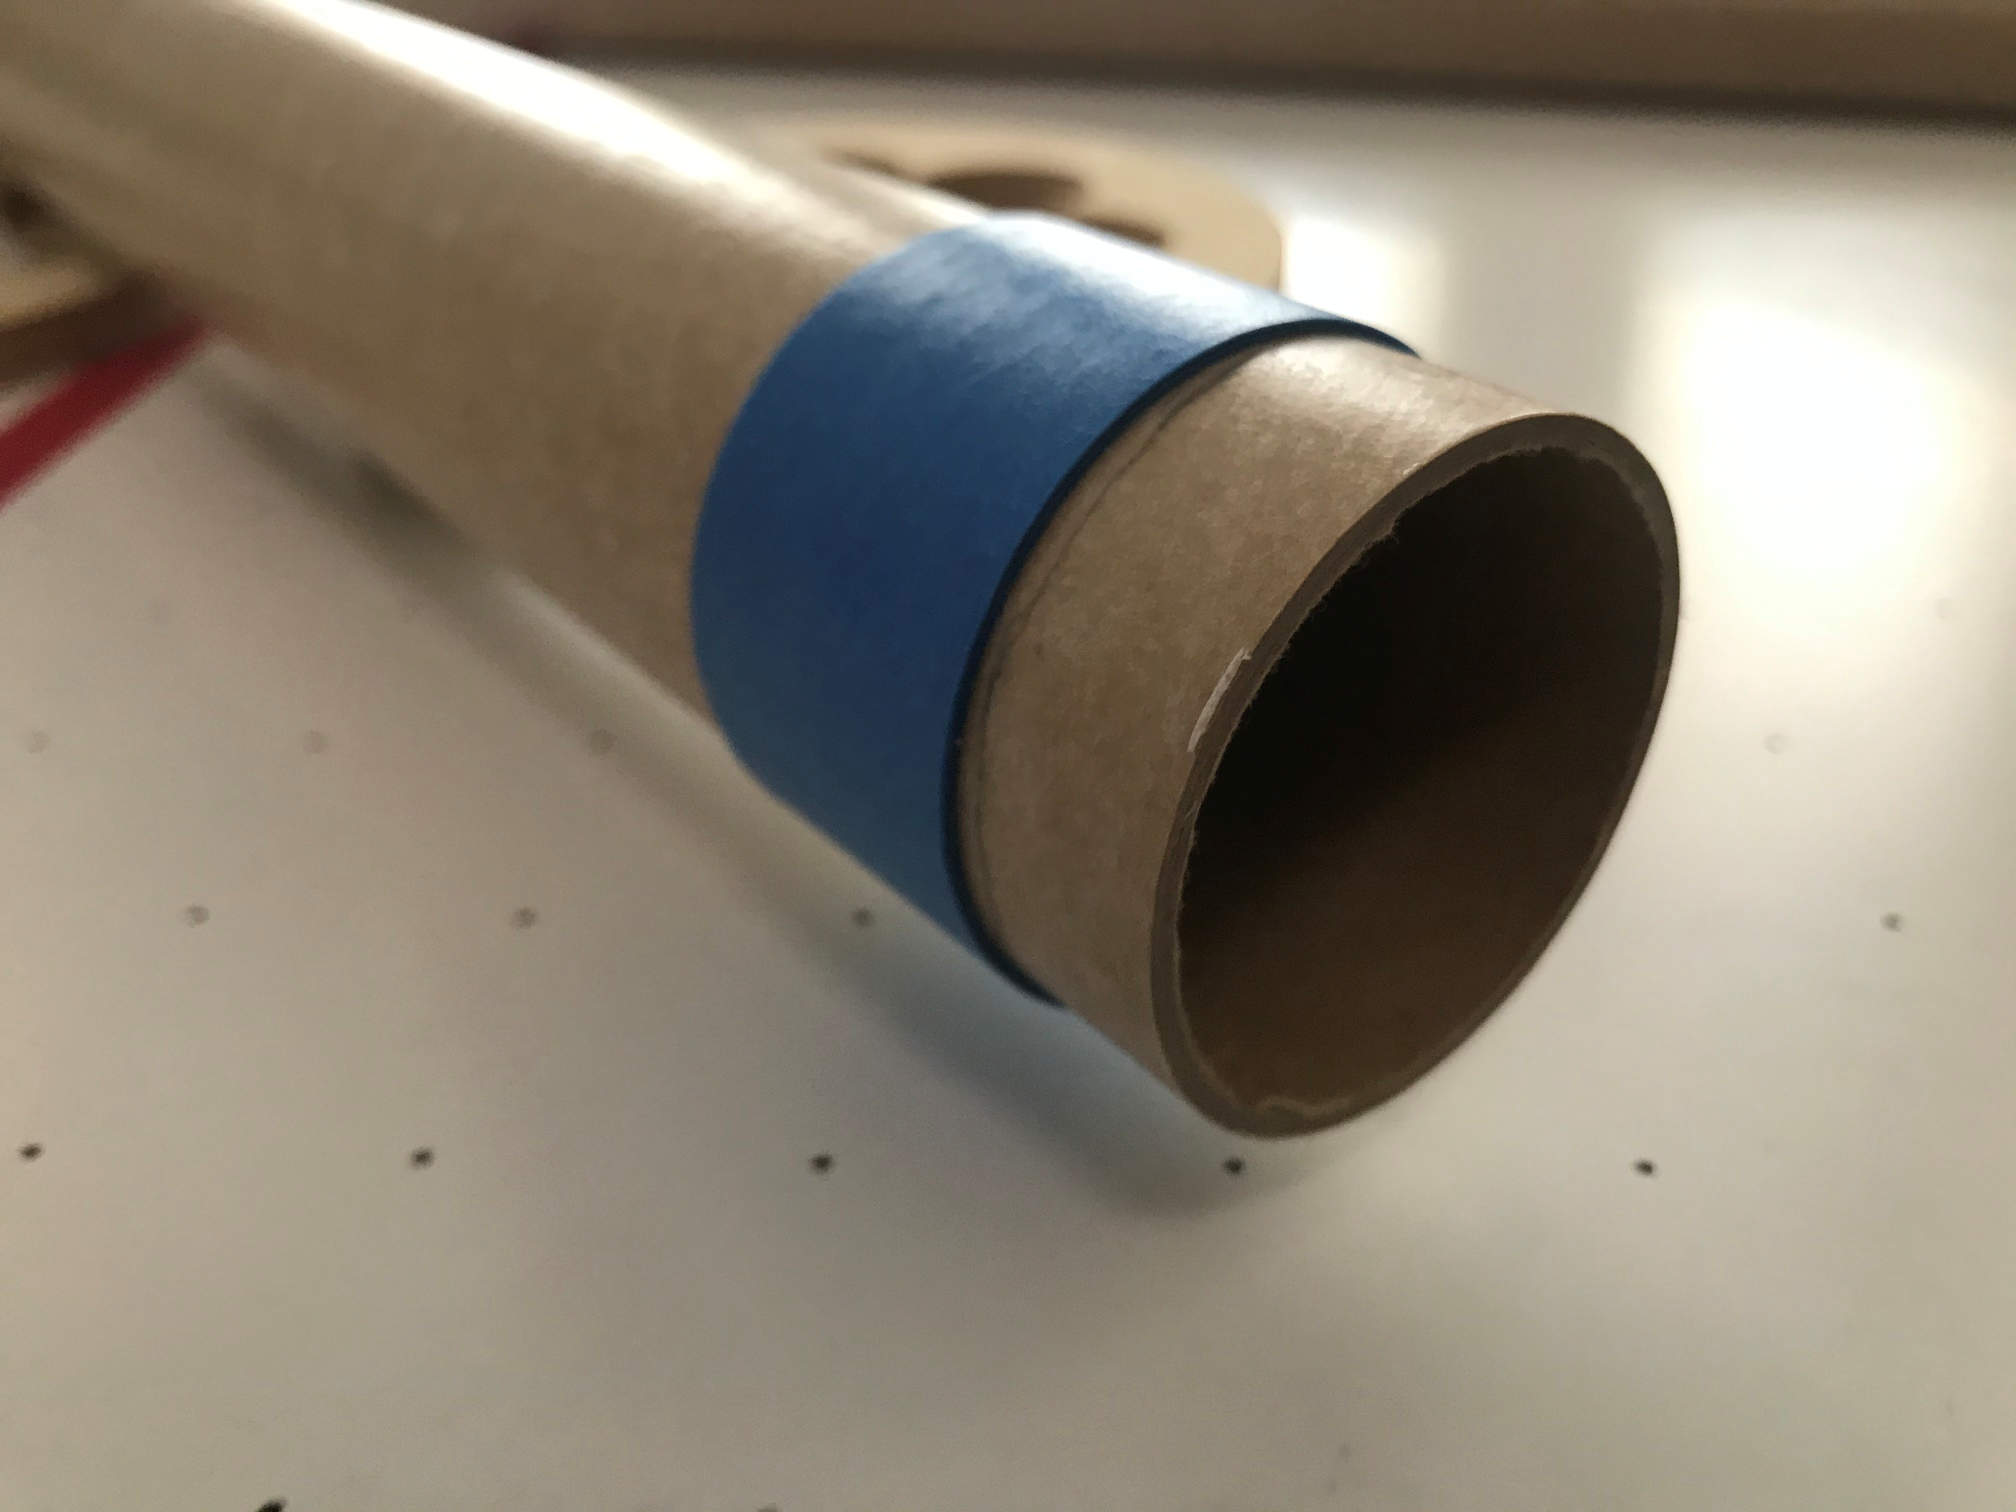
To get a small amount of clearance for the fake nozzles, I wrapped the end of the 38mm motor tube with some masking tape. That will move the 29mm tubes out enough to clear the Slimline retainer that I’ll be using on the 38mm tube.
With that done, I started putting the tubes in the centering rings.
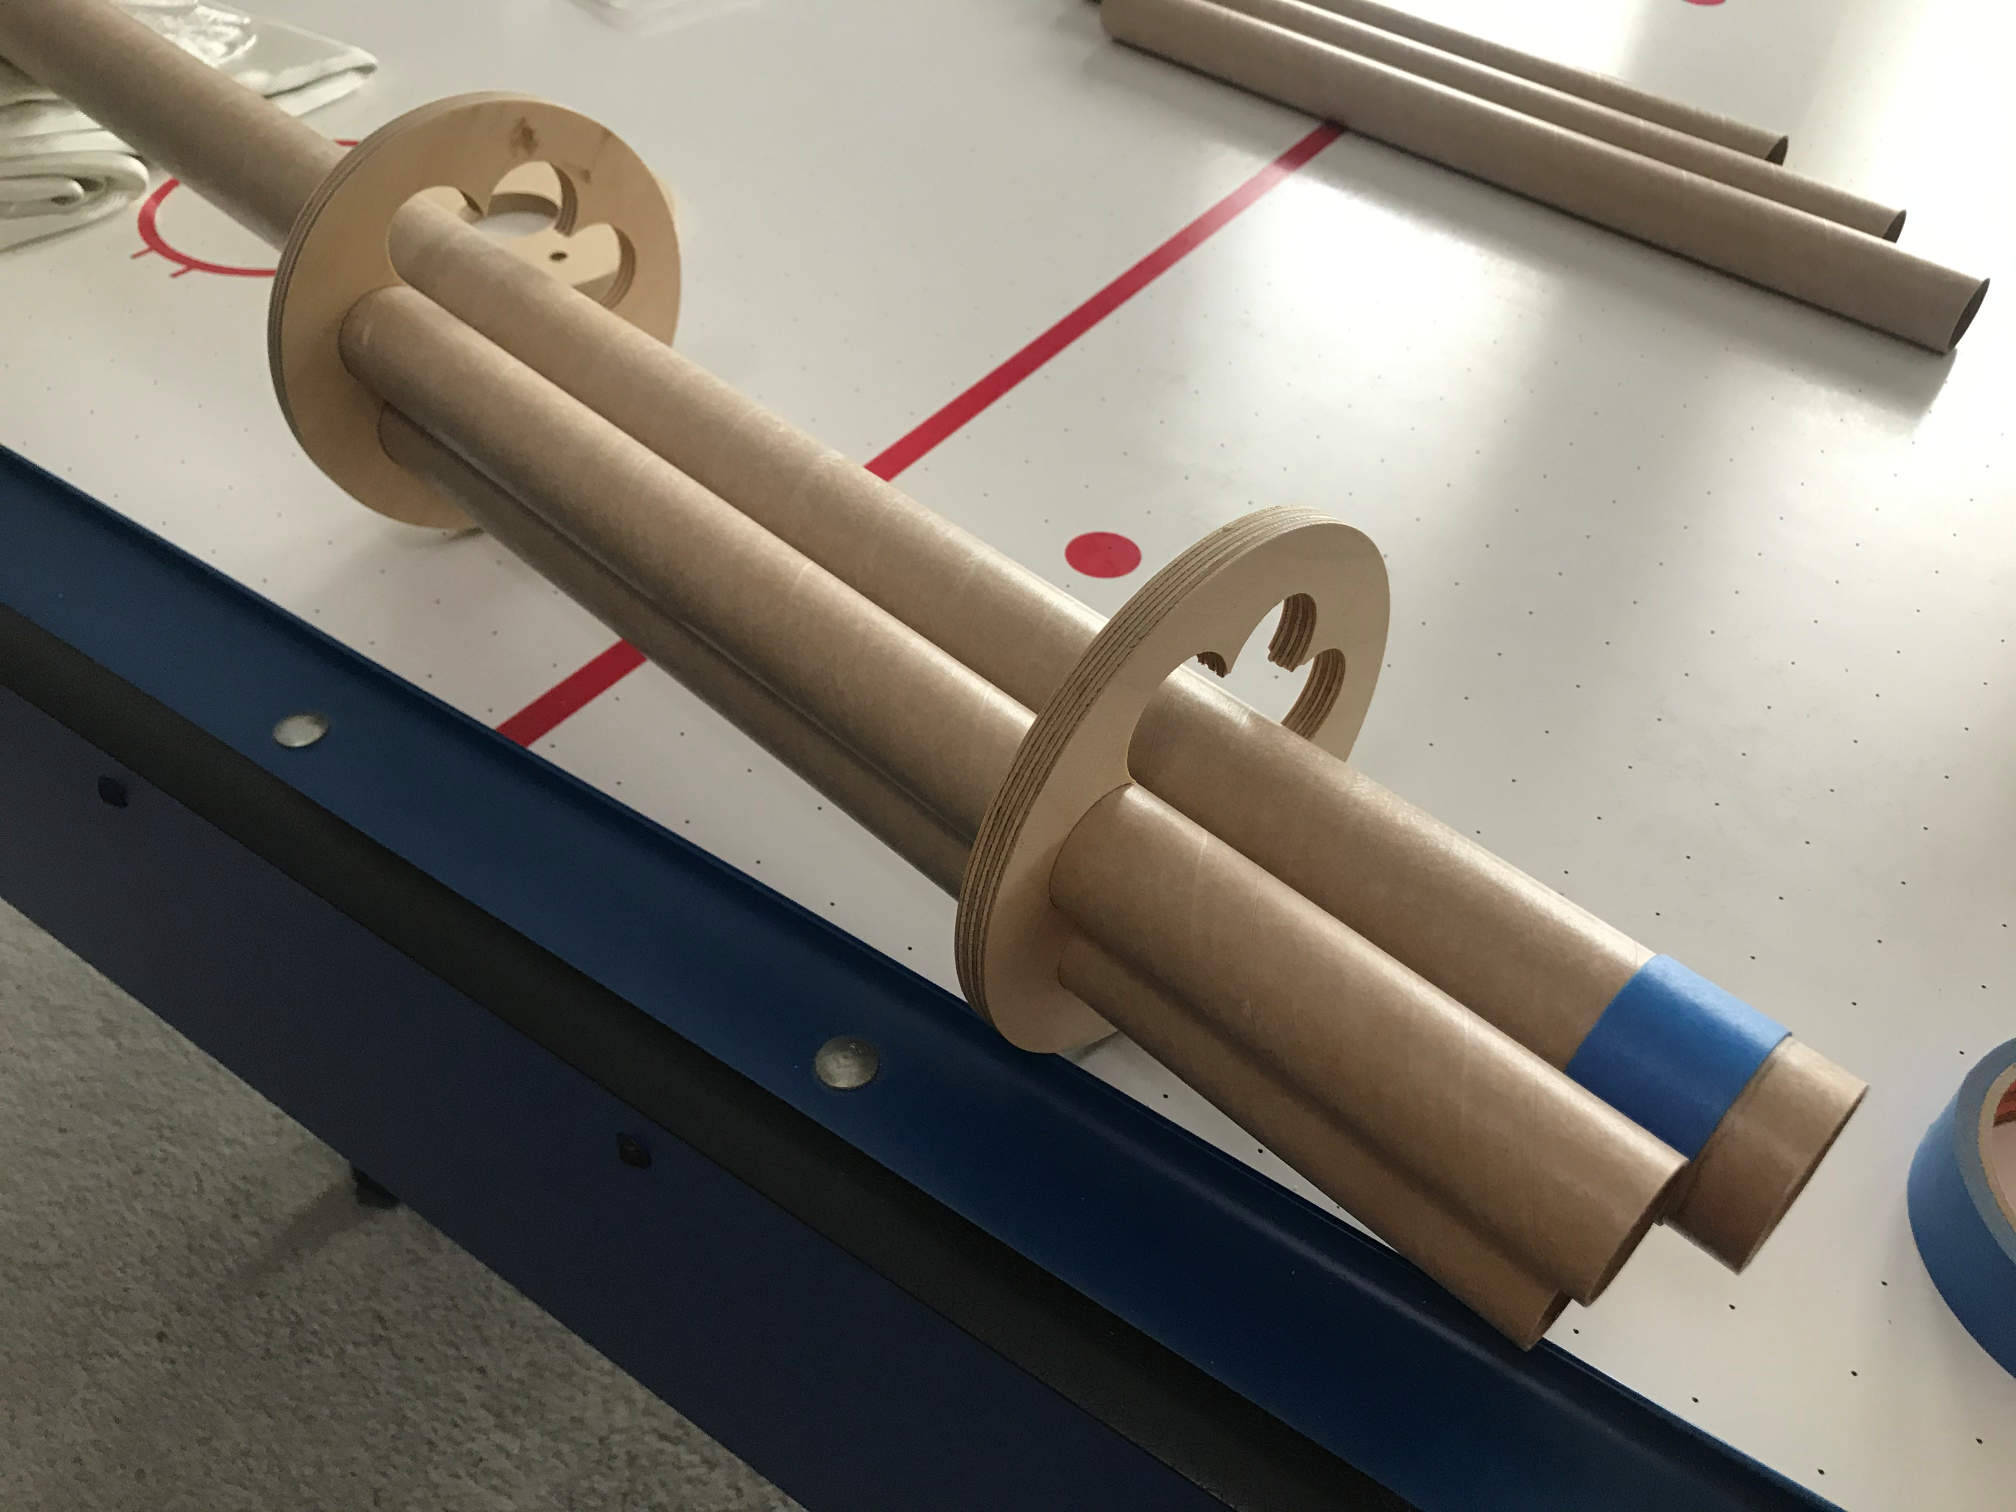
I’ve done this a couple of times before when trying to solve the above mentioned problems. The rings need to be kept in a good alignment to get all the tubes in.
Here is a closeup of one of the fake rocket nozzles.
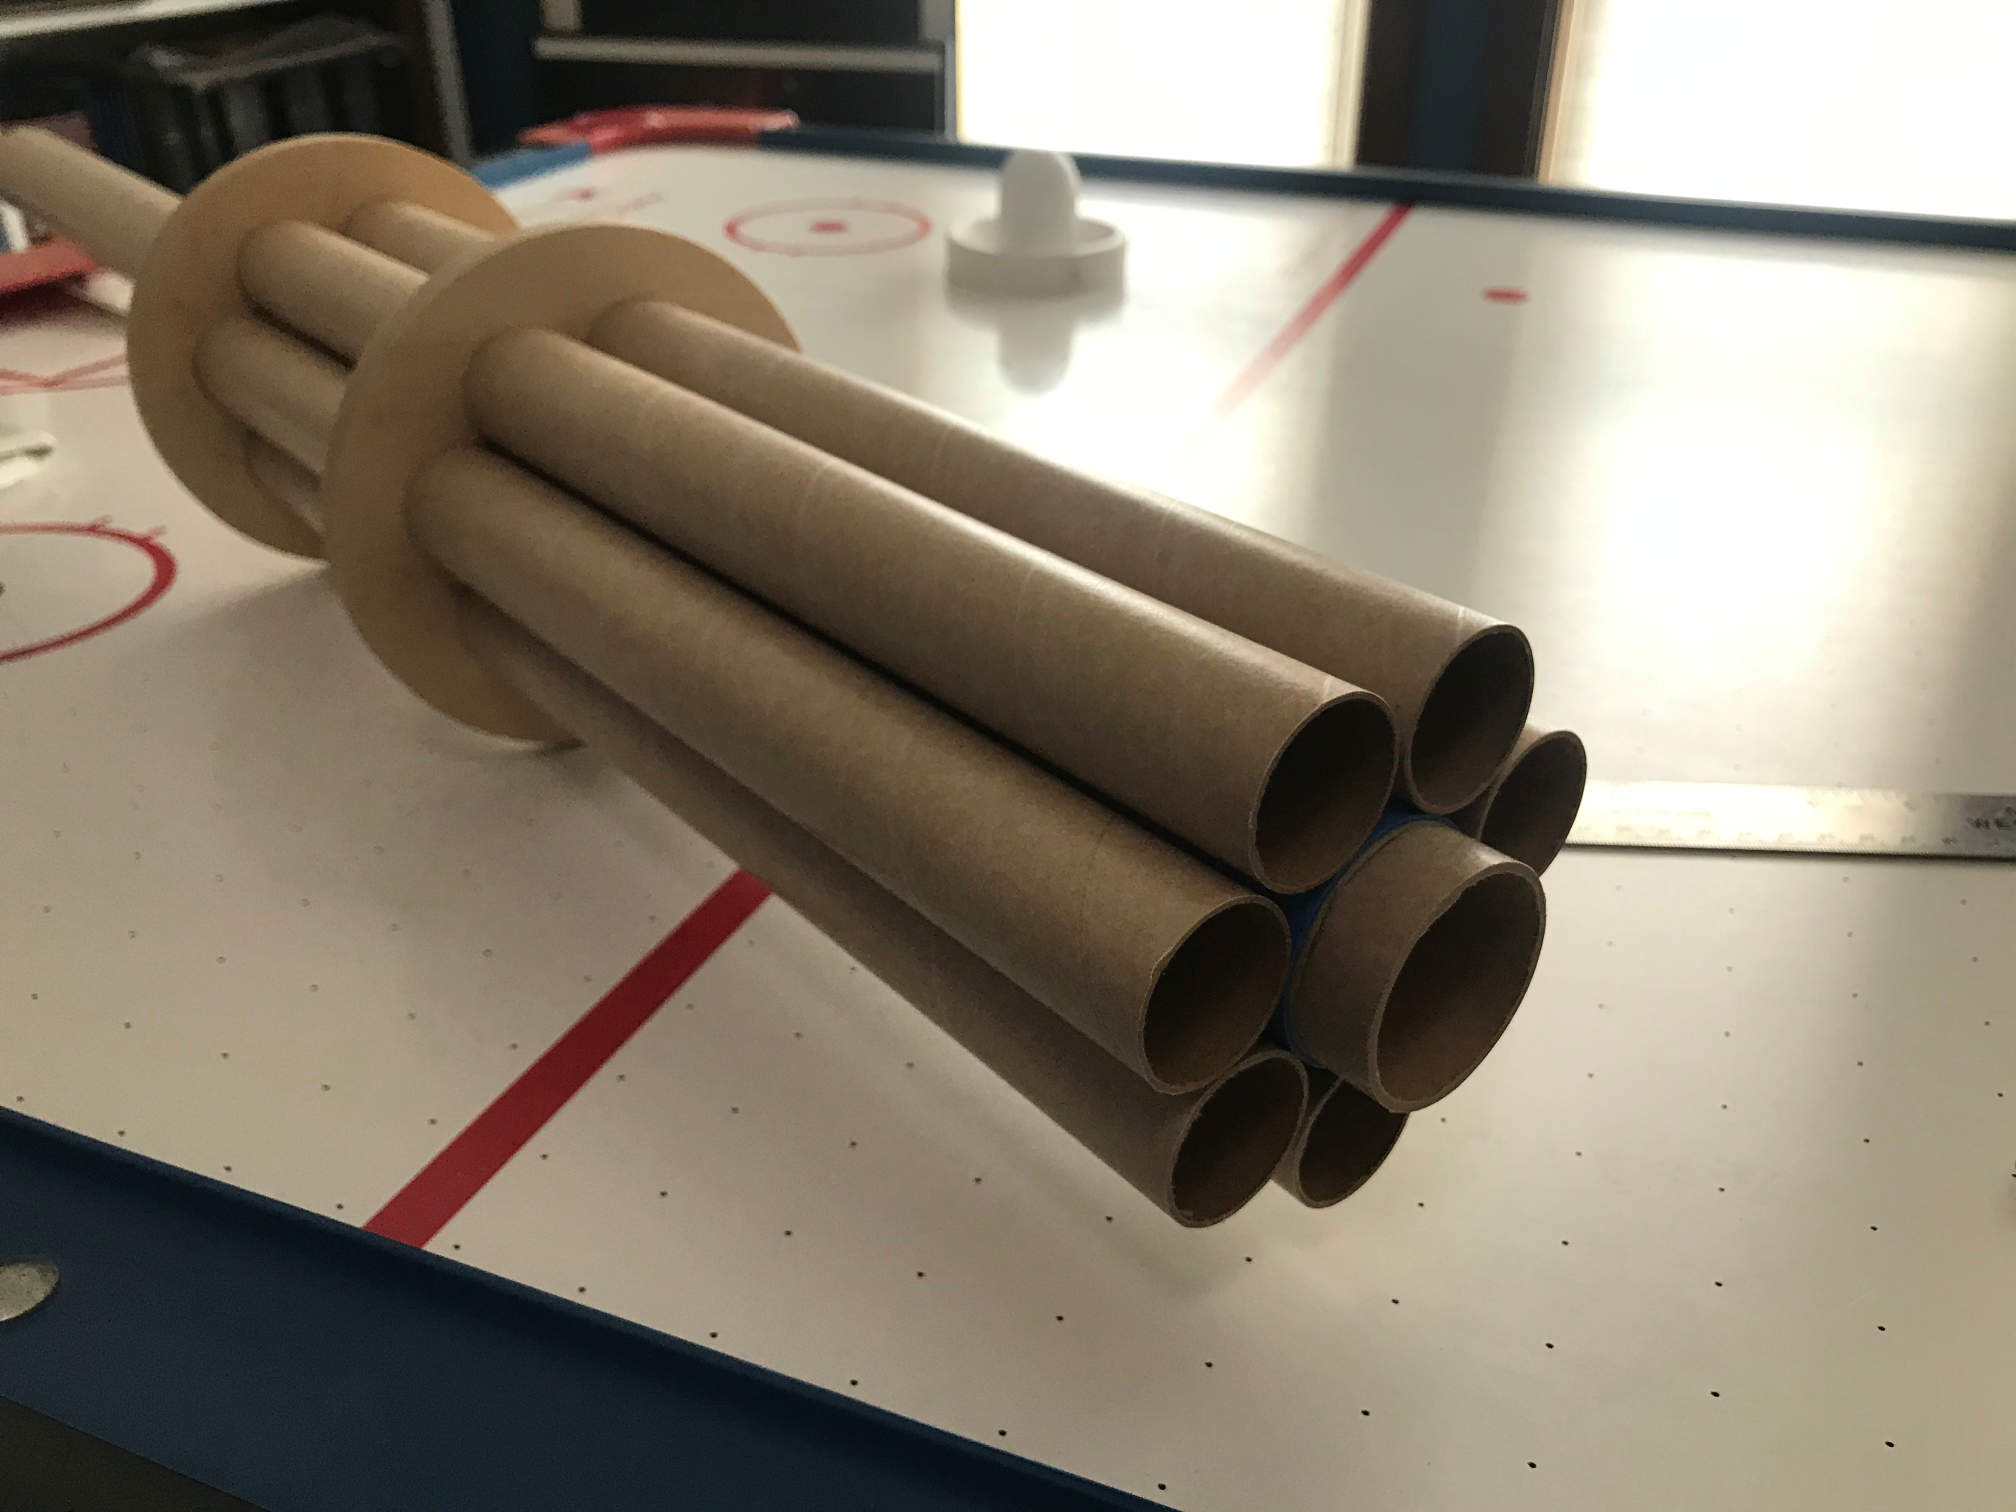
With the tubes in place (nothing is glued yet) I put the Slimline and a nozzle in place to check for clearances.
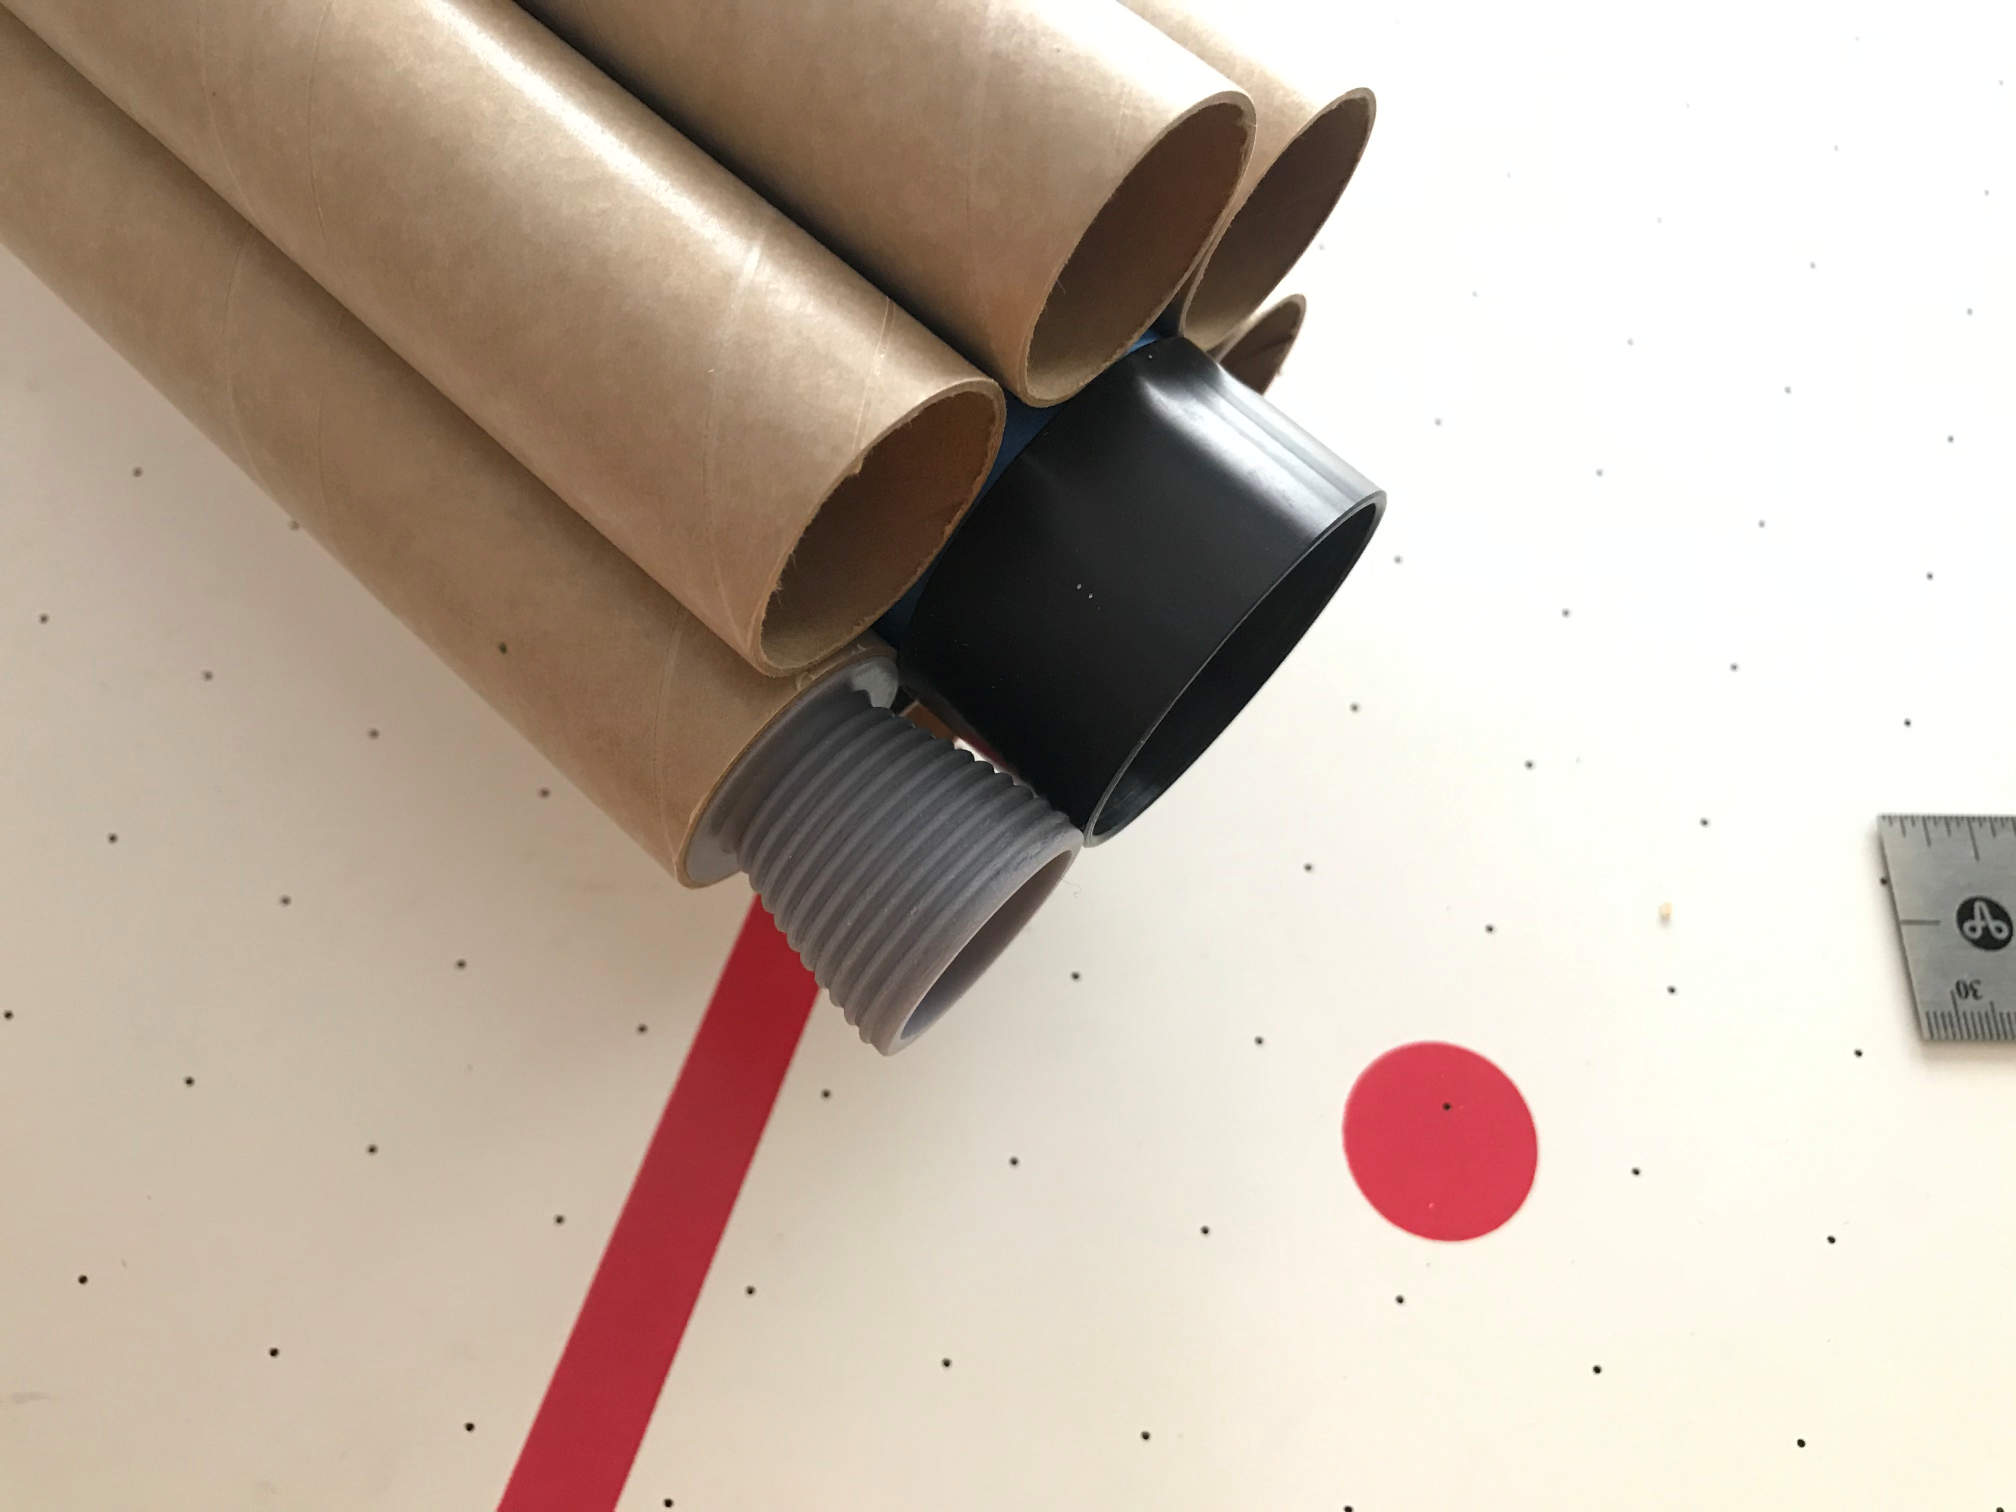
Just enough room. The centering rings need some sanding to fit nicely into the main body tube. I’ll do that after I glass the main tube. Before I do that, I need to sand the tube to get the major fuzzies off (you can never get all the fuzz off). I then applied some CA glue to the ends to harden them and also to repair a couple of minor dents on the ends.
Now I need to actually glass the tubes. First I need to get over to West Marine to get some new pumps for my resin and hardener. The pump in the resin can seems to be permanently attached now and the hardener is a black orange color so it appears to be past its prime. The cans didn’t have much left in them anyway and it has been about 5 years since I last used them. I have trimmed the fiberglass and marked a start line down the main tube, so I’m ready whenever I get the pumps and have some time.
I’m also working on a new plastic model (a BanDai 1/72 scale X-Wing), so I’m dividing my time between this project and the X-Wing (and whatever life decides to throw my way). More to come. Thanks for looking.

Is there a way you could provide the fin dimensions, body tube length, the motor mount tube lengths?
I don’t have the instructions anymore. From measurements from the outside the main motor tube is 34 inches long and the surrounding motor tubes appear to be around 18 inches long. I hope that helps. I’ll try measure the fins and body tube a bit later and I’ll post another comment.
Awesome, thank you so much for doing that. Ive always admired that rocket and I would love to build one. I assume the fins are 1/8″? You did a really nice build thread on here as well. Thanks again, -Nik
Nik, here are the answers to your remaining questions. The main body tube is 45 inches long. For the fin the following measurements are approximate since the fins are actually embedded between the seven 29mm tubes that surround the main motor tube. The fins are made from 1/16 inch G10 fiberglass. Root of the fin is 5″. The leading edge is 5″. The trailing edge is 4.25″ and the tip is 2.5″. The angle between the root and the leading edge is 70 degrees and the angle from the root to the trailing edge is 87 degrees. I hope that helps you out. Good luck.
Thank you so much! Hopefully I’ll get started on it soon.
-Nik