

I glued in the rear bulkhead/motor assembly to the passenger stage of the Passenger Rocket (see above). I then added the pilot figure and glued the two halves together. The seams will need some work.
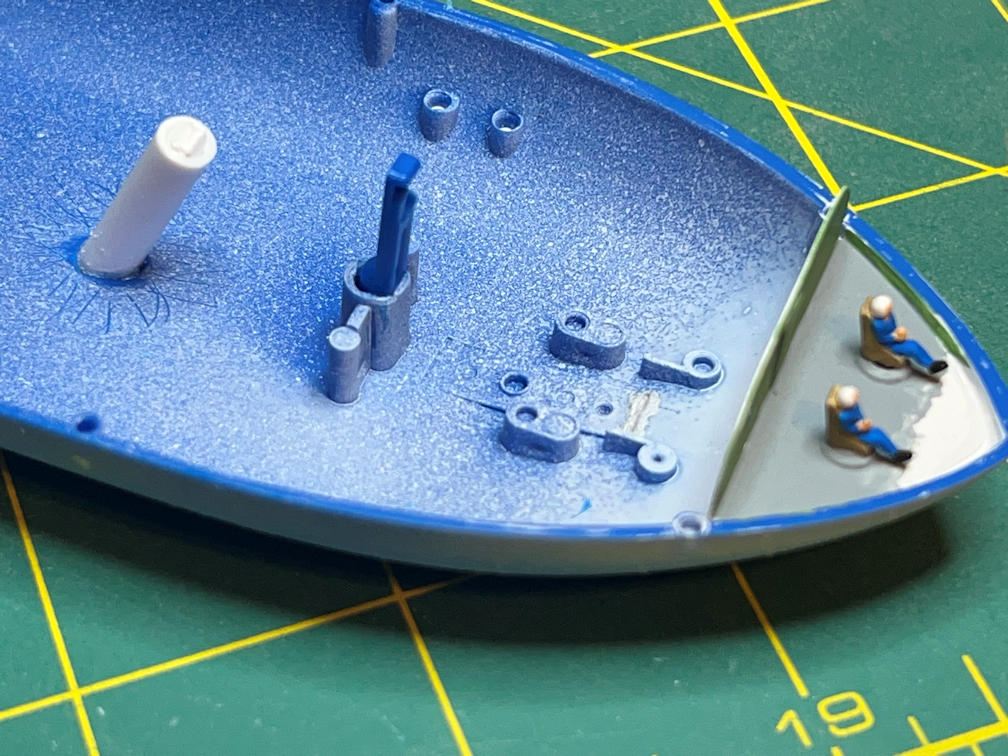
Next I glued the rear bulkhead into the passenger rocket first stage. The fit is not great but liberal amounts of Tenax got it solidly attached.
The pilot figures were then glued into place.

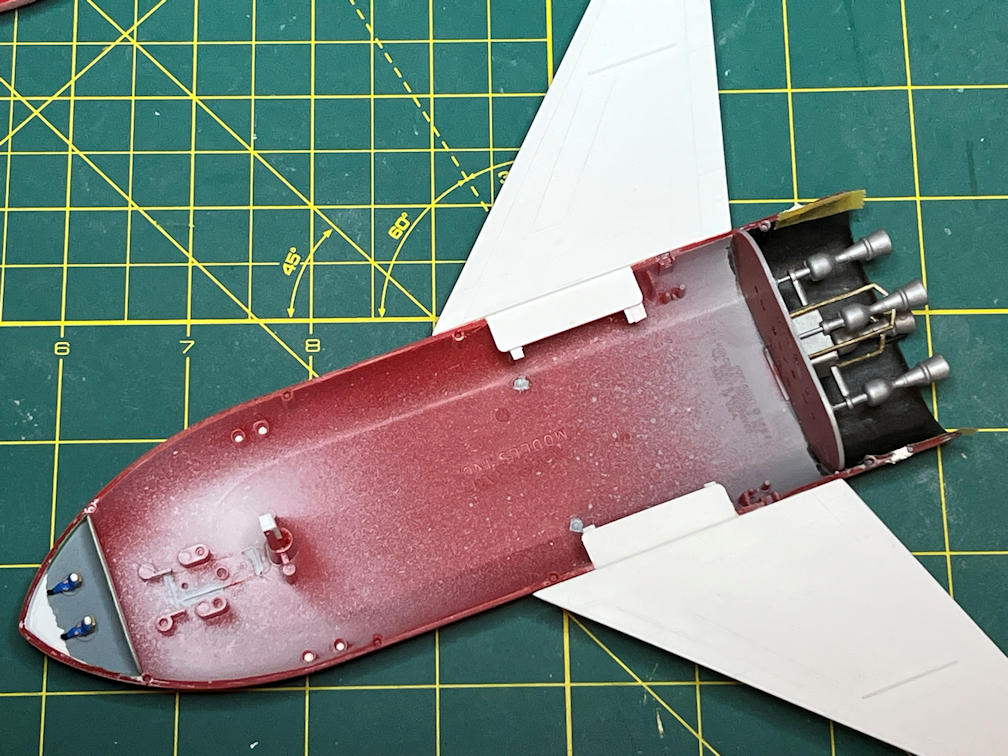
Originally I was going to glue the engines in place after the model was painted . But after test fitting the motors into the installed rear bulkhead I felt like it would have been problematic to do that and still get a good glue joint. So, here they are all glued in place.

Next I glued the wings in place. This is where I realized that my idea of gluing the landing gear fairings on first, while a good idea for getting a good fit to the fuselage, was not going to allow the wings to fit as designed. The wings are supposed to have quite a large amount of dihedral. This is evident by the posts on the inside of the fuselage. So instead I glued attached the wings based on the landing gear fairings. This made for some very good joins with the wings/fairings but large gaps with the posts inside the fuselage. I solved the problem by adding some plastic shims on the inside and some liberal applications of Tenax to get a good weld on all the plastic. You can see the shims in the below photo.
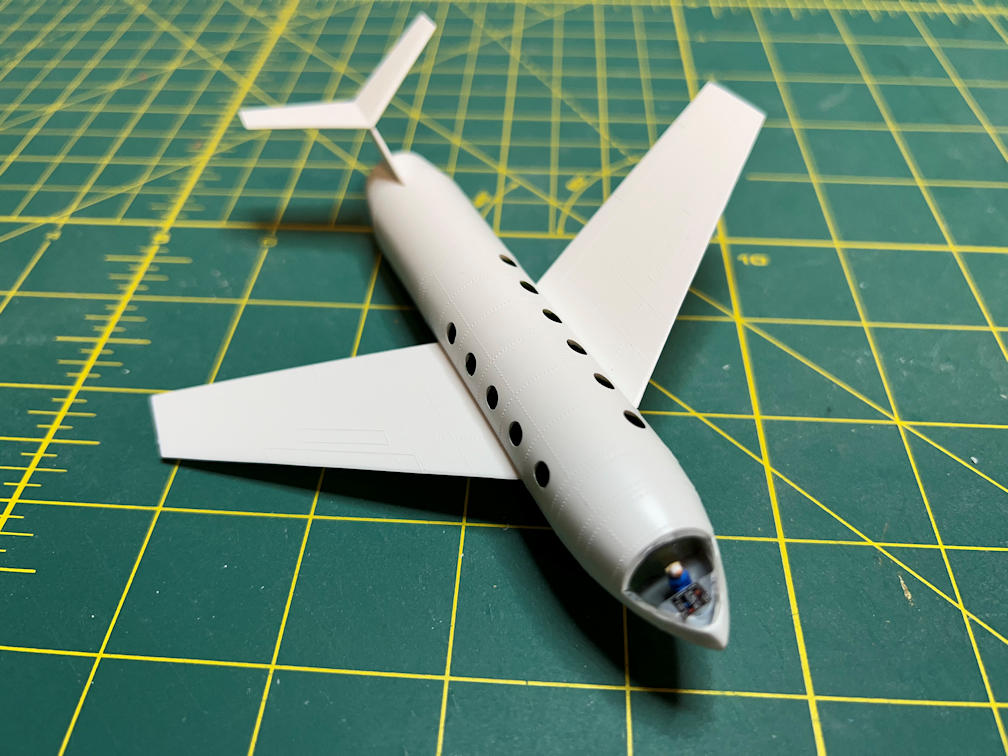
There is still a good deal of dihedral but not as much as the kit intended.
I then did the same thing to the Orbital rocket. But since I’m not using the landing gear fairings the wings fit as designed.

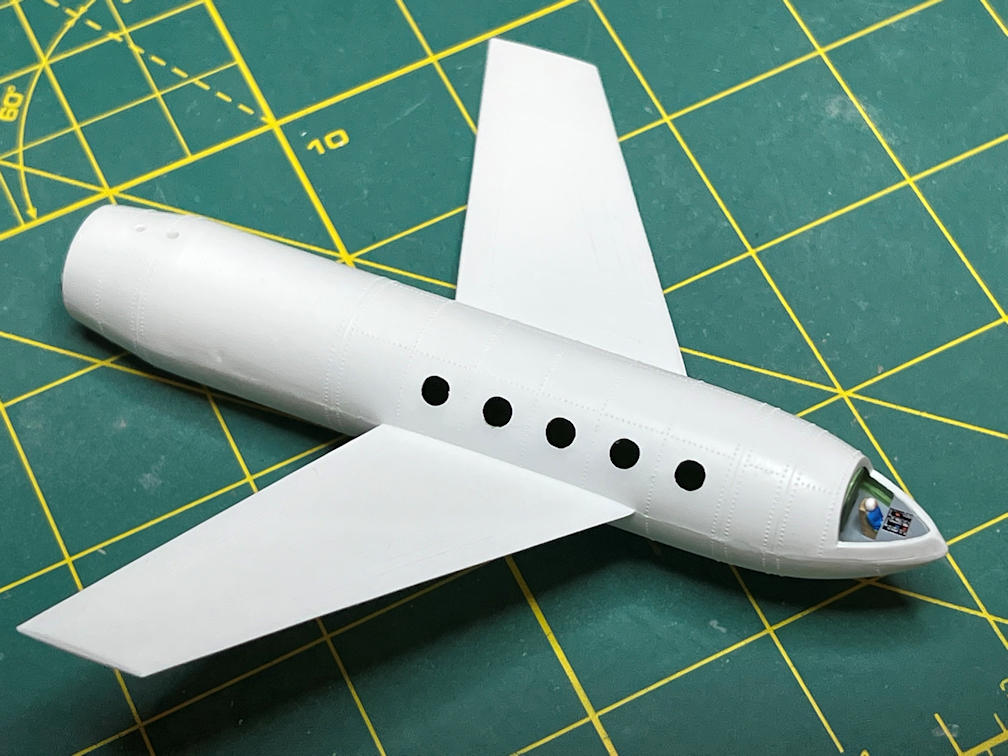
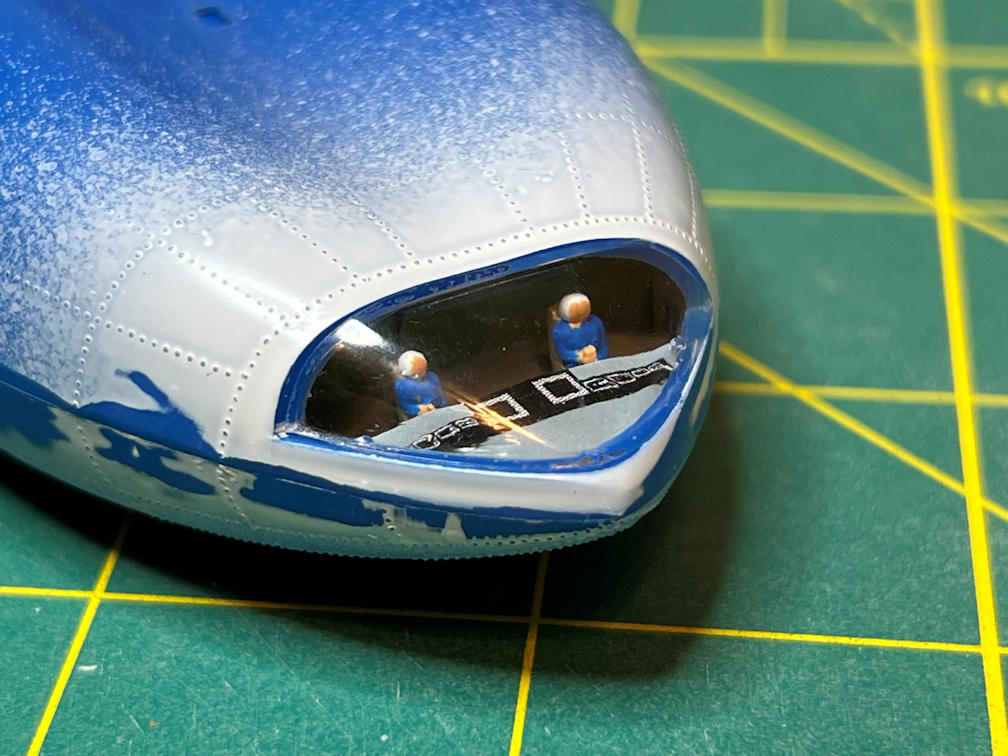
Back on the passenger rocket, I glued the upper fuselage half in place. It took some rubber bands and some additional hand pressure to get the halves together without gaps, but it worked. I also glued the clear canopy in place. The fit for this part was quite good and the the capillary action of the Tenax got a very good glue join.

I then glued the vertical stabilizers to the two space planes, followed by gluing on the horizontal stabilizers. The clear canopies were also glued into place. The fit of all these parts were pretty good, especially the clear canopies. The side windows on the passenger space plane will be filled with MicroScale Micro Kristal Klear instead of the kit windows. I could not find any way to get the kit windows to fit and still look good. I’ve used Kristal Klear before and it makes fine reasonably clear windows. They won’t be added until after the decals go on.

I decided that at this point I should probably think about how I am going to display this pair of models. What I came up with was to have one sitting on the provided launch pad and the other on a rod in the air above the other at an angle as if flying. Here is the pad for the passenger rocket, which is the one that will be displayed on the pad.

The trickiest part of this was getting the standoffs square and also making sure that the four upper points are level. There are also small sink holes at three corners of the base. With the texturing of the part, fixing them is very problematic. But careful application of some Vallejo Plastic Putty seemed to fill the holes and not mess up the surrounding pattern. The photo is pre-putty.
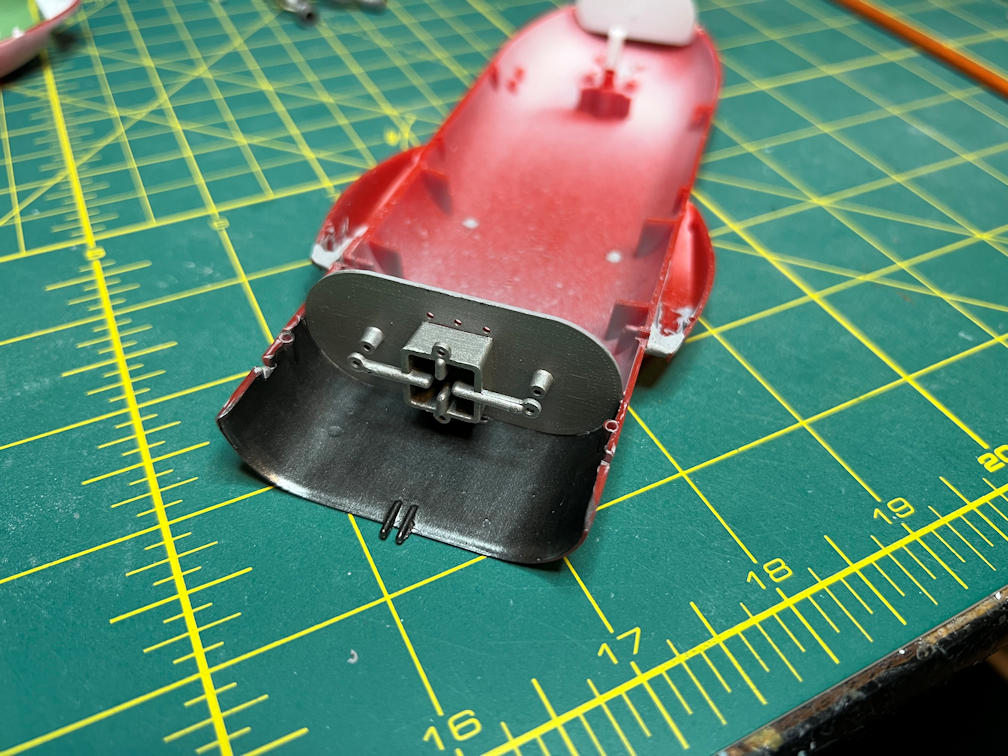
I then test fitted the passenger rocket to the pad base and found that it was straight and square. Unfortunately, I had completely forgotten about the stability of the model on this base. It is only held in place by two small forks at the base of the first stage. While they keep the model properly oriented, they are very unstable to any side forces. I was able to knock the model off the base by just a gentle puff of air on the side of the model. I should have added some extra weight to the bottom of the model with some BB’s or clay on the rear bulkhead. Too late now. So, I drilled a 3/32″ hole in the rear bulkhead, in the center of the rocket motor piping. This will allow a section of 3/32″ rod to be mounted to the wooden base where both models will be displayed. Then the model can be slid down the rod and onto the launch pad base. That will keep it stable. Sorry no photos of that modification.
Now the orbital rocket needed to be modified so that it could be displayed suspended at about a 30 degree angle next to the passenger rocket. I found a styrene tube that reasonably fits a 3/32″ rod. I cut a section and drilled a hole in the bottom of the orbital rocket. I then glued the tube in place and filled the top end with a short section of styrene rod so the 3/32″ rod would not be rubbing against the top of the fuselage. Here it is being glued into place.
After the glue set I tested to see if I had the angle I wanted.

I was happy with the angle, but I noticed there was a slight tendency to spin on the rod with the possibility to swap ends if too much weight was put forward. To counteract this I glued a set of BB’s to the rear bulkhead with some epoxy (having learned my lesson from the passenger rocket). I also added a substantial epoxy fillet to the base of the styrene tube for extra support. I then glued the upper fuselage to the lower half.

After working on the side seams, I glued the clear canopy in place. It really is too bad that the fit of the rest of the parts was not as good as the canopies.
The drop tanks were added next. The fit of the tanks was pretty good. The only area that needed some touch up was at the back. You can also see the tube for the mount rod.

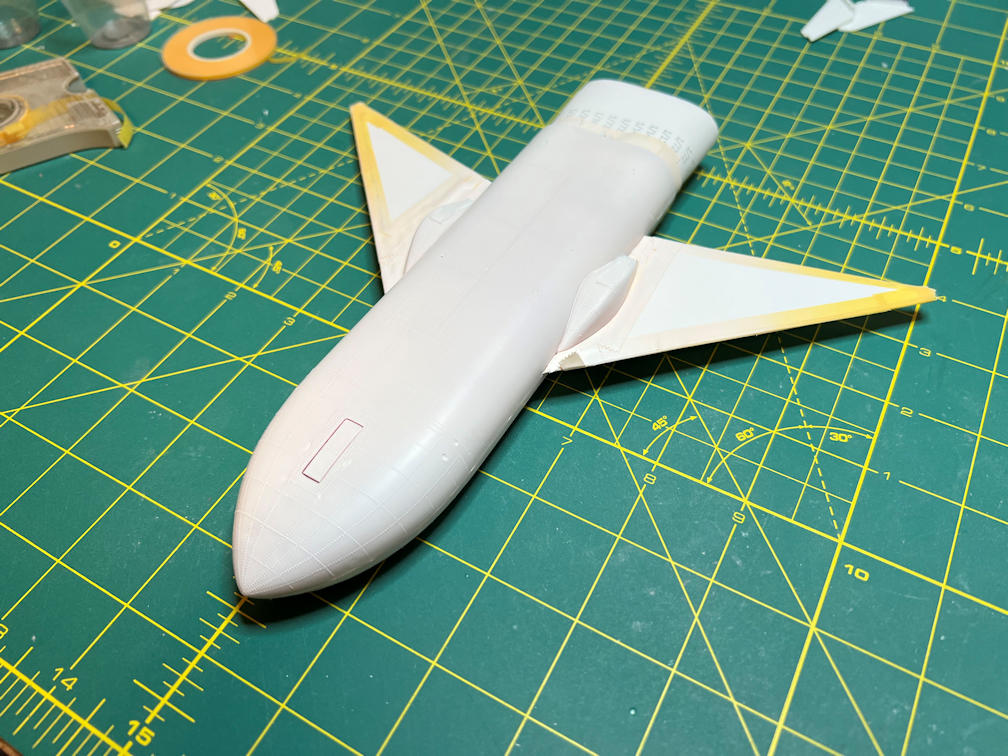
The passenger rocket’s wings are already painted primer white so I needed to mask them so I can paint the fuselage Tamiya X-7 Red. I also rolled some paper and added it to the rear to keep stray paint off the engines. Note the blue tint on the clear canopy. This is MicroScale Micro Mask. I put it on all the clear canopies to protect them from the primer and paint.

The two main stages were then sprayed with Tamiya white primer. The orbital rocket will have the wings and drop tanks masked before painting it with Tamiya XF-8 Flat Blue.

The temperatures have dropped into the teens so I’m probably going to be delayed getting the color sprayed. I’m hoping it warms up soon, the garage is a bit chilly for painting right now. The two space planes will be primer white. I’ve given them a coat of Tamiya Clear to prepare them for decals.
That’s it for now. I wasn’t able to get this set finished before the end of December, but I think I can get it done before too far into January, so I’m still going to count this as a 2024 build.
Thanks for looking and don’t forget to subscribe below to get notified of new posts.
