
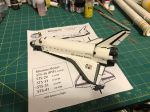
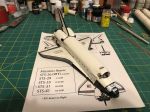
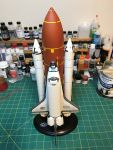
Well I missed my self-imposed deadline, but not by too much. I finished it before Christmas. The SSME and OAMS engine bells went on well and the orbiter was given a coat of Future Floor Finish to protect the massive amount of decals on the orbiter. After giving that a day to set up, Discovery was given a coat of dull coat. It looks pretty good. If I build another, I’ll be sure to paint the cockpit walls black. It is a bit distracting that there is nothing behind the windows. Otherwise though I think it looks pretty good. Here are some photos of the finished orbiter.


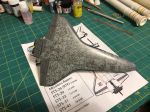
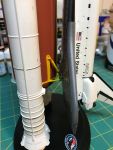
The SRB’s were next. They had been sitting there, painted white patiently waiting for me to do something with them. The top section of each SRB is painted a light cream/tan color. Mixing that one took some time to get something I could live with. With the orbiter finished it was time to start adding the decals to the SRB’s. I had to reprint the “LOADED” markings a few times before I got them the correct size. Those suckers were TINY! I also painted the foam on the stiffening rings on the lower SRB segments. Next time the black rings on the SRB’s will be a bit wider, these seem too narrow. After the decals, the SRB’s got a coat of Future Floor Finish to protect the decals from the dull coat that was to follow. Below is a pic of the remaining sections of the shuttle stack. The ET has the yellow sections painted and waiting to be masked off before painting the darker shades of foam. Masking the aft shuttle attachment was a pain in the butt. The SRB’s are still missing their nozzles. Those will go on after the dull coat. You can see the brass tube sticking out the bottom of the SRB. This will accept a wire rod that will support the stack on the stand. Both SRB’s have the brass tubes in them. To be sure they are centered and vertical, the rod runs the entire length of the SRB from the tip of the nose cone to nozzle. They are epoxied into the nose of each SRB.
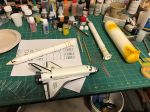
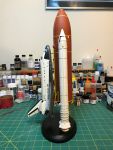
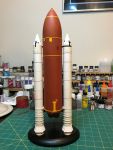
I didn’t get pictures of the painting process for the ET, unfortunately. But here are some pictures of the finished stack. It turned out pretty well. I’m happy with the ET colors. If I had to do it again, I’d probably change the shade of the intertank area a bit, but I’m still happy. The stand could have been a bit better. I’m not pleased with the grain showing through. But at a distance it looks good. The stiff wires running up the SRB’s are doing a great job of holding the stack vertical without my having to add a support for the orbiter. Here is the finished gallery of photos.


Now I’m ready for the new year and a new project. Next up, a 1/144 Saturn V for the 50th anniversary of Apollo 11.
