
Time for another update. I’m continuing with the photoetch for the most part.
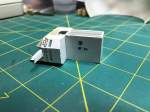
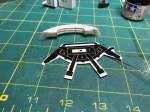
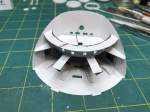
I folded the pod bay into shape and CA’d it together. I would have installed the floor but I was waiting on another set of LED’s to arrive. The first set were fine but they had a slight green cast to them. I ordered another set from a different source and I’m hoping that these are more white.
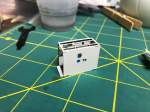
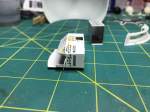
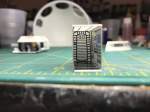
Anyway, in the meantime I moved on to the cockpit photoetch. I started with the hallway behind the cockpit. I filled the openings with Micro Kristal Kleer, except the ceiling. The openings are way too big to fill. I will apply a piece of clear styrene that I will sand on one side to make it more opaque. The part itself is a simple rectangular cube when folded. The main thing to be careful of is the ceiling. It is mostly open to allow the lights to shine through. As such it is very easy to bend the wrong way, but with a bit of care it went together just fine. After bending, I painted the backside of the openings with various Tamiya clear colors to enhance the color of the decals when lit from behind.
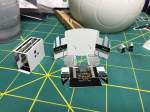
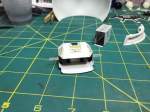
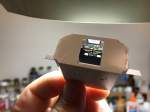
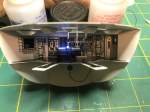
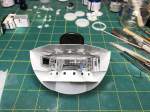
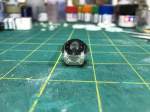
Next came the cockpit itself. I filled all the small lights and openings with Kristal Kleer as before. Then I applied the decals. When they were dry, I turned it over and started painting the back with the clear colors to match the colors of the decals. I also folded and painted the seats that will be installed later. When the paint was dry I started folding the cockpit section. There are a number of small pieces to bend but I had little trouble. ParaGrafix really does make it pretty easy to get a good bend without special tools. The lights look good, too bad you will be able to see so little of it after it is installed.
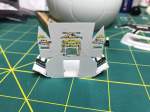

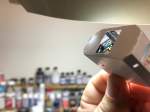
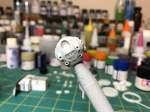
When the new LED’s came in I tested them and they were much more white that the others. I glued one to the pod bay floor to illuminate the workbench. I also bent and installed the PE cockpit window frame.
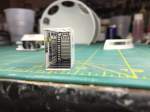
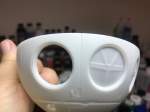
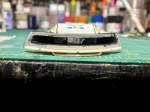
I decided I could wait no longer. I had to cut one of the pod bay doors out. I was dreading doing this, but it really needed to be done. In the film you can see that when the pod bay doors are open the notched frame remains in place. This meant that I had to cut out the doors and leave only the frame to be installed. I used a brand new #11 blade and slowly and carefully cut around the door inside the frame. After what seemed like forever the door finally came out. After sanding the inside edge of the frame, it looks pretty good.
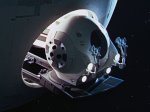
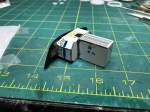
Now it was time to install the suit rack and workbench on the pod bay floor. I CA’d them into place. I then CA’d the floor into the pod bay walls. I turned on the LED and found a little light leak that I’ll paint over with some black. Otherwise it looks pretty good. The photo is a little blown out, but with just your eye it looks good. I placed the bay in the sphere and it looks pretty good. With the other two doors closed you can’t see much, but it does look great.
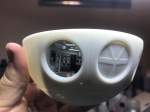
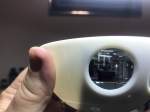
I then folded the PE pod bay sub-floor and installed it on the bottom side of the pod bay floor. I also went back and light blocked the cockpit and then glued it to the window opening and painted it black for light blocking.
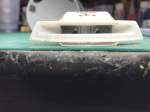
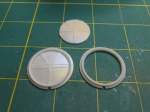
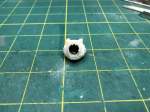
I then started working on the pods themselves. I painted black inside the pod that will be lit. After that dries I’ll paint silver inside to aid in bouncing the light around so the fiber optic head lights can pick up as much light as possible. I then primed the pod that will be installed inside the pod bay. It looks a bit rough on the lower half. For some reason the bottom half of the 3D printed pod is a bit rougher than the top half. I’ll have to do some careful sanding to see if the primer can smooth some of that out. It looks like I’ll have to do the same with the pod that I’m going to light up.
That’s it for now. As you can see, I’m saving the pod platforms themselves for last. I have to drill some holes in the PE for one of the pod pads to allow the wires to pass through. I’m hoping that I don’t destroy the part in the process.
Thanks for looking.
