

I had the cockpits painted and ready for decals, so I applied a decal to each one. They came from an extra set of Millennium Falcon decals I had created back when I built the Falcon. It helps the cockpits have more character than they would otherwise.
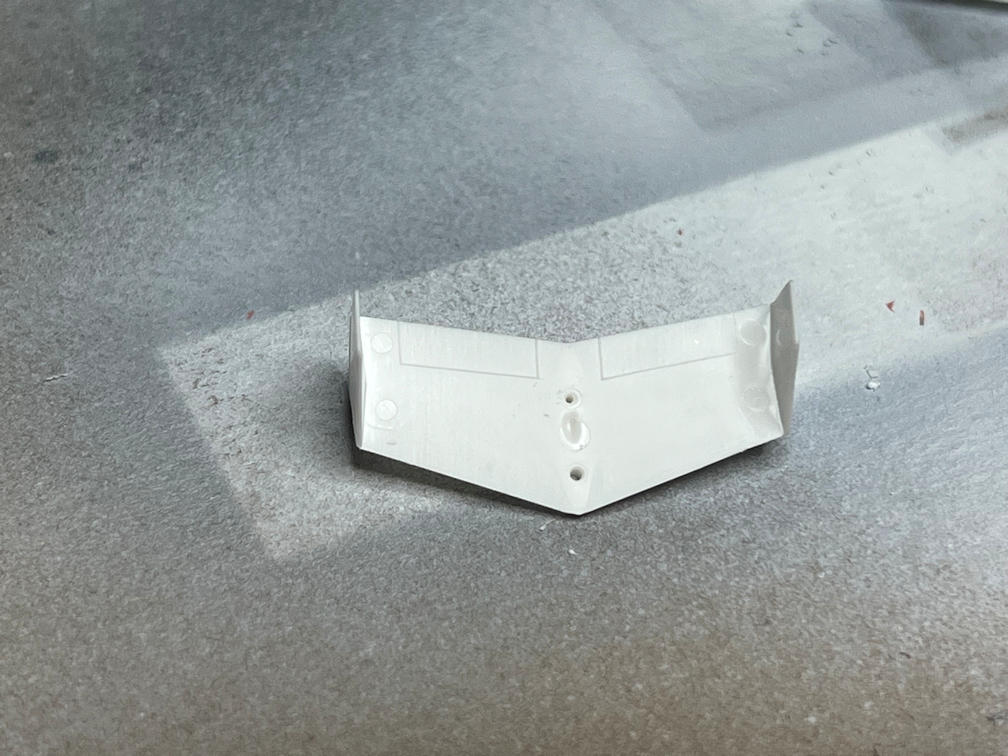
The next thing I did was some test fitting. When I tried to fit the vertical stabilizer to the horizontal stabilizer on the Passenger Rocket, I noticed that they wouldn’t fit. A closer look showed that one of the holes was almost completely filled during the molding process. I measured the diameter of the pin on the vertical stabilizer and got a matching .020 bit. I drilled out the hole and fitted it again and it now fits fine. The drilled hole is the small one towards the back of the horizontal stabilizer.
I also used some Tamiya black panel line enhancer and applied it to the door of each cockpit. It highlights the door better.

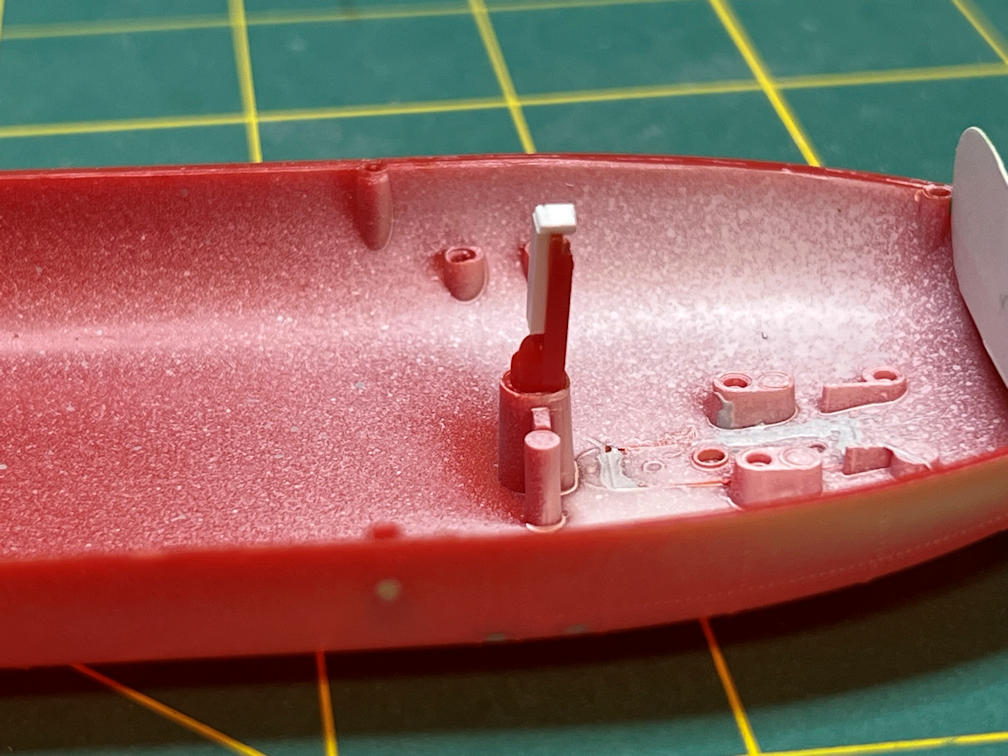
I then decided it was time to check the “spring latch” that will hold the upper stage of each model to the first stage. Each upper stage has a small hook that engages the spring and holds the stage in place. When I did the check I noticed that the spring for the Passenger Rocket was broken. Most of the spring was there but the catch that engages the hook was missing. The Orbital Rocket spring was just fine. I used it as a pattern to fix the spring from the Passenger Rocket. Here is a picture of what I added.

I squared off the broken edge of the red spring and attached a .040 plastic strip to the back side. I scored the tip of the plastic strip and then bent it over. I glued a .020 rod in the gap at the back of the plastic strip to reinforce the bend. I then inserted them into their holes in their respective models.

Once I had them in place I dry fitted the other half of the first stage and tested to make sure the repaired spring held the upper stage and was easily removed without breaking. I next glued the hook to the Passenger stage as seen in the below photo.

It all seemed to work, so I glued the springs in place.
The below picture is the second and third stages of the Orbital Rocket and the second and first stage of the Passenger Rocket showing the areas that got painted. The engine areas of each stage were painted Tamiya X-10 Gun Metal. The rear bulkheads where the engines attach were painted Model Master 1780 Steel enamel. The forward bulkhead of the second stage was also painted Steel. The engines were painted with Tamiya Lacquer LP-38 Flat Aluminum. The extra pipes on some of the larger engines were painted Model Master 1782 Brass enamel. The inside of each nozzle was painted Tamiya XF-84 Dark Iron.

These parts needed to be painted before any assembly otherwise it would be very difficult to paint later. If you look closely at the engine area of the third stage of the Orbital Rocket (second from left) you can see a tiny extension at the rear. That extension is actually a tiny separation motor which I painted flat aluminum just like the larger motors.
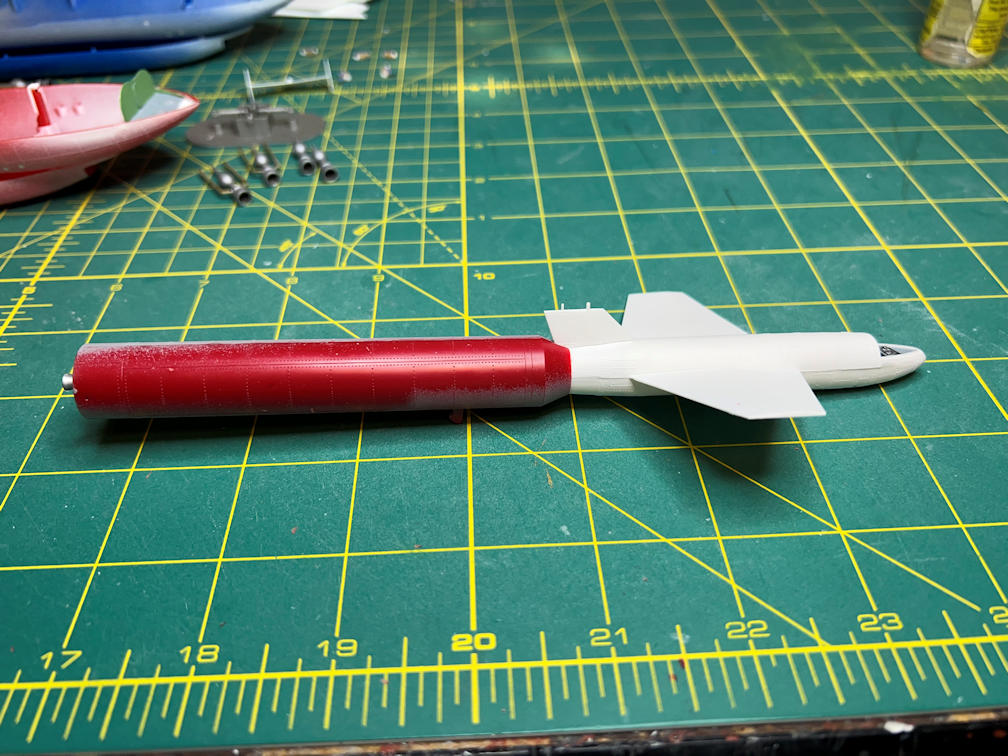
I glued the motor to the Orbital Rocket space plane and added the pilot figure.

I glued the top half of the space plane to the bottom. The seam line will need some attention before painting.

I then glued the bulkheads and rocket motor to the second stage of the Orbital Rocket.

The other half of the second stage was glued in place. I then dry fitted the vertical stabilizer to the third stage and did a test fit of the second stage to the space plane. I found that the space plane would not go on as far as needed. I sanded the back of the space plane slightly and also scraped some of the paint from the end of the second stage. This made the parts fit together pretty well. Here is a photo.
Next I’ll probably start on the first stage of the Passenger Rocket.
That’s it for now and thanks for looking. If you want to be notified anytime I make a new post please subscribe to my blog with the button at the bottom of the page.
