
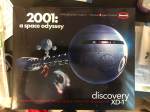
I’m getting ready to start my next build. It will be the Moebius kit of the Discovery XD-1 from the movie 2001: A Space Odyssey. This is one of my grail kits. I’ve wanted a kit of this model ever since I saw the movie back in 1968. There have been no injected styrene kits of this up until Moebius did it a couple of years ago. There were some garage kits in resin, but they were either out of my price range or I didn’t find out about them until they were out of production. I pre-ordered the kit from CulTVMan when it was announced. It’s been in my stash since then. Now I’m finally getting around to building it.
Of course this model screams for a detailed pod bay which is not included in the kit. Fortunately ParaGrafix has come to the rescue with a pair of photoetch sets that re-create the pod bay and the cockpit of the XD-1. I also found out that HDA Modelworks was making a set of decals for the ParaGrafix sets that would help me avoid having to paint all that detail by hand.
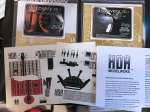

Obviously, since there was no pod bay in the kit, there are no pods in the kit either. After looking at what was available from after-market sources, and actually purchasing a couple, I was not enthusiastic at what I had found. The first one I picked up was cast in clear resin so it might be possible to light it. Unfortunately it was way undersized. I found another that was about the correct size but the detailing in the back seemed wrong, and it was cast in solid white which would make lighting next to impossible. Finally, I heard about Falconware on Shapeways. He was producing a 3D printed set of pods that were the right size and nicely detailed. He had even included the provision to add fiber optics for the headlights of the pod. I bought a set of three and they look very good. He also provides a set of arms in various positions so you can model them parked, picking up Frank, or opening the emergency airlock.
So now I have most of the aftermarket add-ons that I need (I still need to get some LED’s for the lighting) I’m ready to start on the model. I opened the box and examined the runners. Each runner is in a separate bag so if any parts come off the won’t go far. Unfortunately, my kit had two parts that were damaged. The main antenna spider had one of its arms broken. Also the window sill was cracked. After sparing application of liquid cement and careful bending of the broken part, I was able to fix the spider. You can barely tell where it was broken. I used a similar procedure on the window sill. Both came out great.


Now I need to figure out my plan of attack for the model. I think I’ll be starting with the photoetch sets from ParaGrafix. I’ll be modeling the scene where Dave is leaving the pod bay in his attempt to get Frank. So I will only need two of the three pods that I bought. I will also only need to light the one that Dave is using. I’ll model that pod platform extended with the headlights on and the arms in the parked position. I have a bit of work to do before I install the platforms which is good since I’m still waiting on the brass tubes that support the platforms.
I expect the initial stages of this build to be a bit slow, but things should start progressing nicely after the interior and lighting is installed.
Thanks for following along.
