
My original plan was to use the RealSpace Models Soyuz conversion set. But when I finished the initial assembly of the rocket and started looking at the Soyuz second stage part I started to find some things that made me reconsider.
First, I noticed that one of the small nozzles on the escape rocket was missing. It looked like it might have been broken off at some point. This is a 3D printed part, but it looked like I could possibly scratch up something that might work to replace the missing nozzle, so not a big deal there. I also noticed that the main nozzles were not hollow so some careful drilling would be required here.
The main resin piece forms the second stage and the spacecraft shroud. When I started comparing the details of this part to some of my reference material I noticed that a lot of the details were either missing or incorrect. I considered removing the raised details and adding my own which would not have been overly difficult. But…then I found one detail that I couldn’t easily fix. The second stage is a cylinder with a conical section that flares out to meet the spacecraft shroud. The conical section was about twice as long as it should have been. The overall length of the stage was correct but the adapter was too long and the rocket stage was too short.
With all the inaccuracies I was finding I was in a situation where fixing all of them might as well have been a scratch build of a new stage. This is not meant to be a knock on Glenn at RealSpace Models. This kit was created back when there were few references available. Back then you did the best you could with what was available. Now we have much more reference material and can see how much off the old kits were. Be that as it may, I still needed a solution for this build. Some modelers might be OK with what is provided, but the scale critic inside my head wanted to do better.
I thought since I have a 3D printer I might as well put it to use on this project. I went to Google and started searching for some 3D models of the Soyuz rocket. I finally found one on Thingiverse. Here is a link if you are interested: Soyuz FG rocket. It had some files in Fusion 360 format which allowed me to load it directly and see what it looked like. It looked good. From what I could tell the details matched my sources pretty well. A few minor bits were missing but at this scale that would be OK.
The Fusion files were divided into three parts. Boosters, core stage, and second stage/spacecraft section. If I really wanted to, I could print a whole model from this set of files. But since I’m already well along with the Apex part of the build I decided to keep it and just print the upper section.
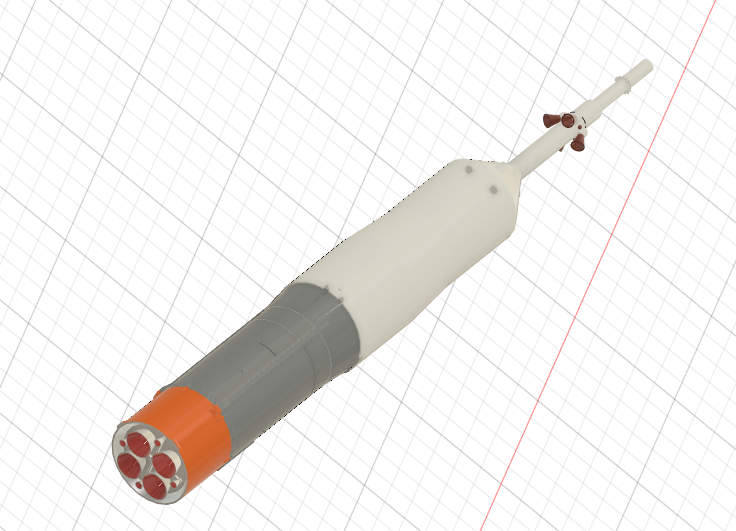
First, I re-scaled it to 1/144. The 3D files were 1/50 scale. I then saved it as an .stl file. This I loaded into Meshmixer and cut off the top part of the spacecraft shroud with the launch escape rocket and saved them as separate files. I then loaded them into my slicer and added some necessary supports and started the printer. Here is a screenshot of the 3D file in Fusion 360.
Five hours later, it was done and I could see what I would need to fix. I found that I needed to add some additional supports for the launch escape rocket nozzles. I also added a couple more supports for the periscope cover. I then re-sliced it and started printing again. Here is the view of the file in the slicer with supports.

This time it came out looking fine. Here is a photo of the RealSpace part and my 3D printed part.
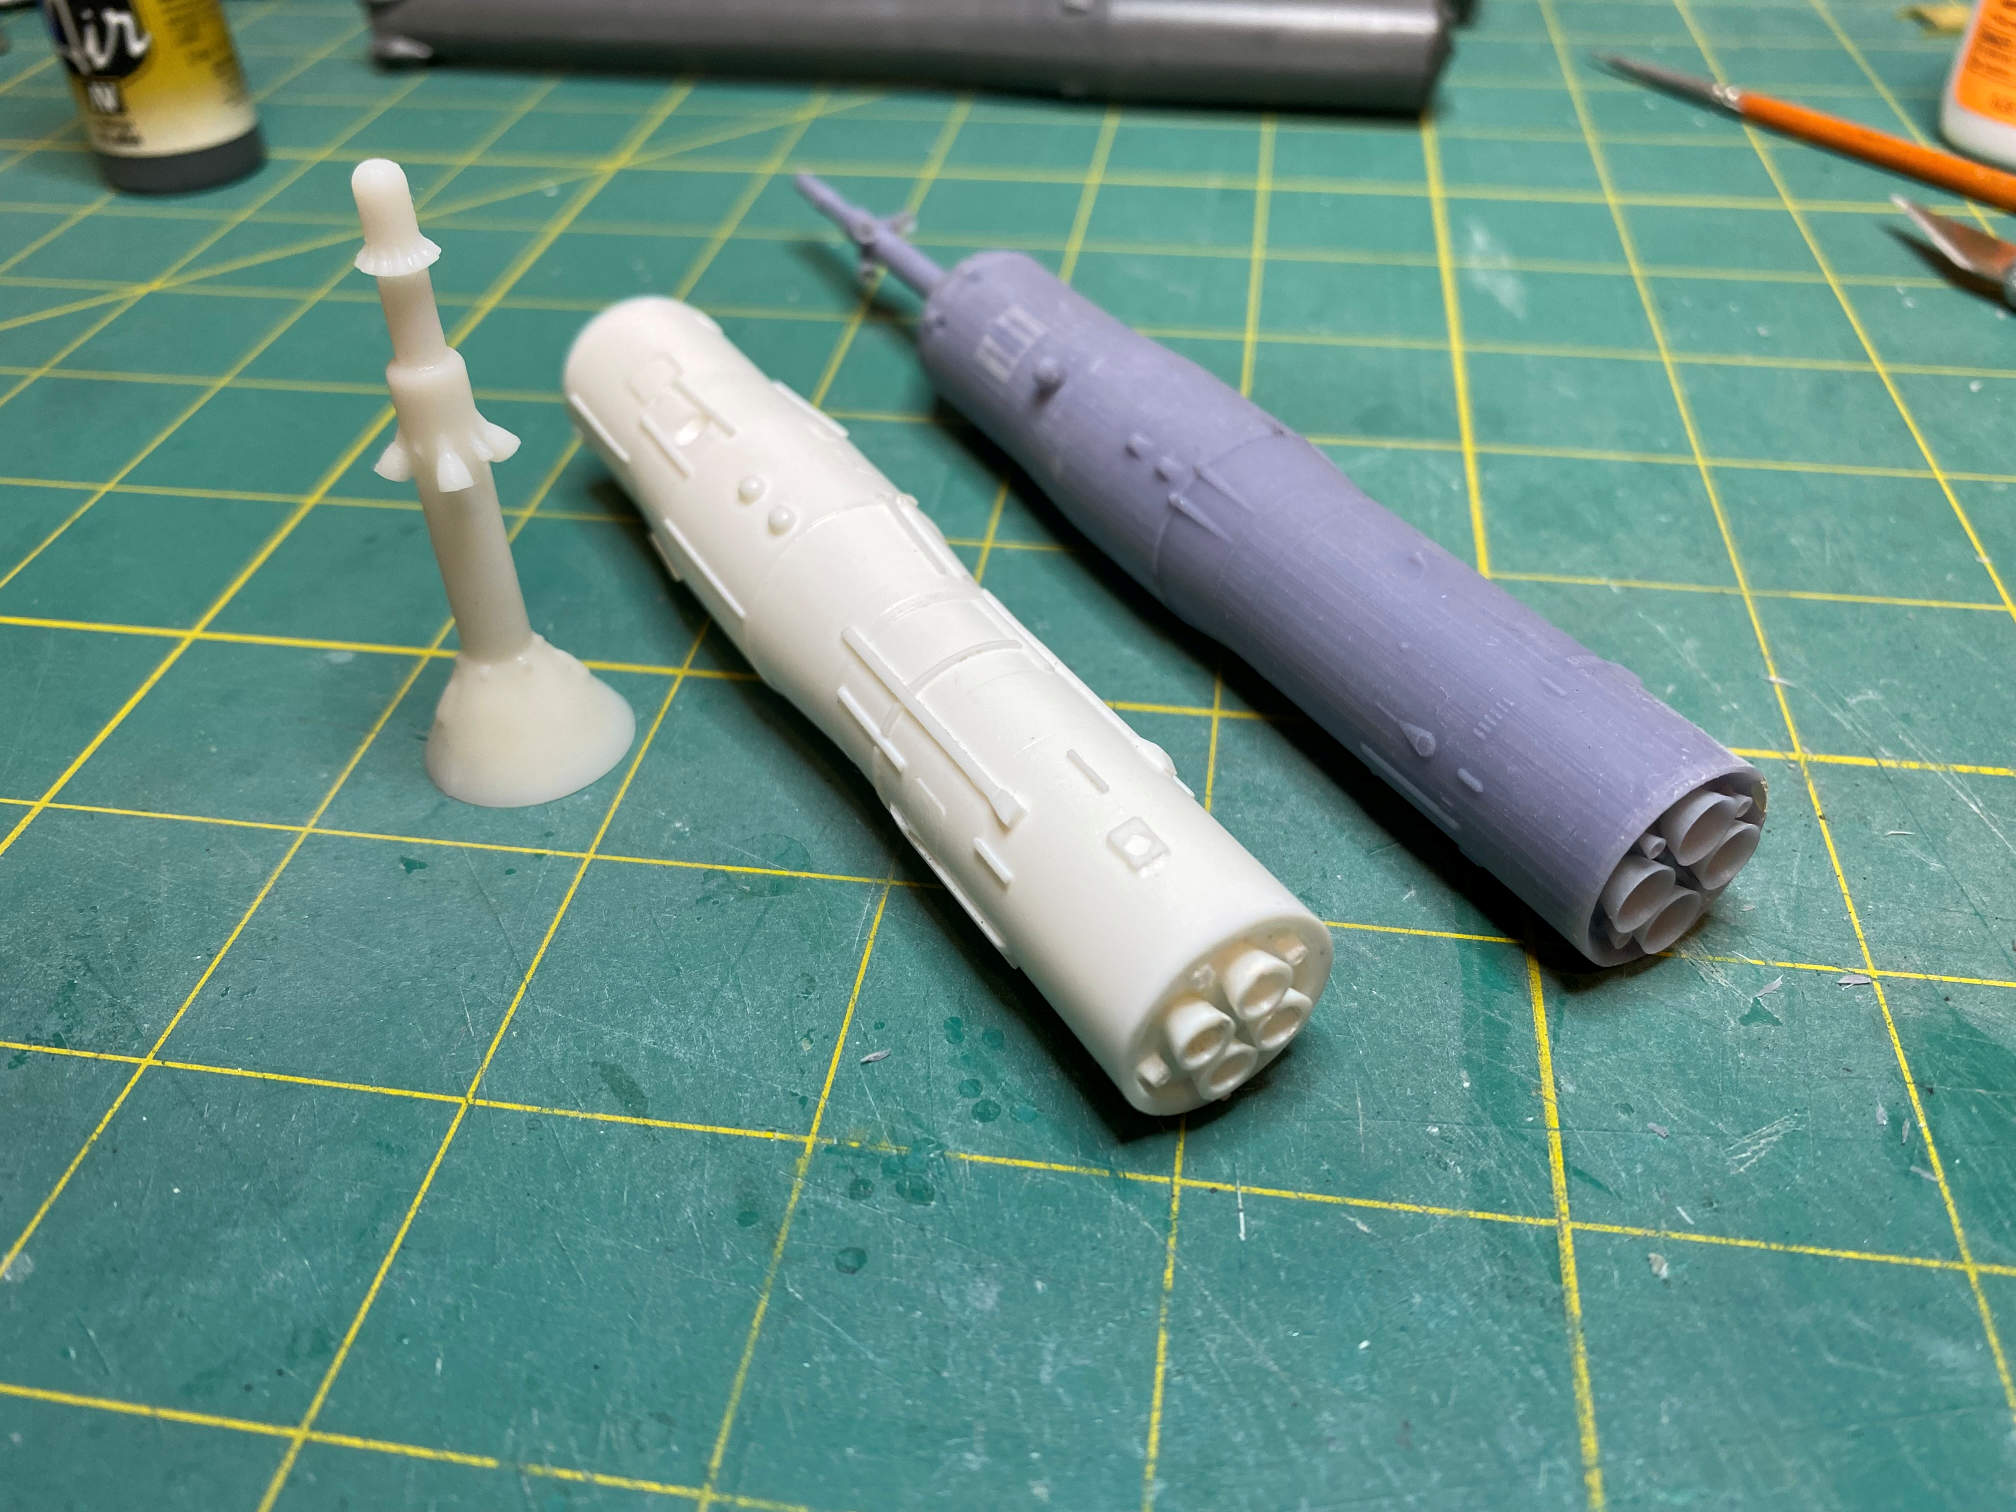
In the above photo I have already glued the top of the shroud to the rest of the 3D printed upper stage. You can see the difference in the 3D printed part and the resin pretty well. These are oriented to the same direction, with the periscope cover pointing up and left. If I could have modified the Fusion 360 part I would have thickened the nozzles just a bit so they wouldn’t be quite so thin. It’s not that the file was locked or anything, it is just that the 3D model is quite complex and I was having a very hard time finding where to make the change. Anyway, once the part was cured they were nice and stiff and solid, but being so thin I am careful that I don’t wack them against anything.
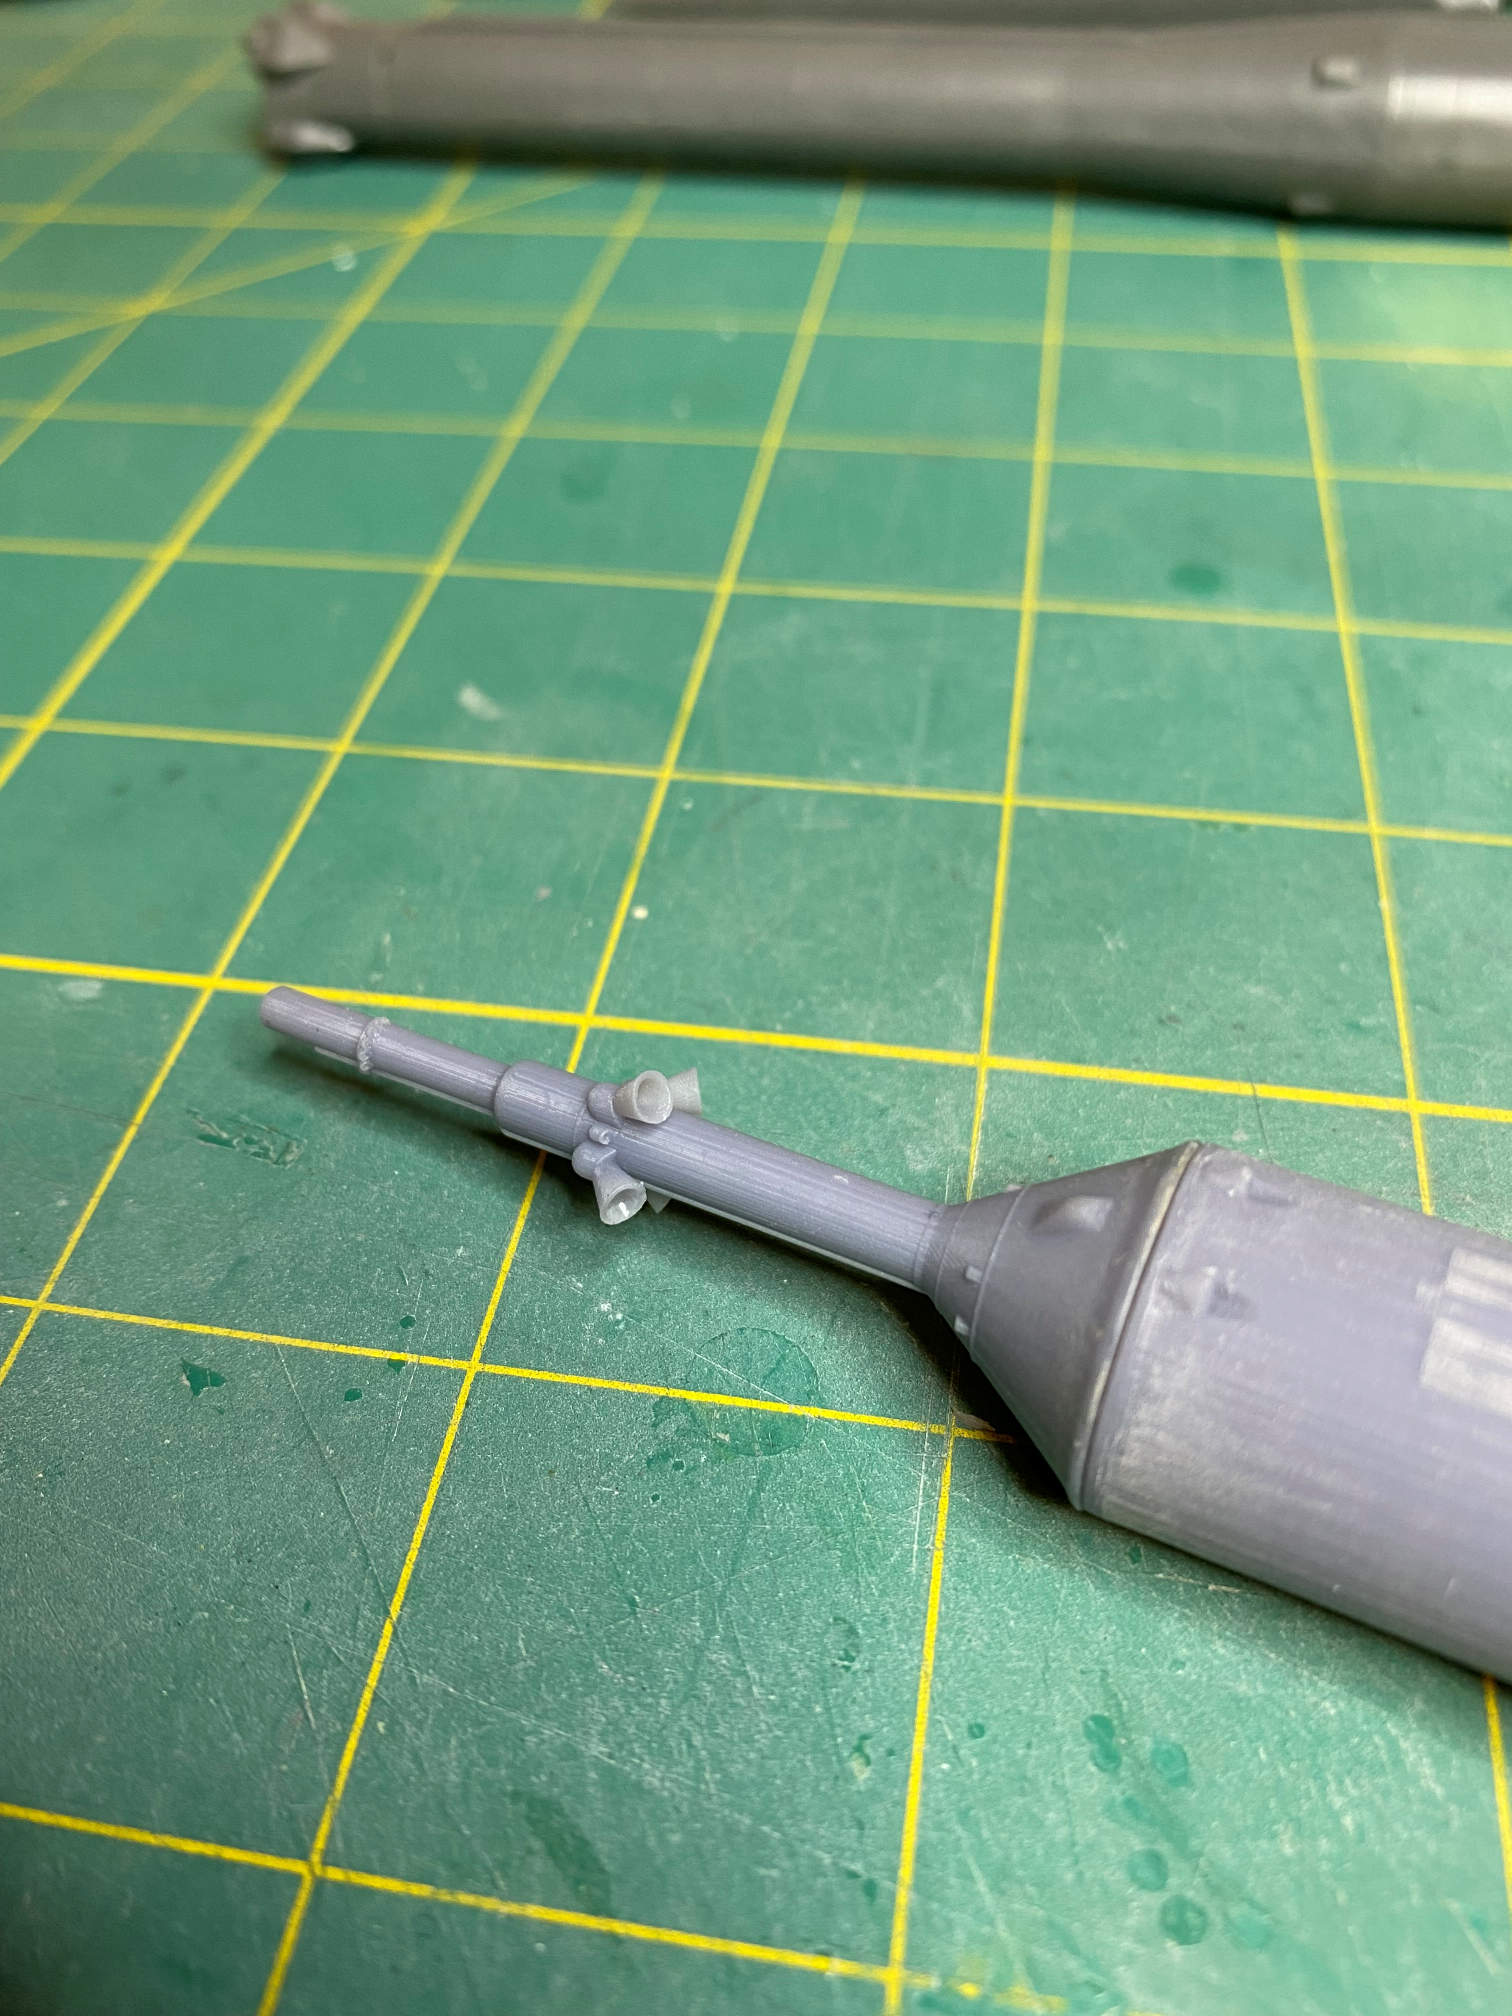
As part of making the .stl file I was able to remove the grid fins. I didn’t want to print those on the shroud as I wasn’t sure how well they would print. Here is a photo of the top of the 3D part. You can see where I glued the parts back together. A little filler will take care of the gap. I love the details on the launch escape rocket.
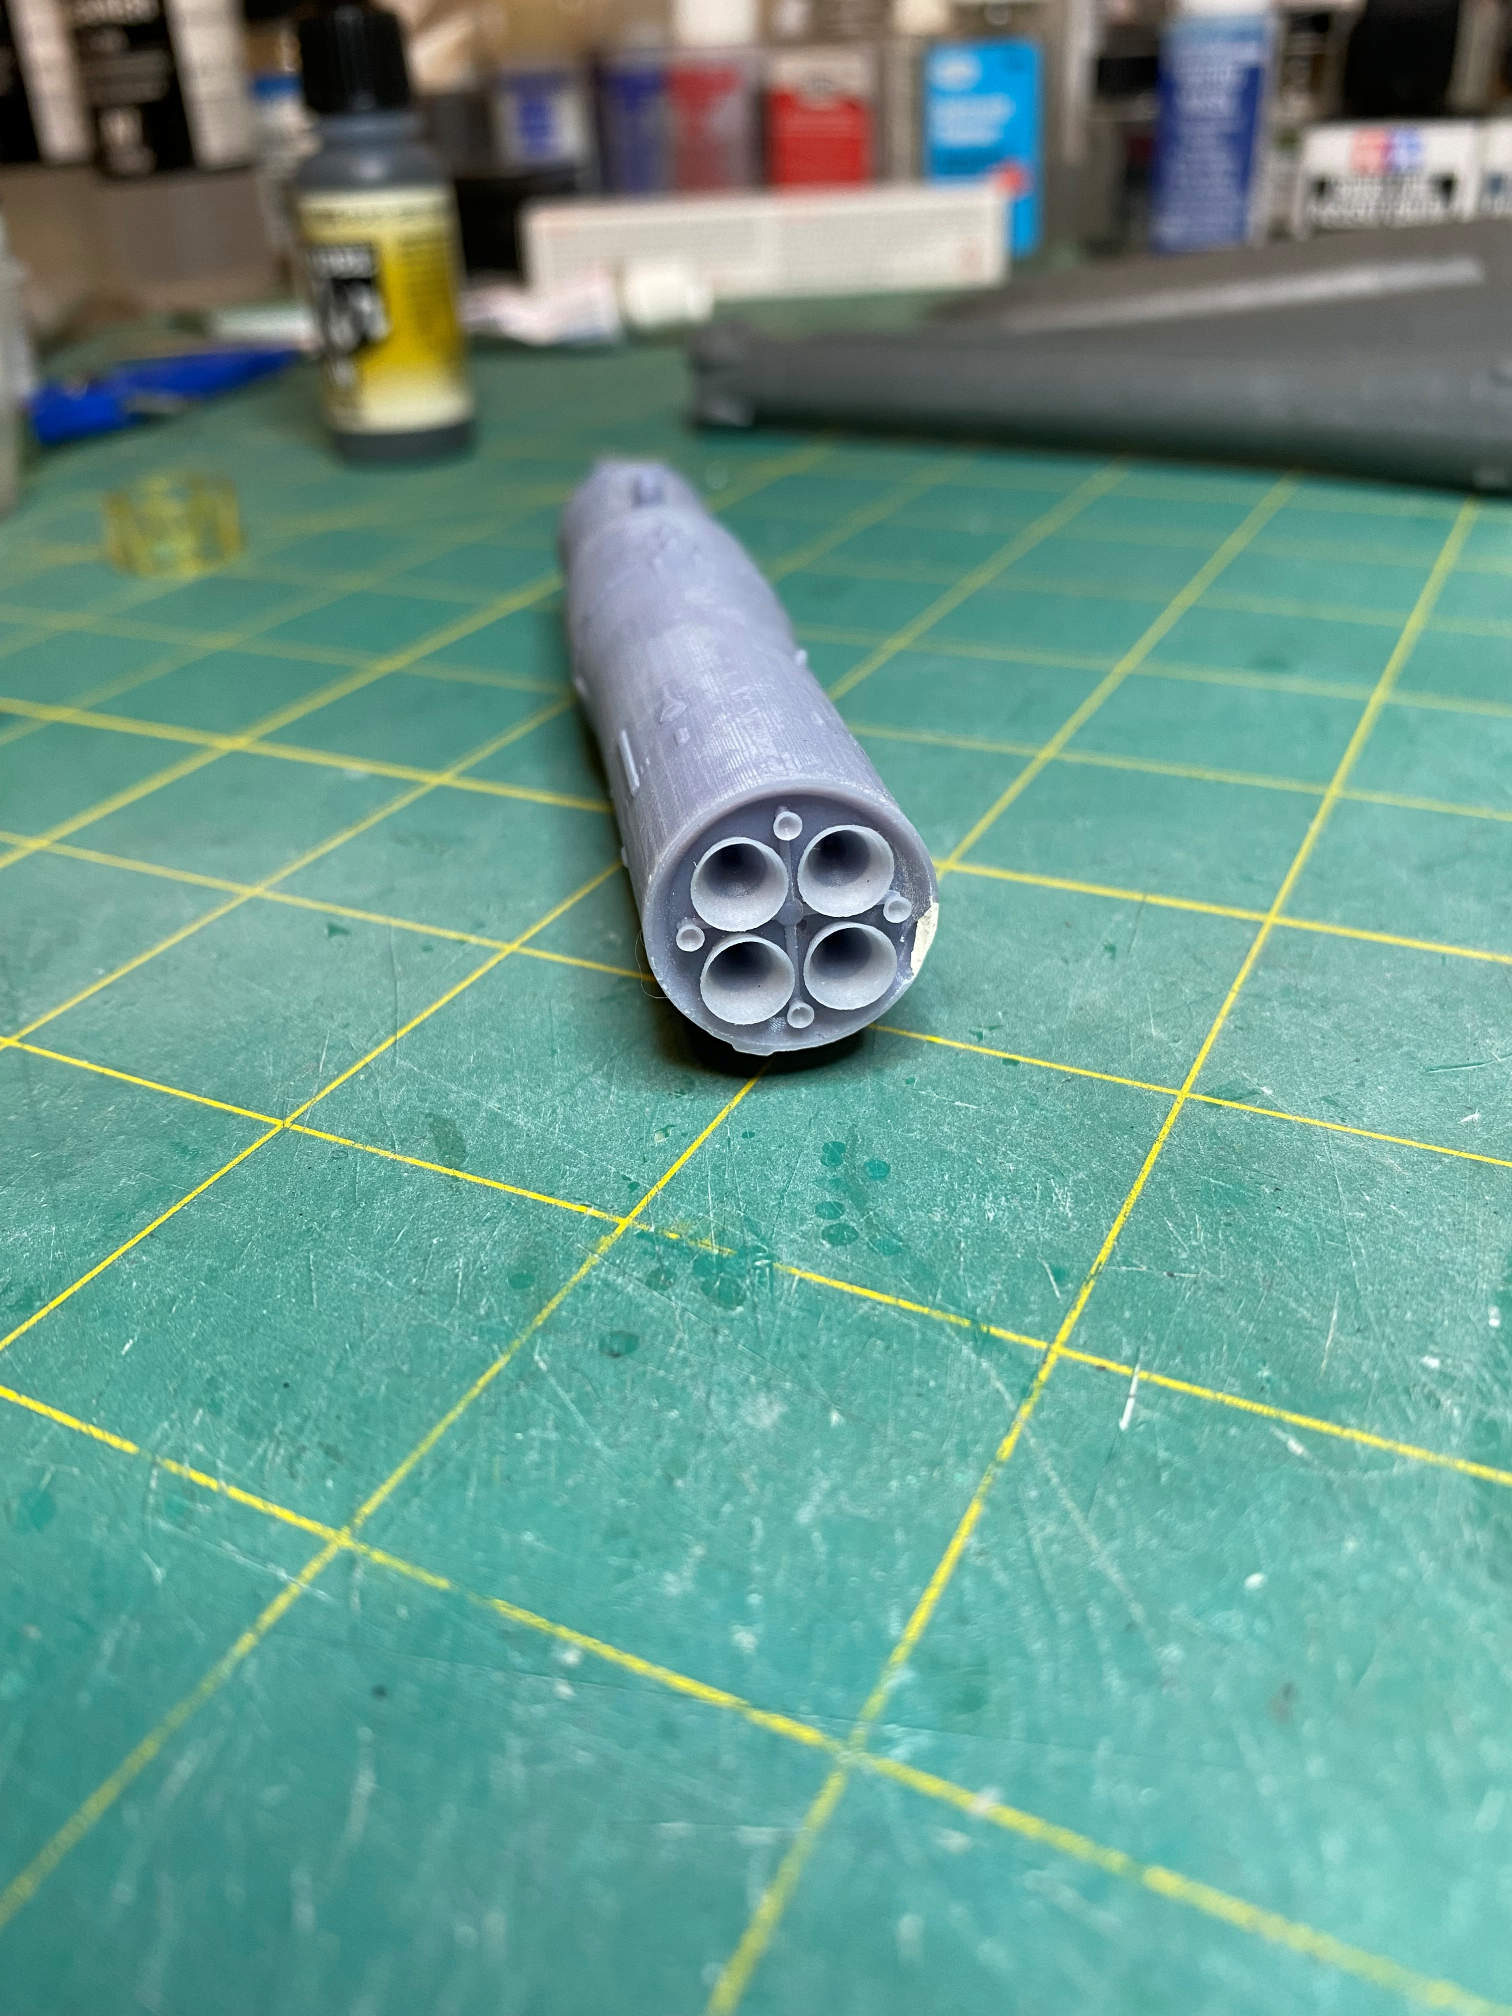
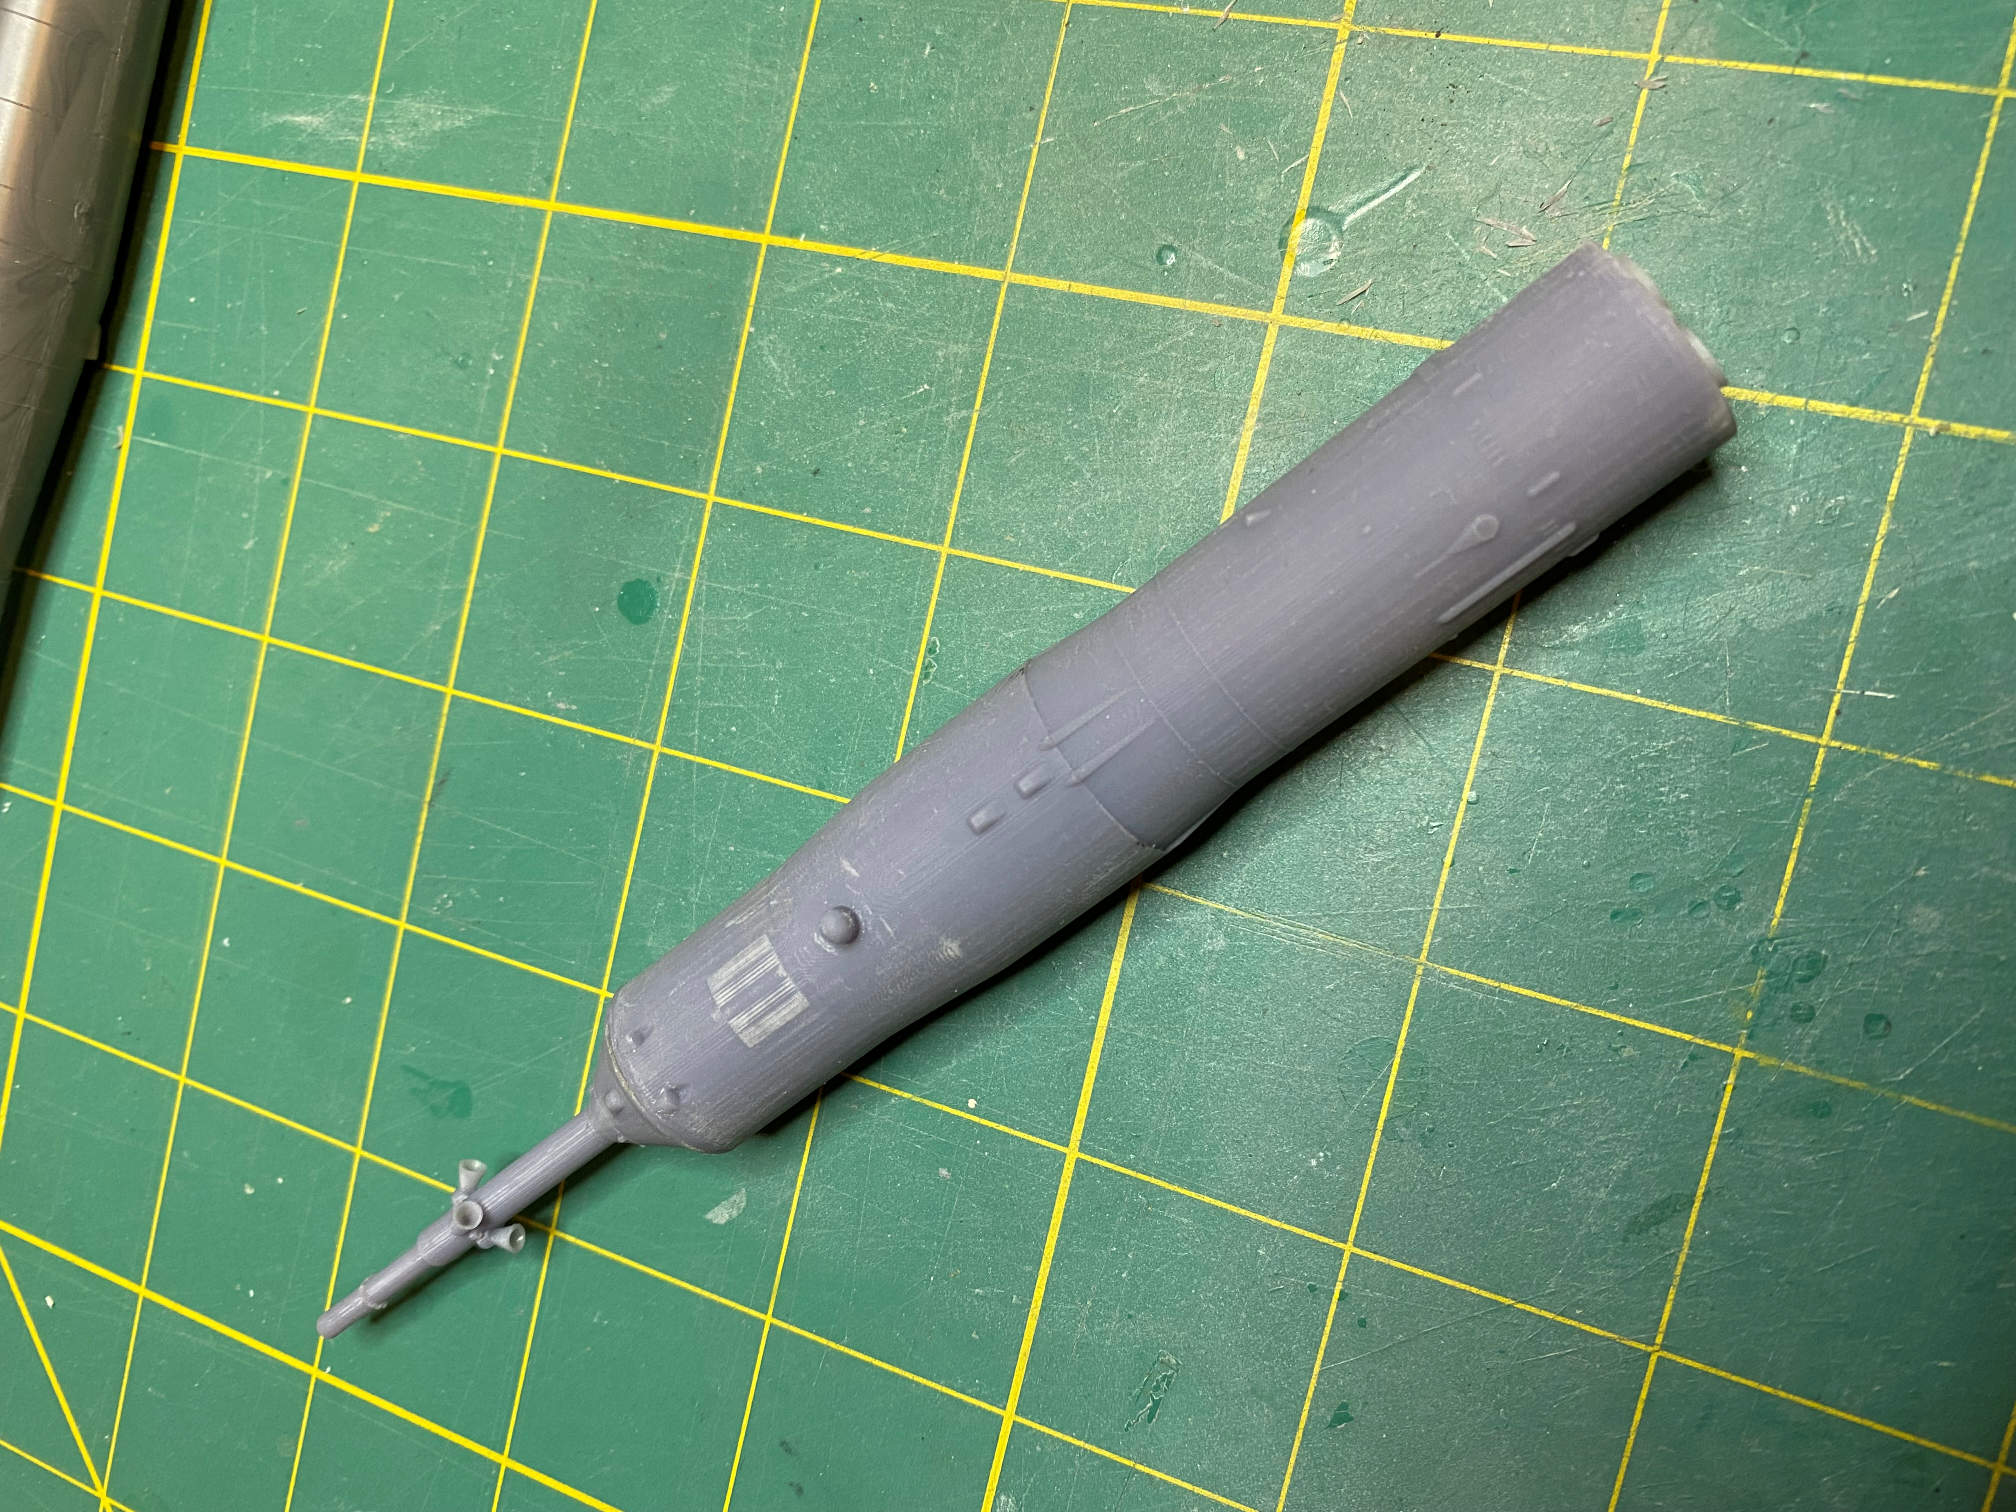
Here is better view of the nozzle end. You can see just how thin those nozzles really are. The white patch on the right is a bit of filler putty. I dropped the part on the tile floor when I was removing it from the build plate and it chipped off a small bit. I was shocked that was the only damage.
Here is an overall shot from overhead of the whole section.
With that pretty well sorted, I felt I could continue the build. The only parts of the RealSpace conversion set it looks like I’ll be using war the photo-etch grid fins and the interstage truss. Oh well, it’s no different than using a whole Airfix kit for just the nozzles and booster truss.
More to come on the next post. Thanks for looking in.
