
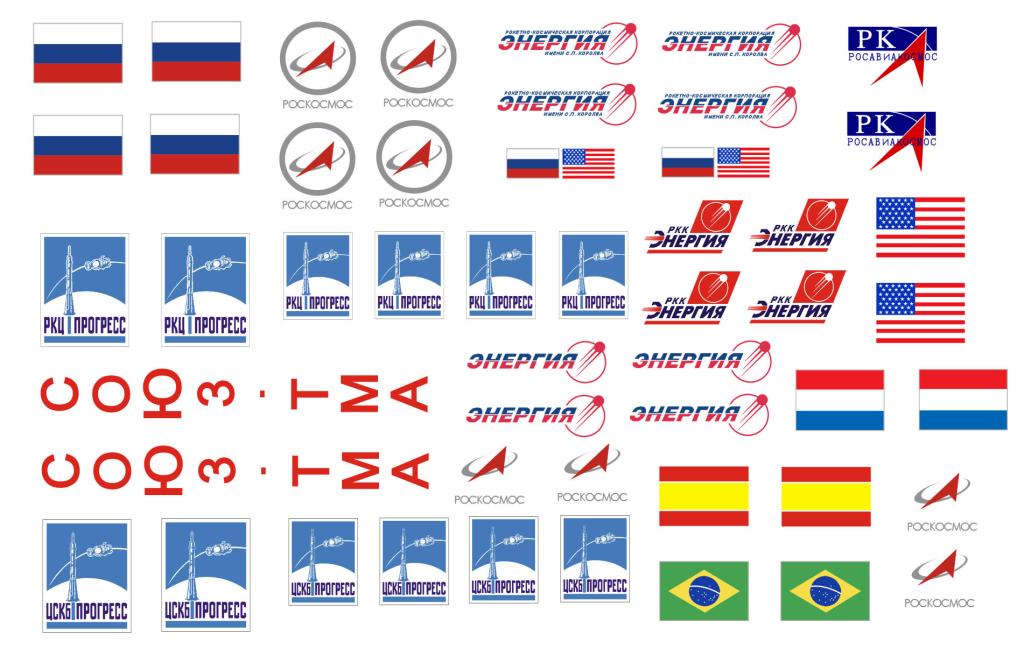
I’ve completed the decal work. Here is the set for Soyuz TMA-16M.

This is just a subset of the decals that I drew. I kind of went down a rabbit hole with my research on the Soyuz TMA markings. I researched as best I could all the TMA and TMA-M markings. The blue decals that go on the boosters and core actually has two different versions, so I drew them both. It appears that the early boosters were marked “TsSKB Progress” and the later ones were for “Progress Rocket Space Center” written in Cyrillic of course. The Roscosmos logo had two different versions. One with the gray circle and one without. The Energia had two versions as well. One that said PKK Energia and another that just said Energia with some small Cyrillic text above and below. Some missions had the Russian Aerospace Agency (PKA) logo, so I drew that. Before they started using the small Russian/US flags above the Energia logo there were larger flags for the flight participants. I found markings for a few other things that I have not yet drawn. For example, Space Adventures, ESA mission emblems and a few others. I finally had to stop or I wouldn’t have finished the decals I needed for this model. Here is a picture of all the Soyuz launcher decals I’ve drawn so far.
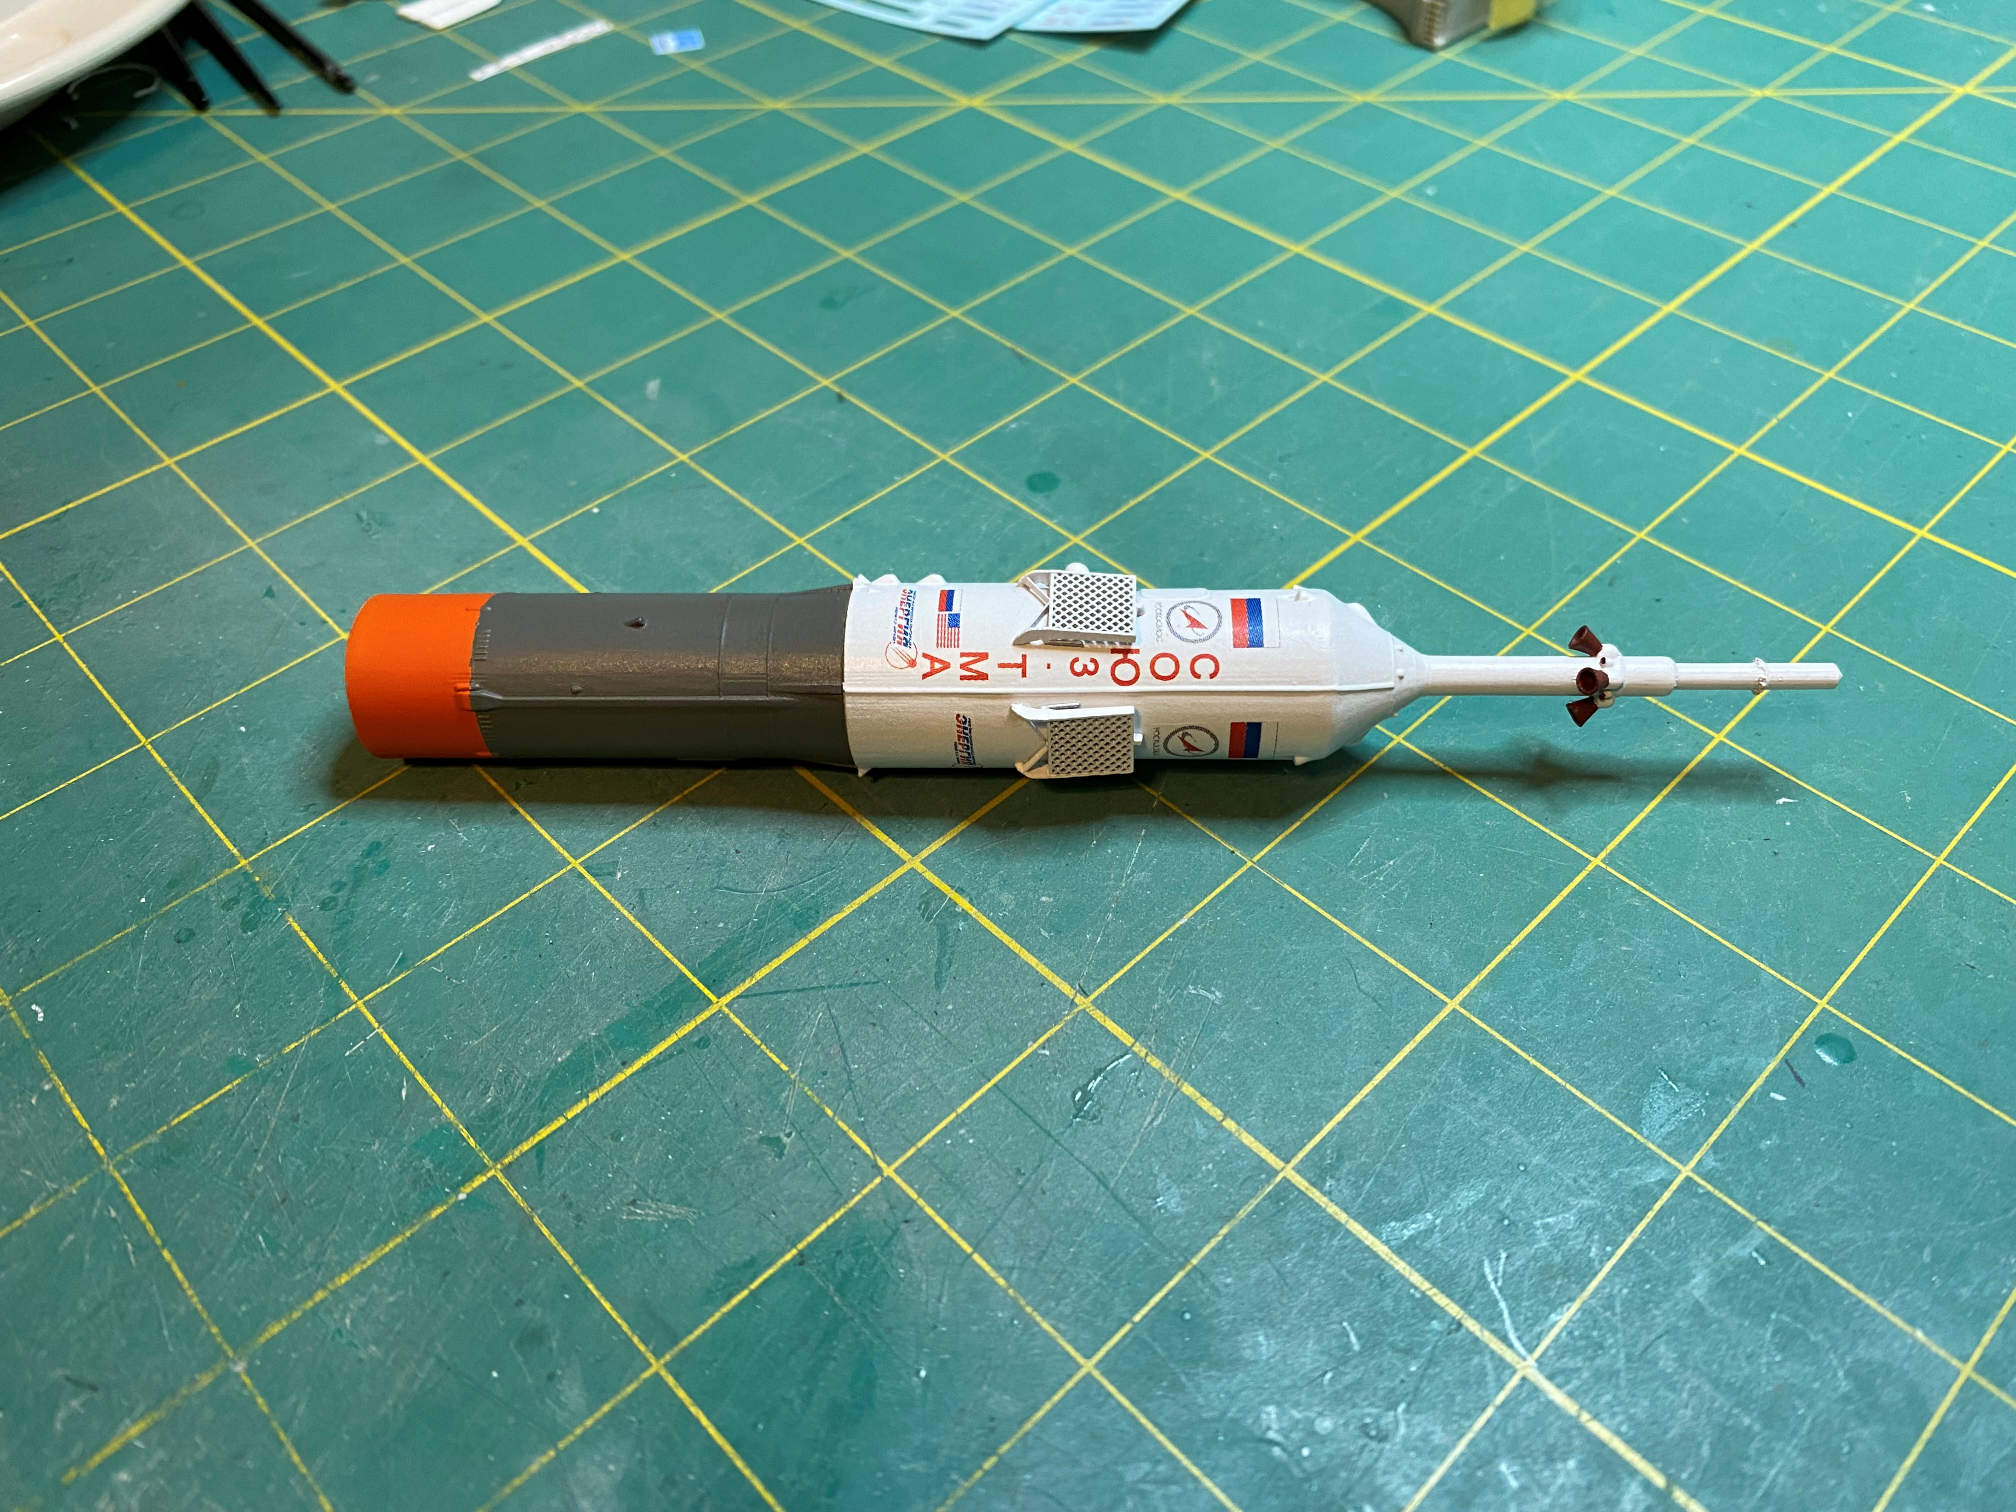
I started applying decals with the second stage/spacecraft section. In spite of some dithering on some of the decals, I think they turned out quite well.

When the decals had dried I applied some Tamiya Clear over them. When that dried I sprayed the whole stage with Tamiya Matte Clear.
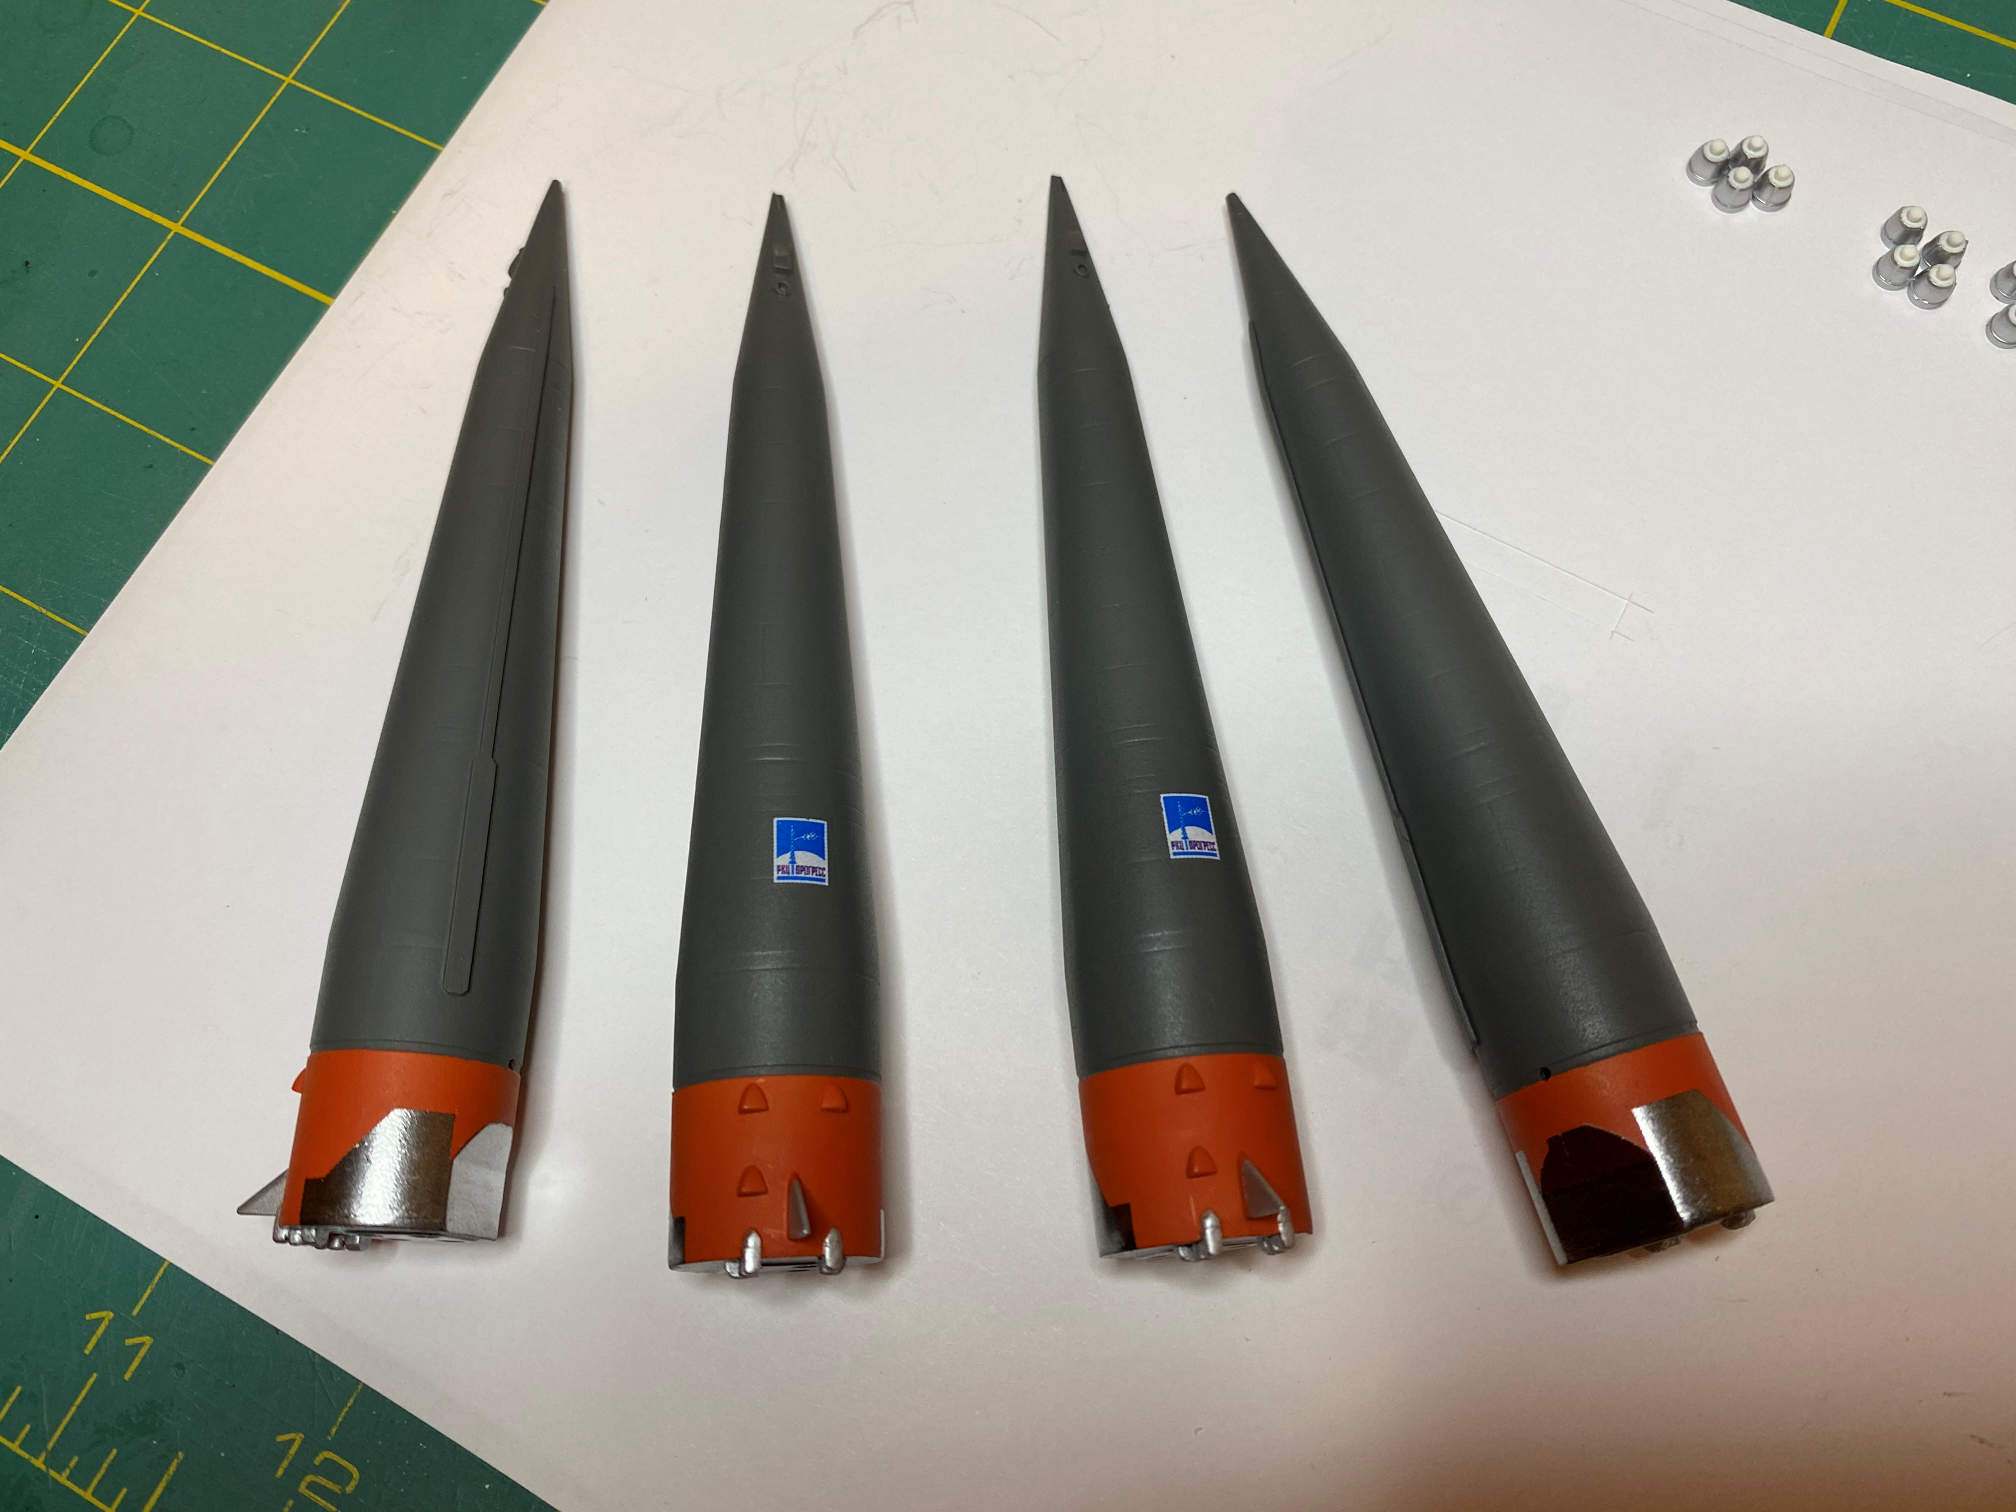
I also applied the decals to the boosters and core stage and gave them the same Tamiya Clear/Matte Clear treatment.

Here is a photo of the boosters with their decals added. It was really hard to find any good photos of the booster fins. All the “in assembly” photos show that the fins are not attached. Even the rollout photos don’t show any fins attached. I found a couple of distant shots of the rocket on the pad that appear to show the fins as being silver in color. The base of each fin is fixed and part of the booster. The moveable portion is apparently installed later and is silver.
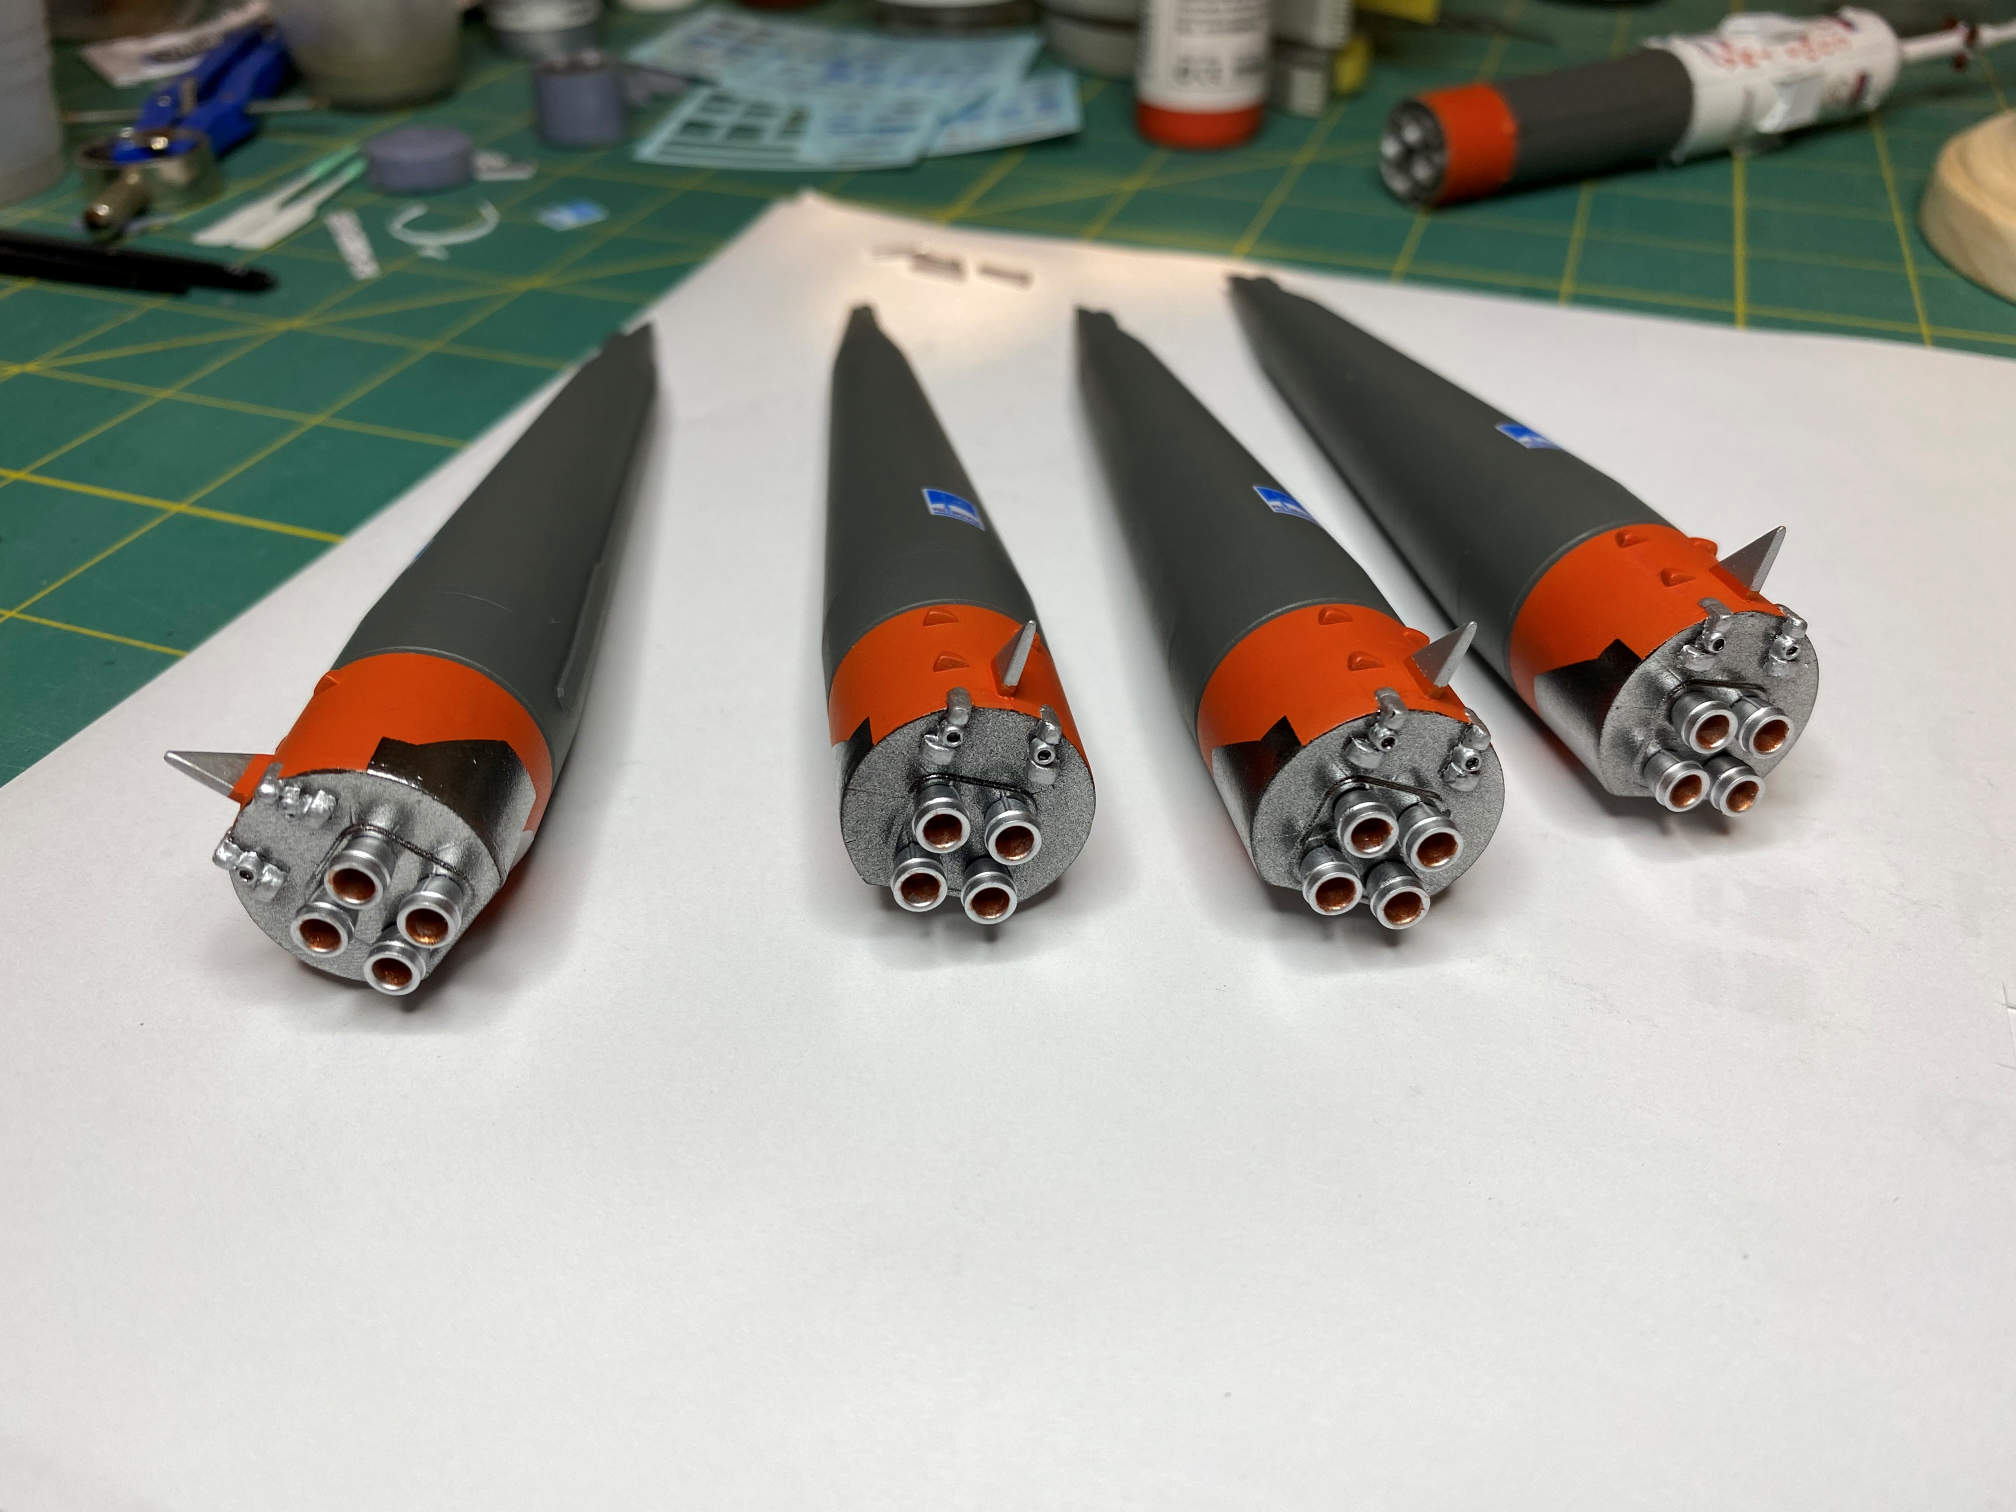
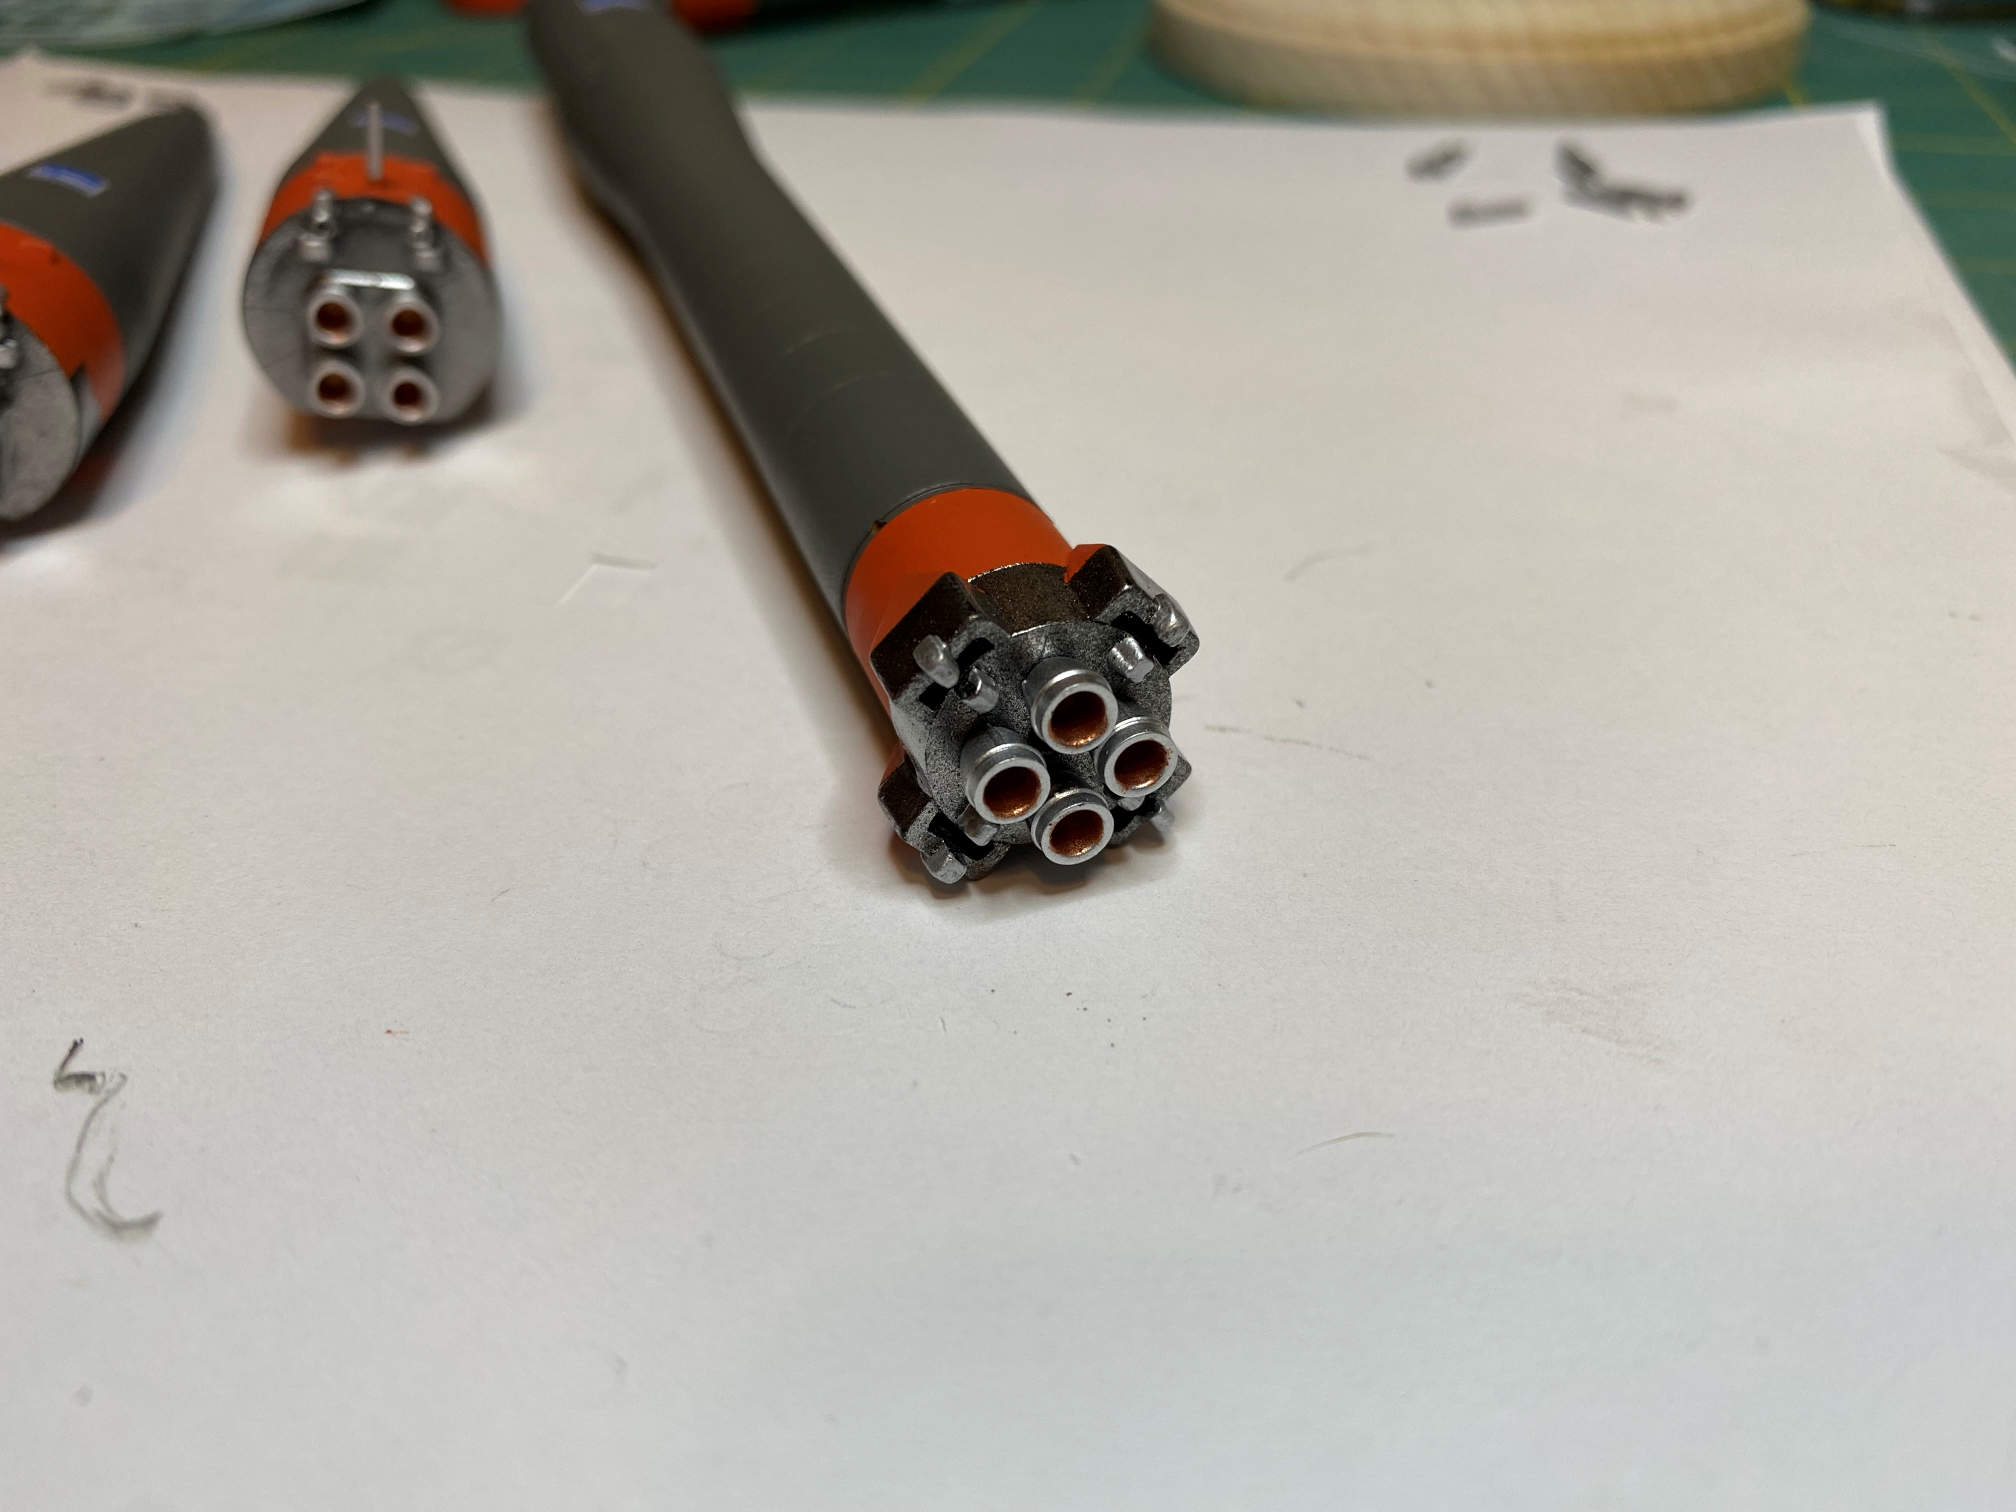
I had previously sprayed the nozzles with silver and set them aside. Now I painted the inside of the nozzles with some Tamiya Copper. What little research I’ve found appears to show the inside of the RD-107/108 (now RD-117/RD118) nozzles have a somewhat copper like color to them.


I used CA to attach them to the boosters. The holes I had previously drilled fit the pin on the Airfix nozzles nicely.
I then did the same for the core stage.
I had to do some trimming to get the Airfix vernier nozzles to fit into the core stage.

For the boosters I had to cut off just about everything above the nozzle to get them to the right length.

That completed the assembly of all the major parts. The next thing I did was to glue the booster attachment grid using the Airfix parts. I forgot to take a picture of that assembly, but it went together well just like it had when I built the Voskhod II model.
It was then time to attach the boosters to the core stage. The holes I had previously drilled in the boosters to accommodate the Airfix grid really helped in getting the boosters lined up properly. I let the CA cure for about an hour between adding each booster. When that was done I put the model on its base. This gave me a good vertical orientation to attach the second stage/spacecraft shroud. A drop of CA on each of the guide pins I had previously added and then a thin layer on the base of the second stage gave it a solid join to the interstage grid.
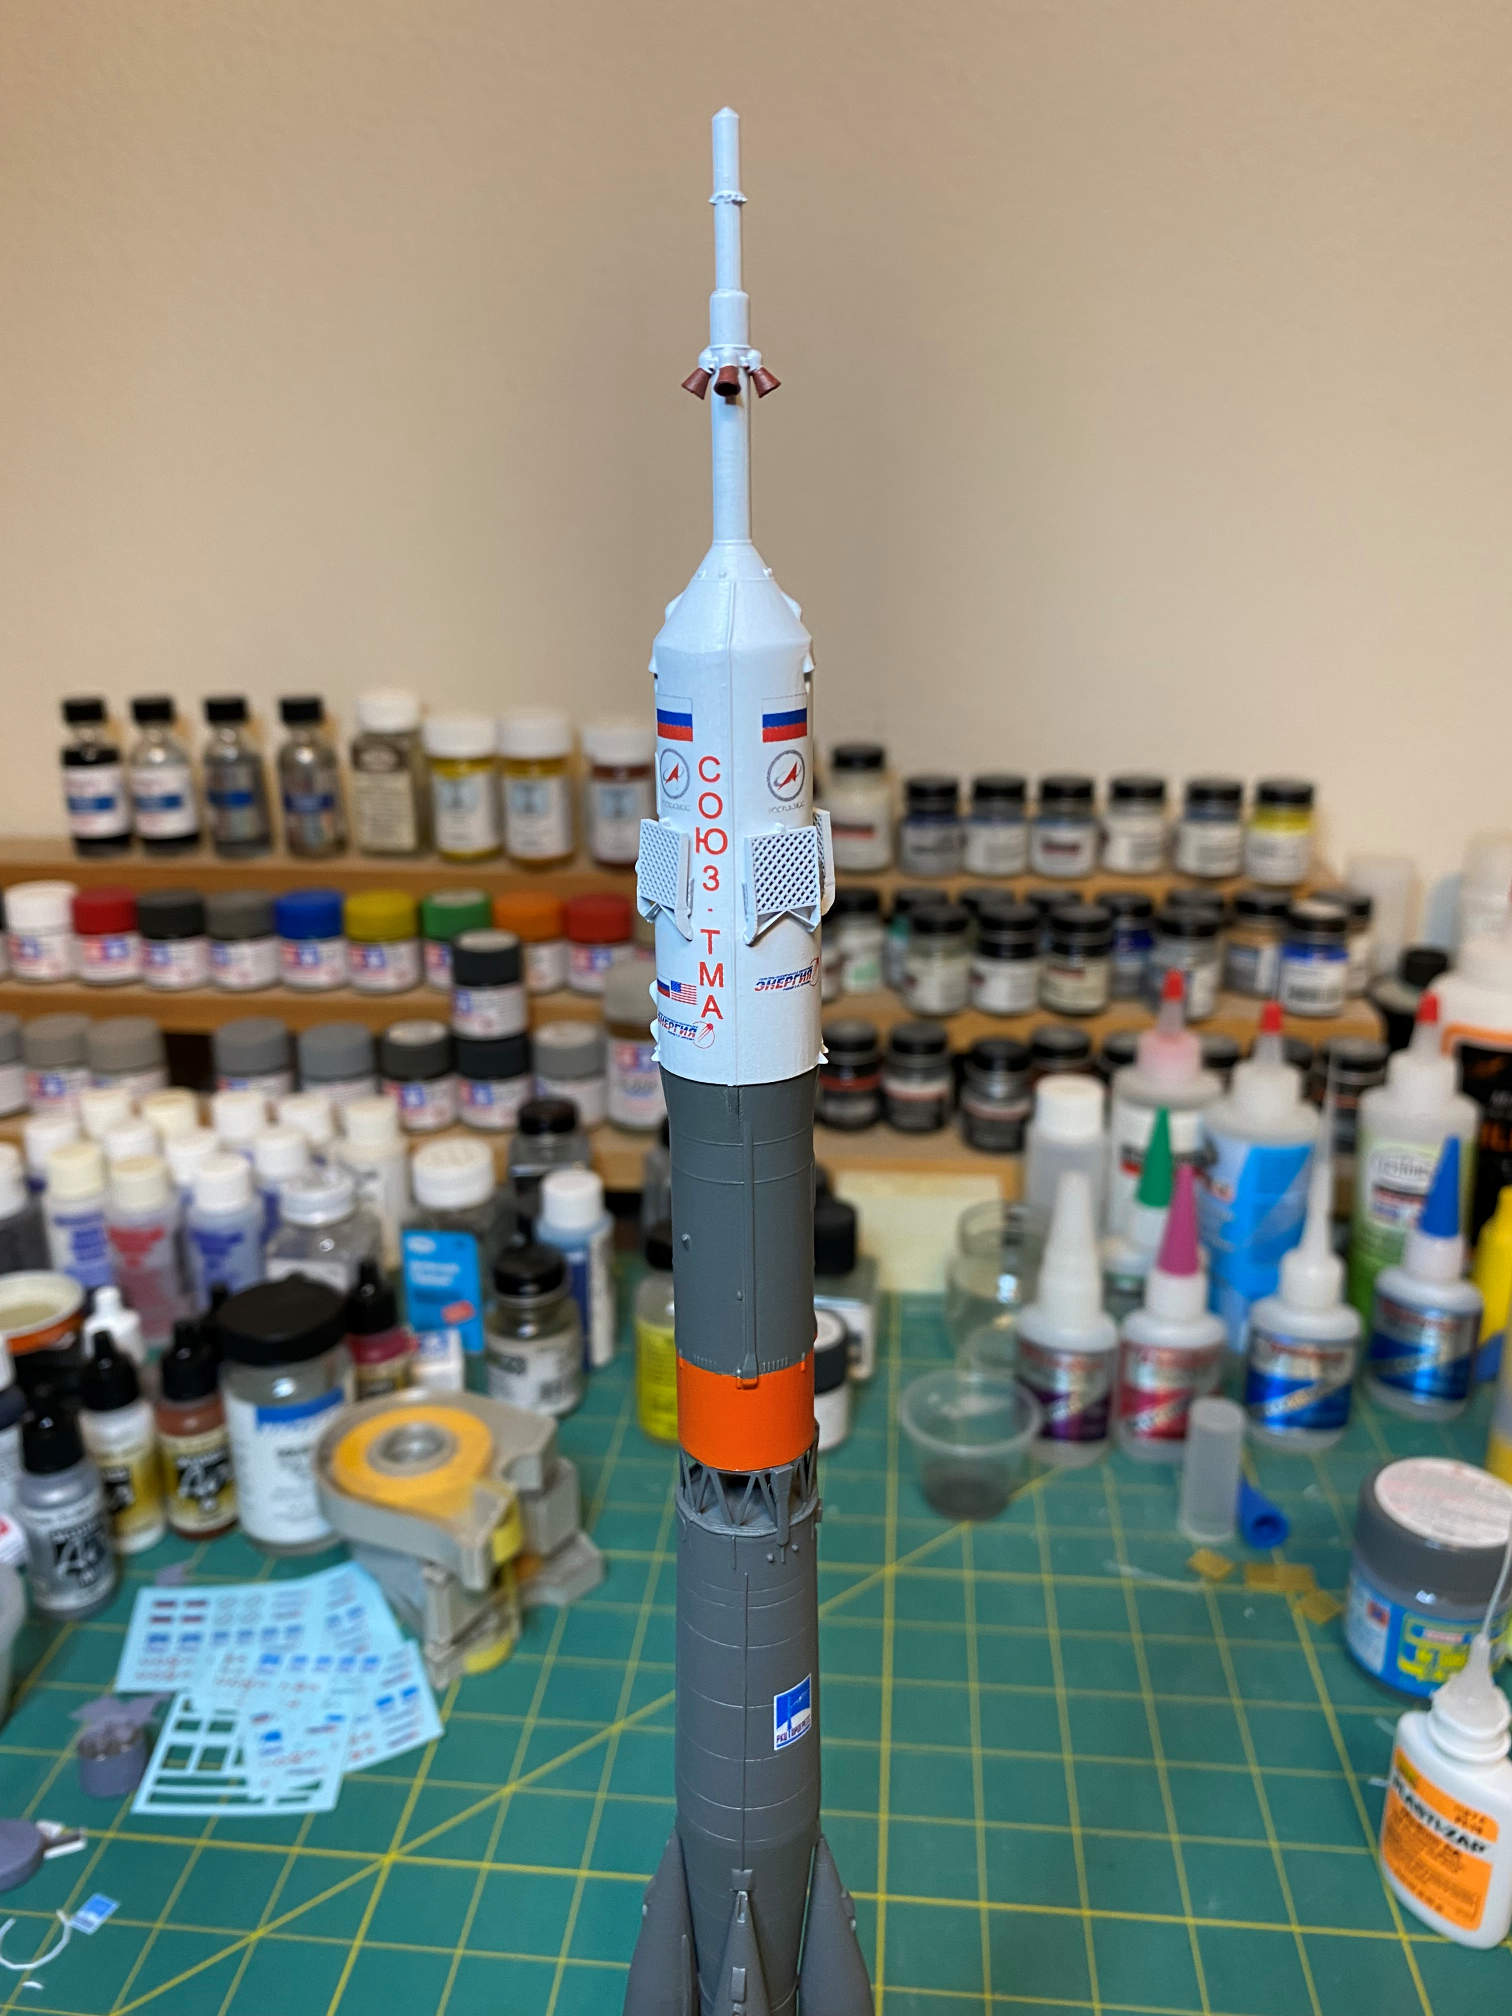
Here are a few pictures of the completed model on its base. First is an overall view.

Here is a bit closer view of the second stage.
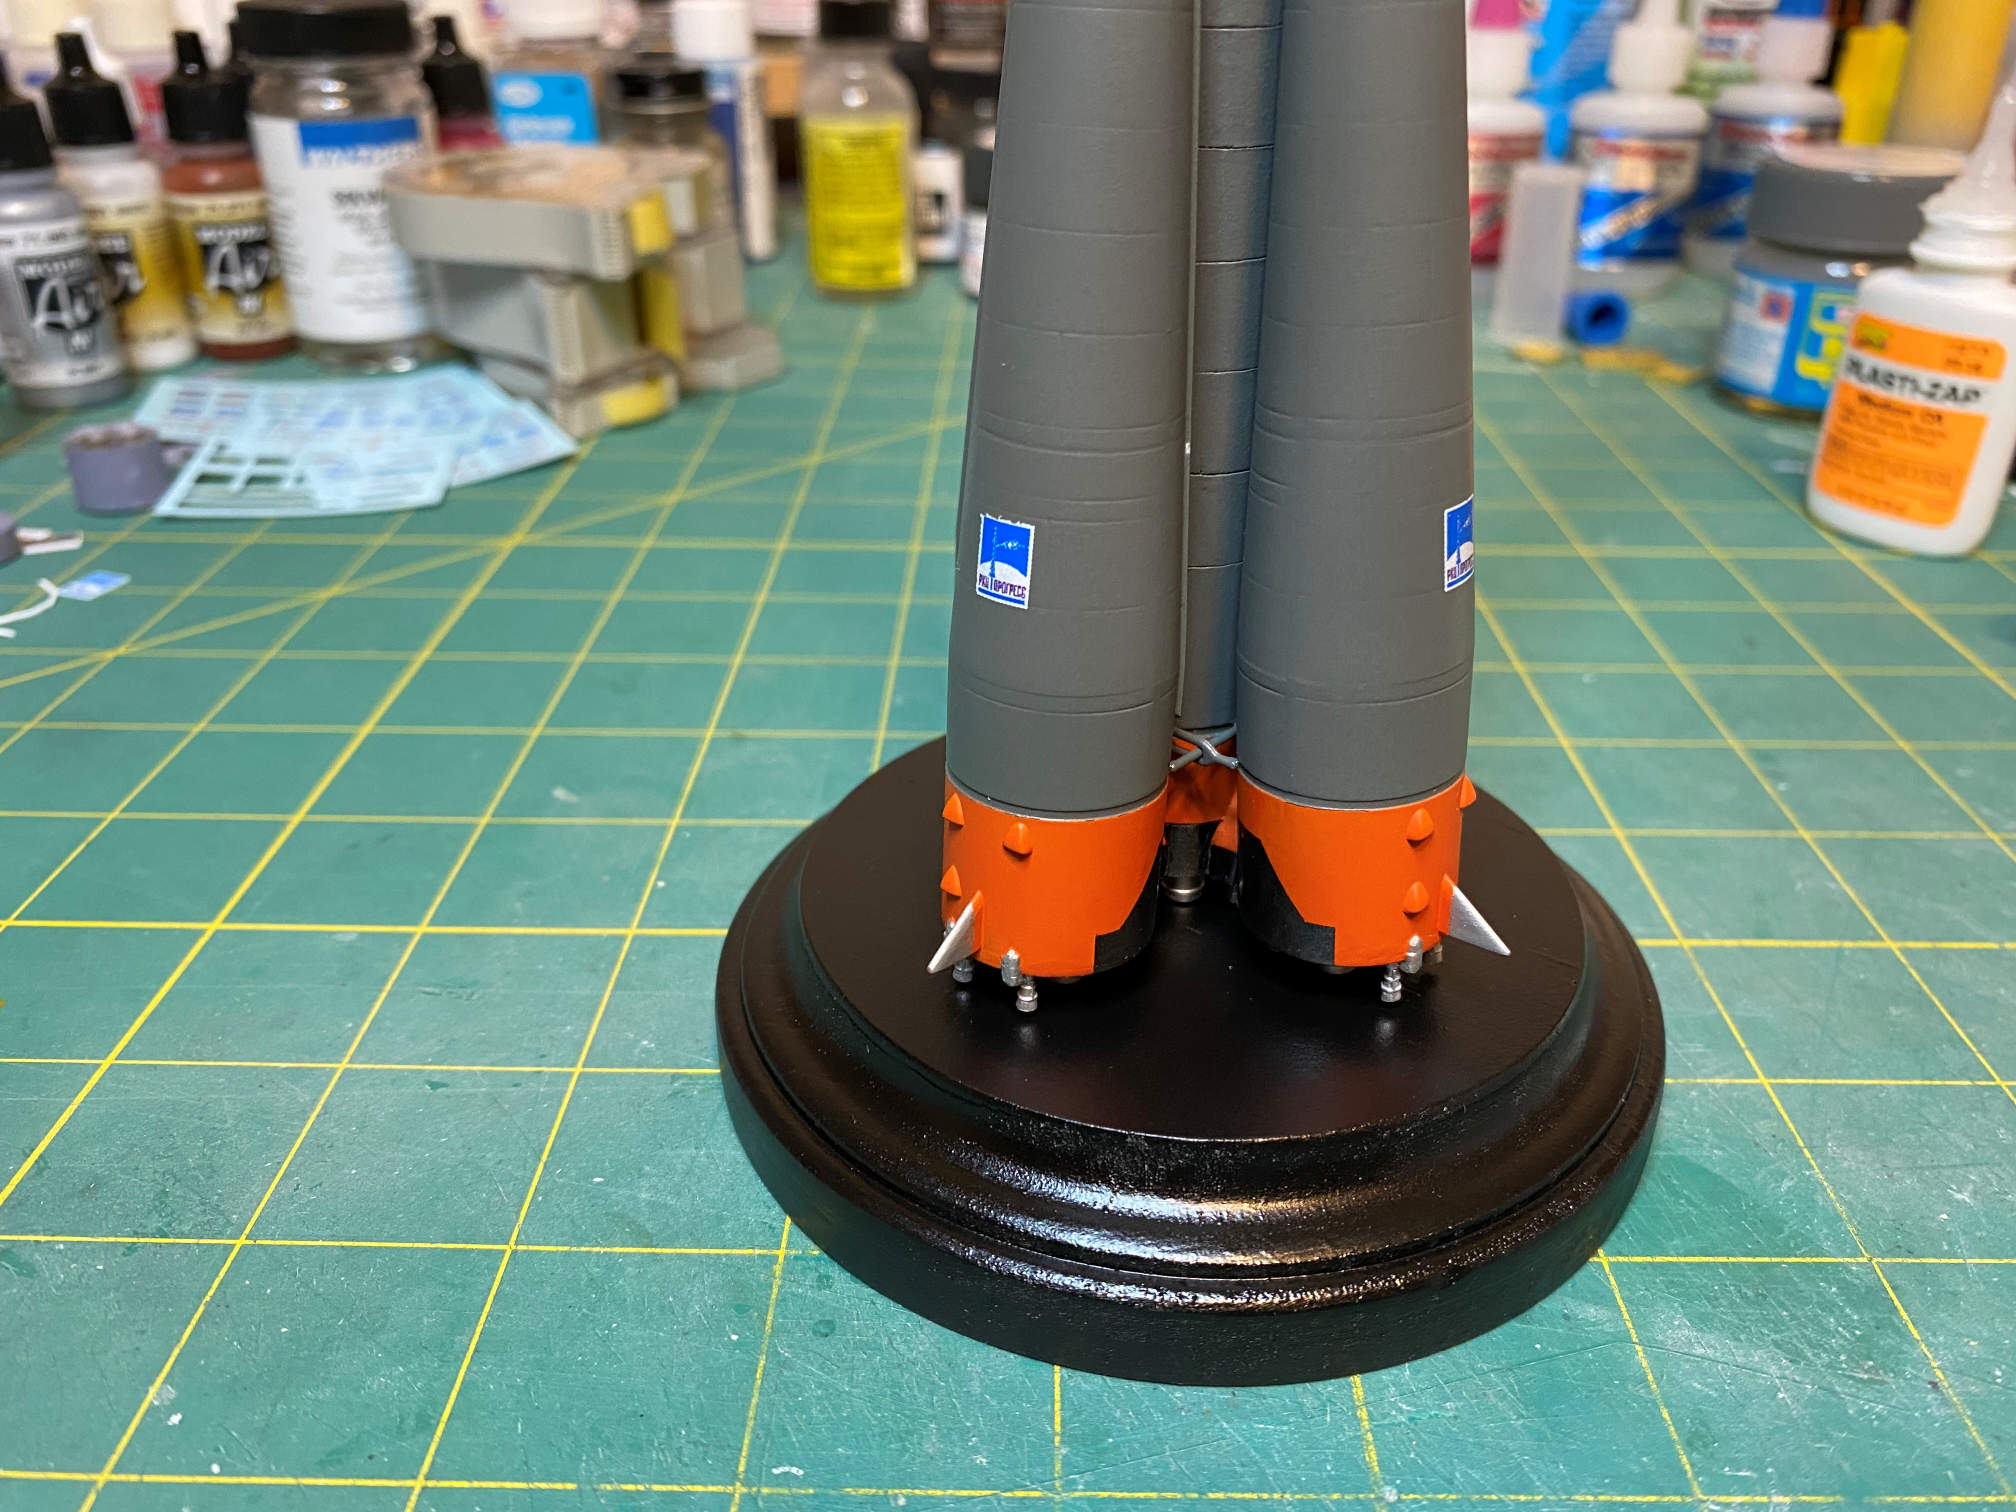
Next is a closer view of the booster section.

Finally here is a bit closer view showing the grid from the Airfix kit.
For all the compromises that I made along the way, the model looks pretty good. Not contest quality, but good enough take it’s place with the Vostok and Voskhod models.
I’m still deciding what to tackle next. I hope it doesn’t take as long as this one did. Thanks for looking.
