
With the Descent Stage presenting me with some problems, I decided to finish the CSM. I started by applying Micro Kristal Klear to the the CM windows. Once dried they were very transparent. I then painted a couple of small gray circles on the CM that represented two of the areas that had omnidirectional antennas behind them.
I then glued the CM shell to the heat shield. I had to do some scraping and test fitting to get the parts to slide smoothly together. I needed that because I had glued the heat shield to the SM first. I did that so I could be sure of a firm attachment that would hold the weight of the LM without breaking.
Once that was done (sorry I didn’t get any photos of that) I glued the CM shell to the heat shield using a combination of Tenax and Plasti-Zap CA glue. I used Tenax on the two large posts that held the parts together and Plasti-Zap along the edge of the heat shield where they met. I like using Plasti-Zap whenever clear parts are involved since it doesn’t cause clouding of the clear part.
Well, I guess there is something about Plasti-Zap and Micro Kristal Klear because when I went back to check on the bond a couple of hours later all the windows were white. It was as if the Micro Kristal Klear had become un-cured. Or maybe it was the combination of Micro Kristal Klear and the Tenax. In any case, after leaving it overnight to see if the cloudiness would go away they were still completely opaque. (Once again, sorry no photos.)
I used my X-acto knife and removed the windows. I then let the kit set for a day to allow any possible gases to disperse. I then re-applied Micro Kristal Klear and allowed it to dry. The next morning all the windows were still clear.

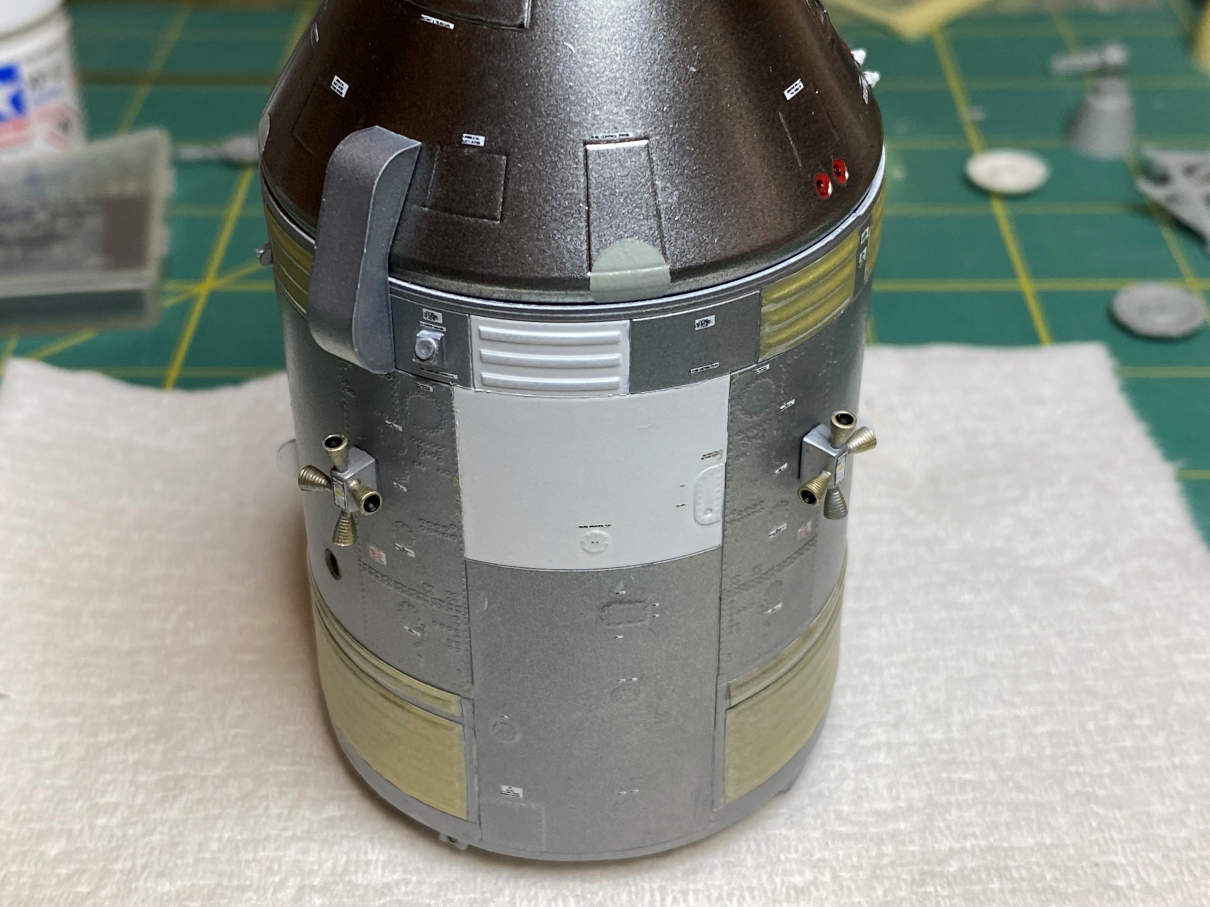
Here you can see one of the small gray circles that cover the omni antennas. You can also see that the umbilical cover has been installed. The white area where the masking tape has been removed shows the final two decals that were applied to the CSM. You can barely make out one of the scimitar antennas that are now installed on the SM.
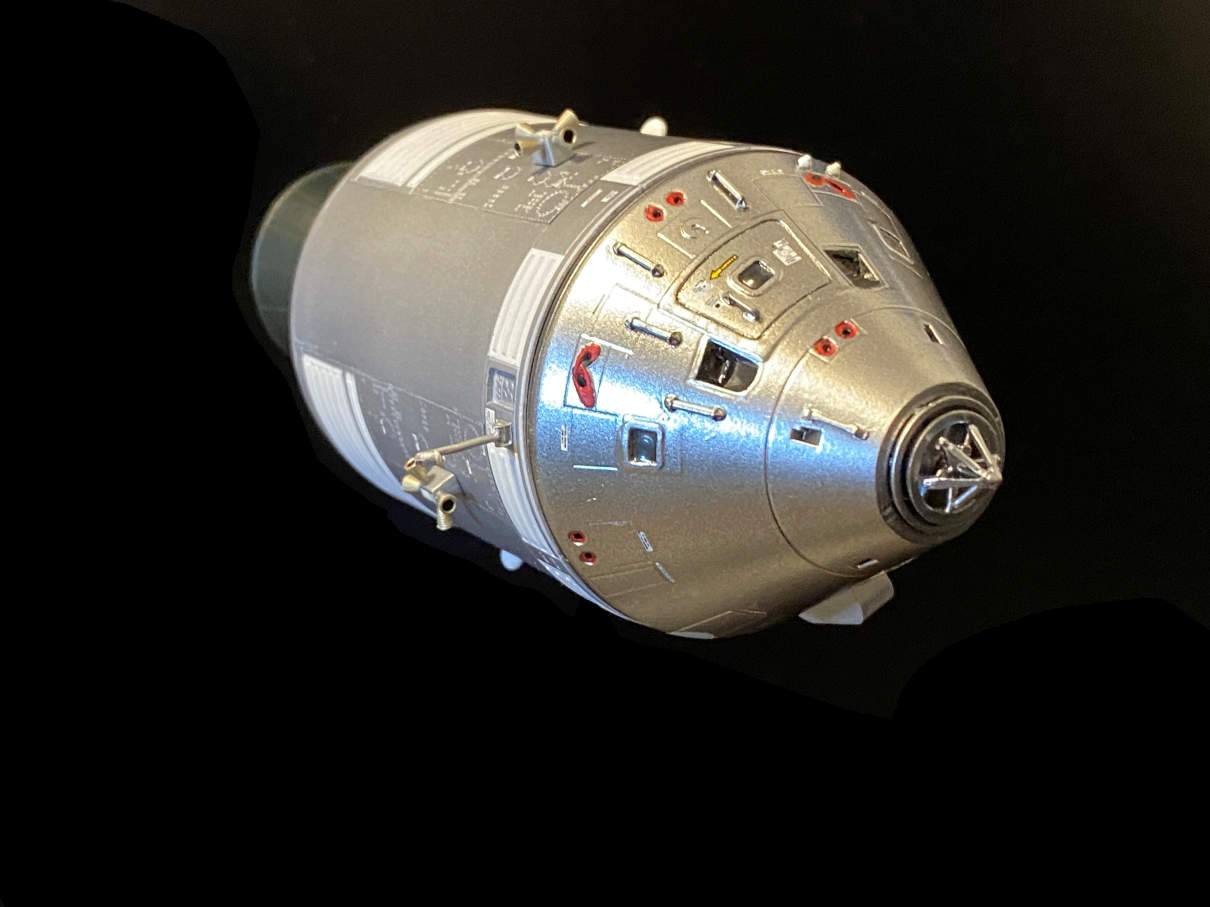
Here I’ve taken a photo head on to show the painted areas of the CM and the now clear docking windows. The docking probe is only friction fitted so I can remove it when I’m finished with the LM.

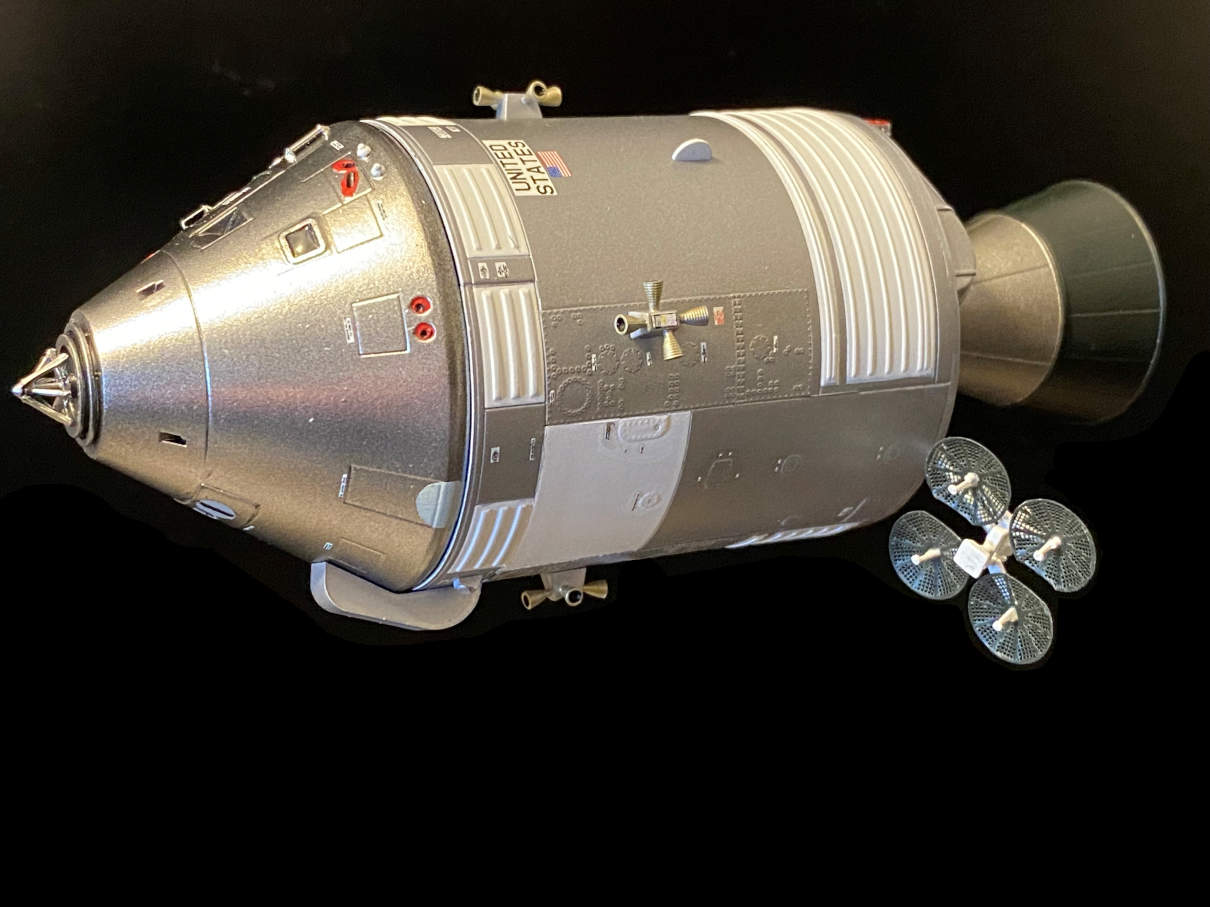
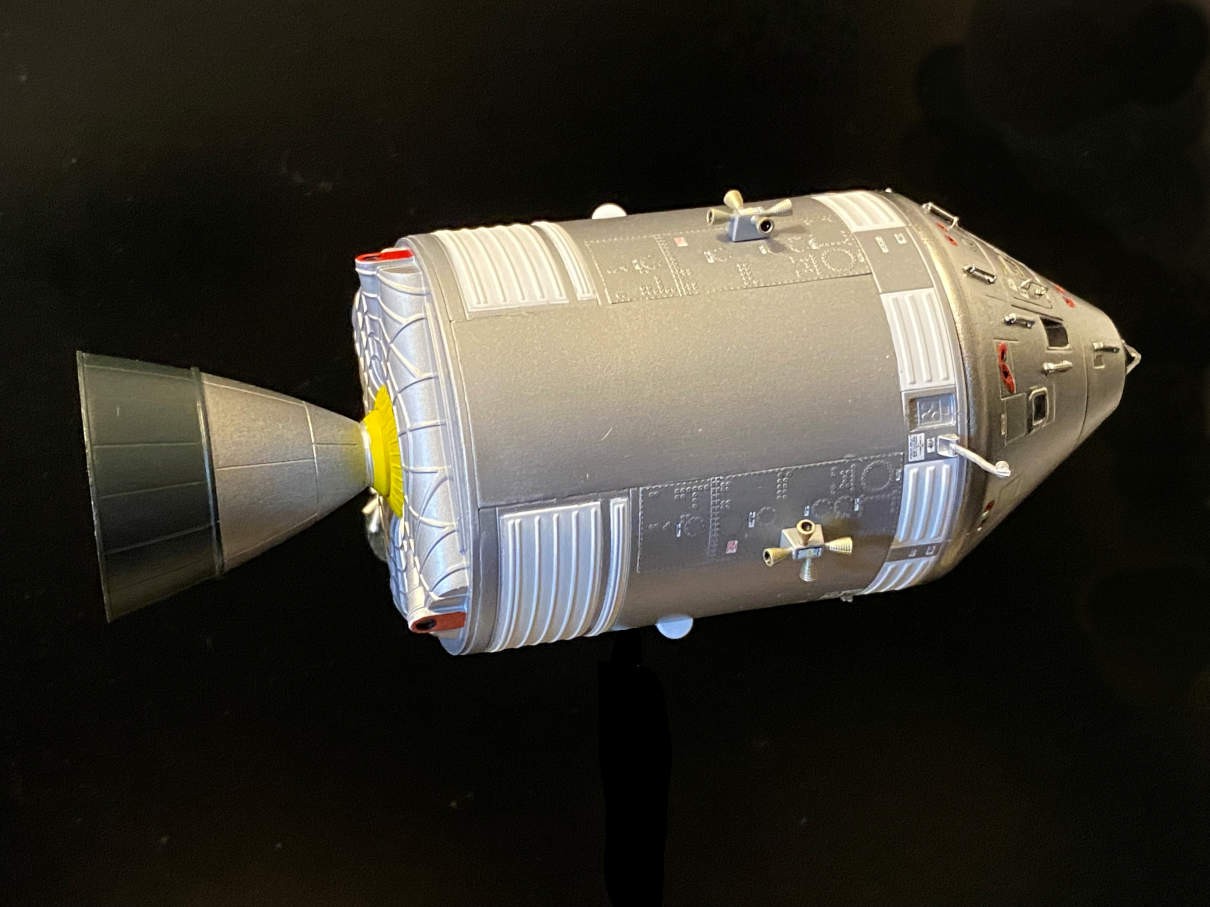
With that finished I added the High Gain Antenna and the SPS nozzle. I then removed all the remaining masking tape. Here is a series of photos of the completed CSM.


Now it’s time to get back to the LM. This may take a while.
