
Now that I have finished the Saturn V and the Lego LM I need to get back to the Voskhod 2 model. When I last posted about this project, I had assembled the stages and put the photo etched brass truss on the first stage. Since then all parts have had primer applied and also painted in gray. Then the bases of the stages were painted with chrome silver. I then glued the 20 engine bells from the Airfix kit to a piece of scrap wood with white glue. This will hold them in place while painting yet be easily removable after the paint is dry.


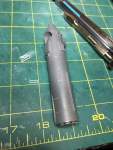
Then I noticed that I needed to move a couple of external pipes on the second stage. From my reference material they were in the wrong position. After I did that I then drilled some 1/32 inch holes to mount the antennas on the second stage. I had done a similar thing with the two antennas on the core booster. To keep the antennas in the proper position until the CA cured I used a scrap piece of .060 strip stock taped to the side of the model. The antennas were made with .4 mm rod bent to the proper shape.


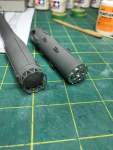
Next I started thinking about how I was going to attach the second stage to the truss at the top of the core stage. The second stage/spacecraft section is solid resin and heavier that the entire rest of the model. If I was doing it again I think I would try to hollow out some of the second stage and spacecraft to lighten it up a bit. After considerable trial fitting, cussing and thinking, I came up with a solution that I think will work. I drilled four 1/32 inch holes in the base of the second stage at four points around the stage where a peak of the ‘V’ from the brass interstage touches the stage. I then used CA to glue in four short stubs of sytrene rod. This should help me align the second stage on the truss and also provide a bit of extra surface area to glue the two together. I’ll glue the second stage to the core stage after I attach the strap-on boosters.
It is getting close to final assembly. Just needs a bit more paint and adding the engine bells to the core and strap-ons. I also need to get the base finished. I have it drilled for the steel rod and the rod is cut to length. I just need to sand and paint the base.
More to come…
