
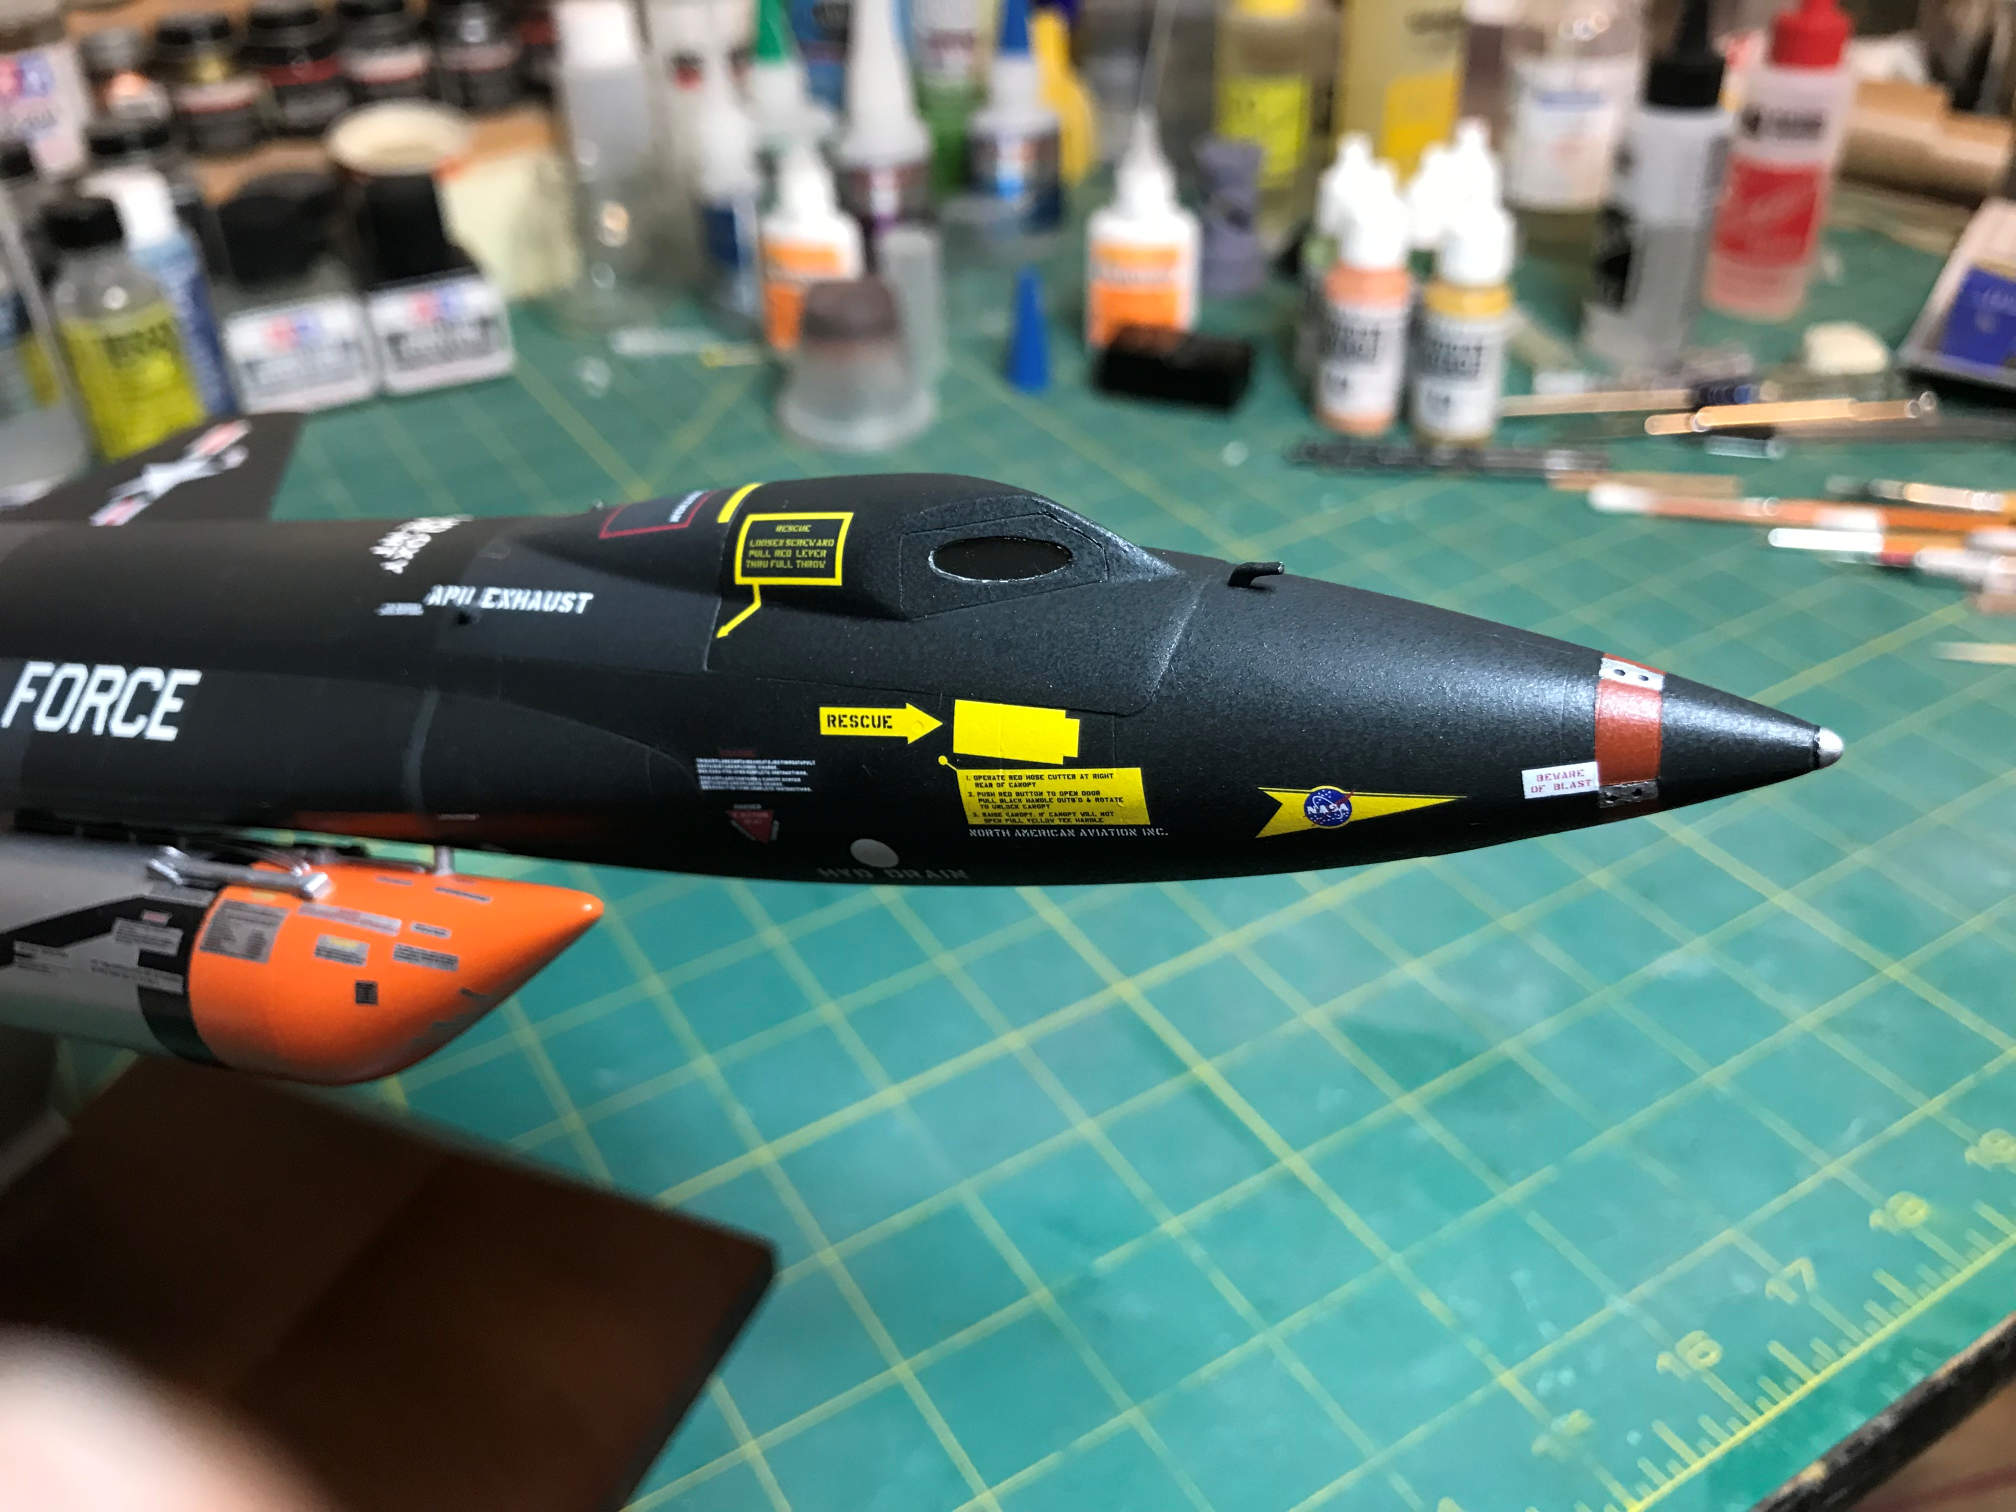
This is the home stretch on the build. Just a few minor things to do. First was to finally remove the masking from the underside of the plane. There was very little bleed from the black over spray. It was easily touched up.

You can also see that at this point I’ve added the two underside antennas. I left the masking over the screw hole so that the upcoming clear coats will not gum up the threads.
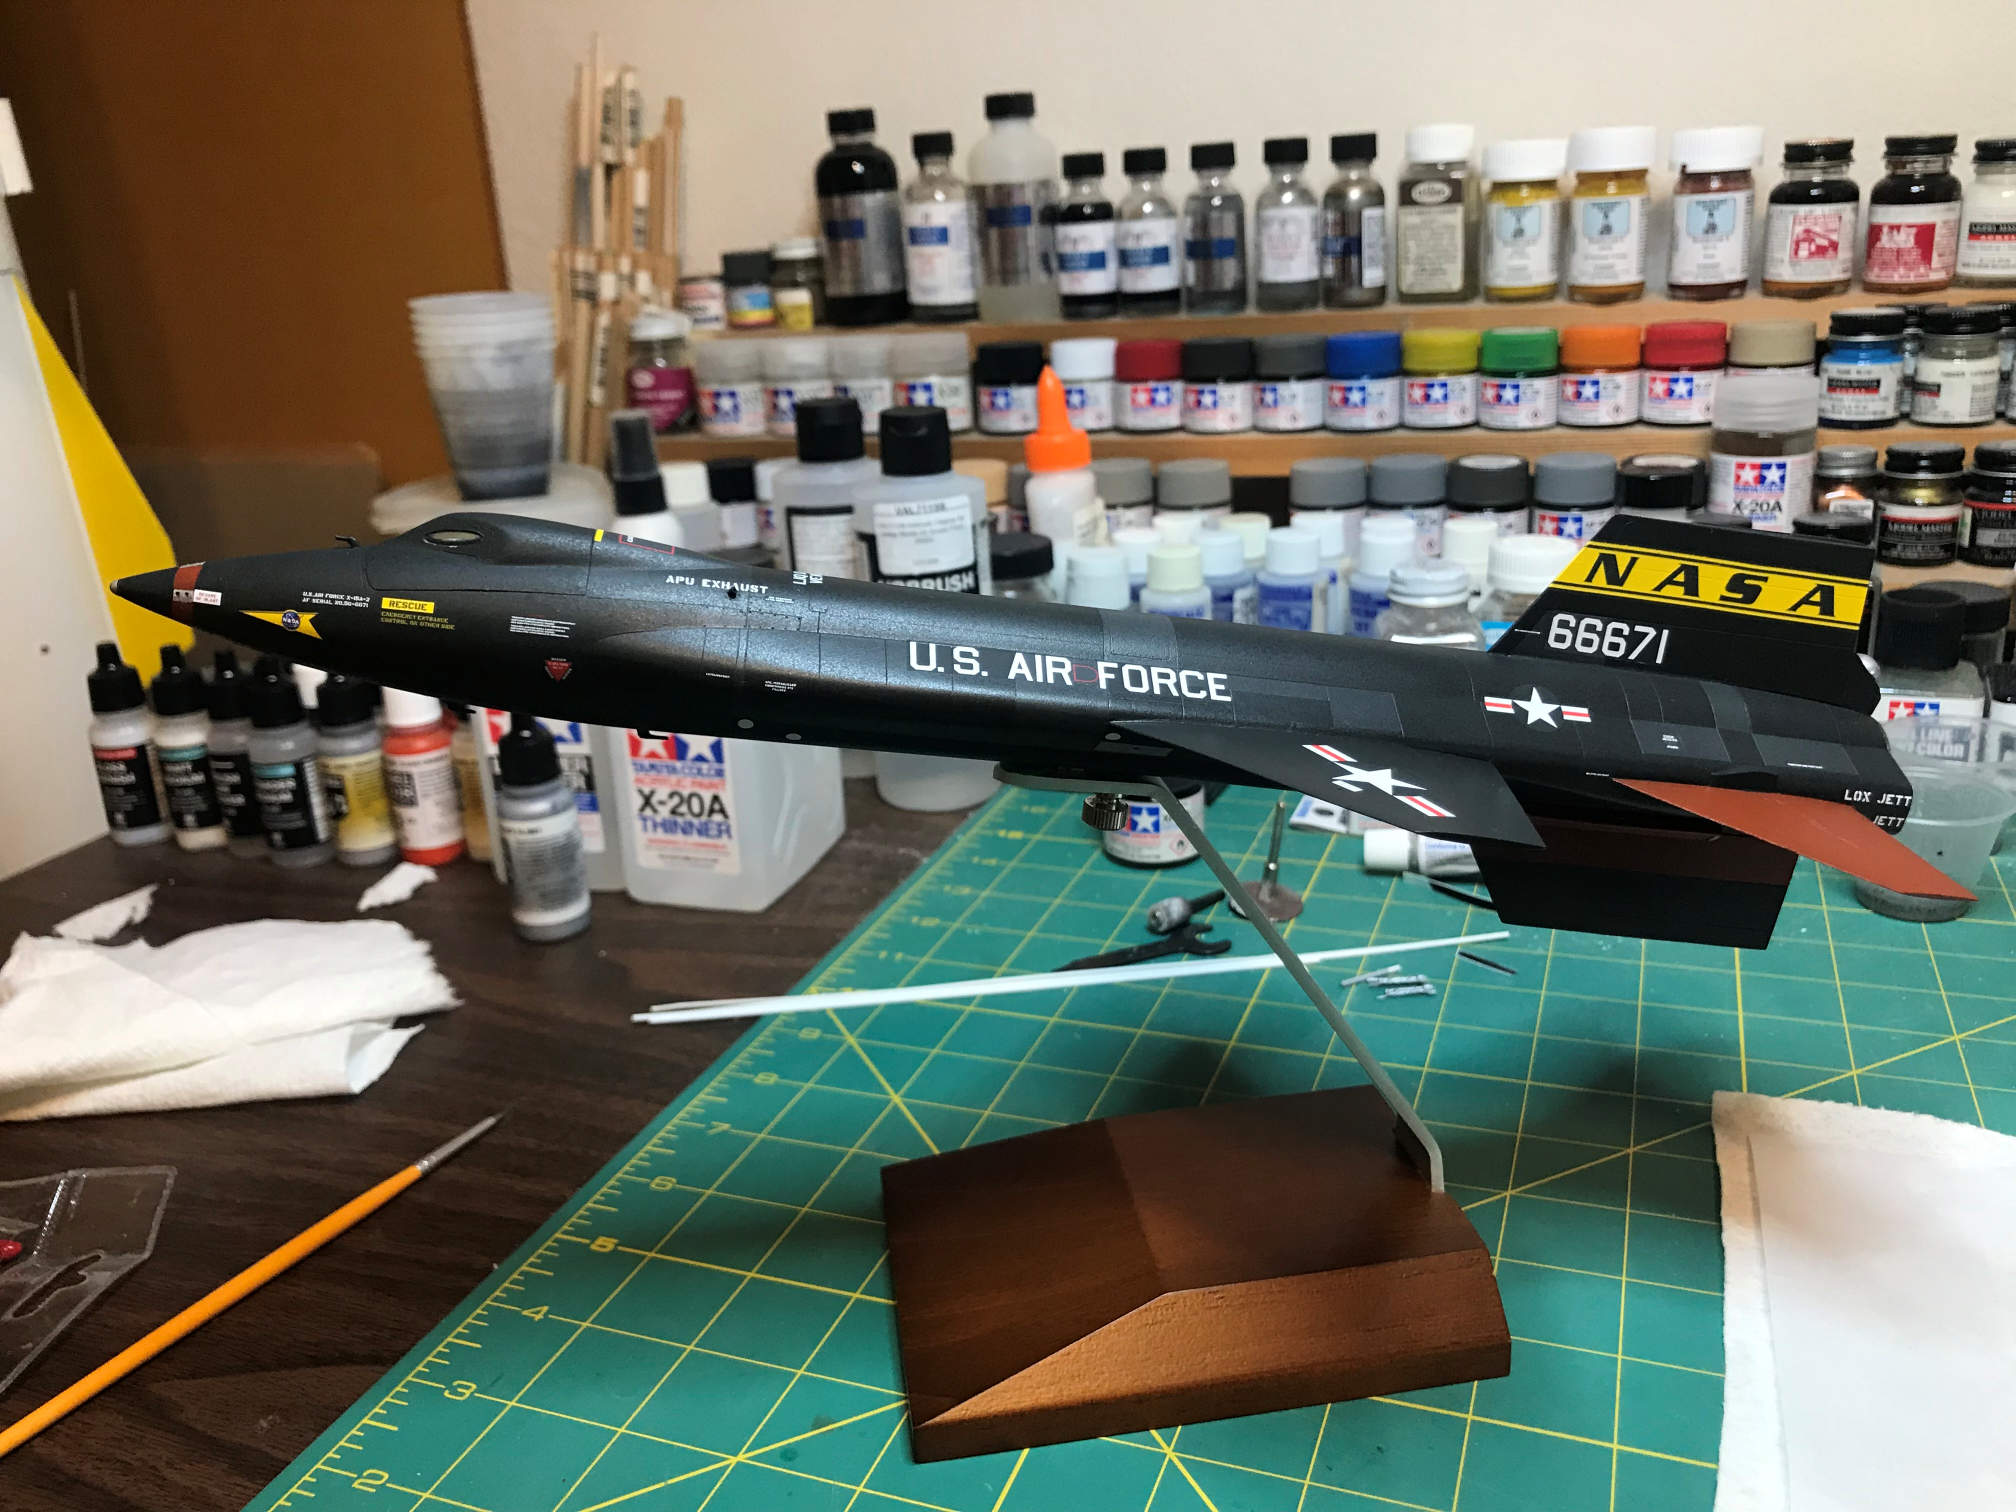
I next sprayed on a gloss coat in preparation for the decals. Then decals started going on in earnest. I started the process about 7:00 pm one night and got on a roll and when I had finished I noticed that it was 3:00 am. Oops, I hadn’t planned on making it an all nighter, but there you are. Here is a view of the right side of the plane with al the decals on.

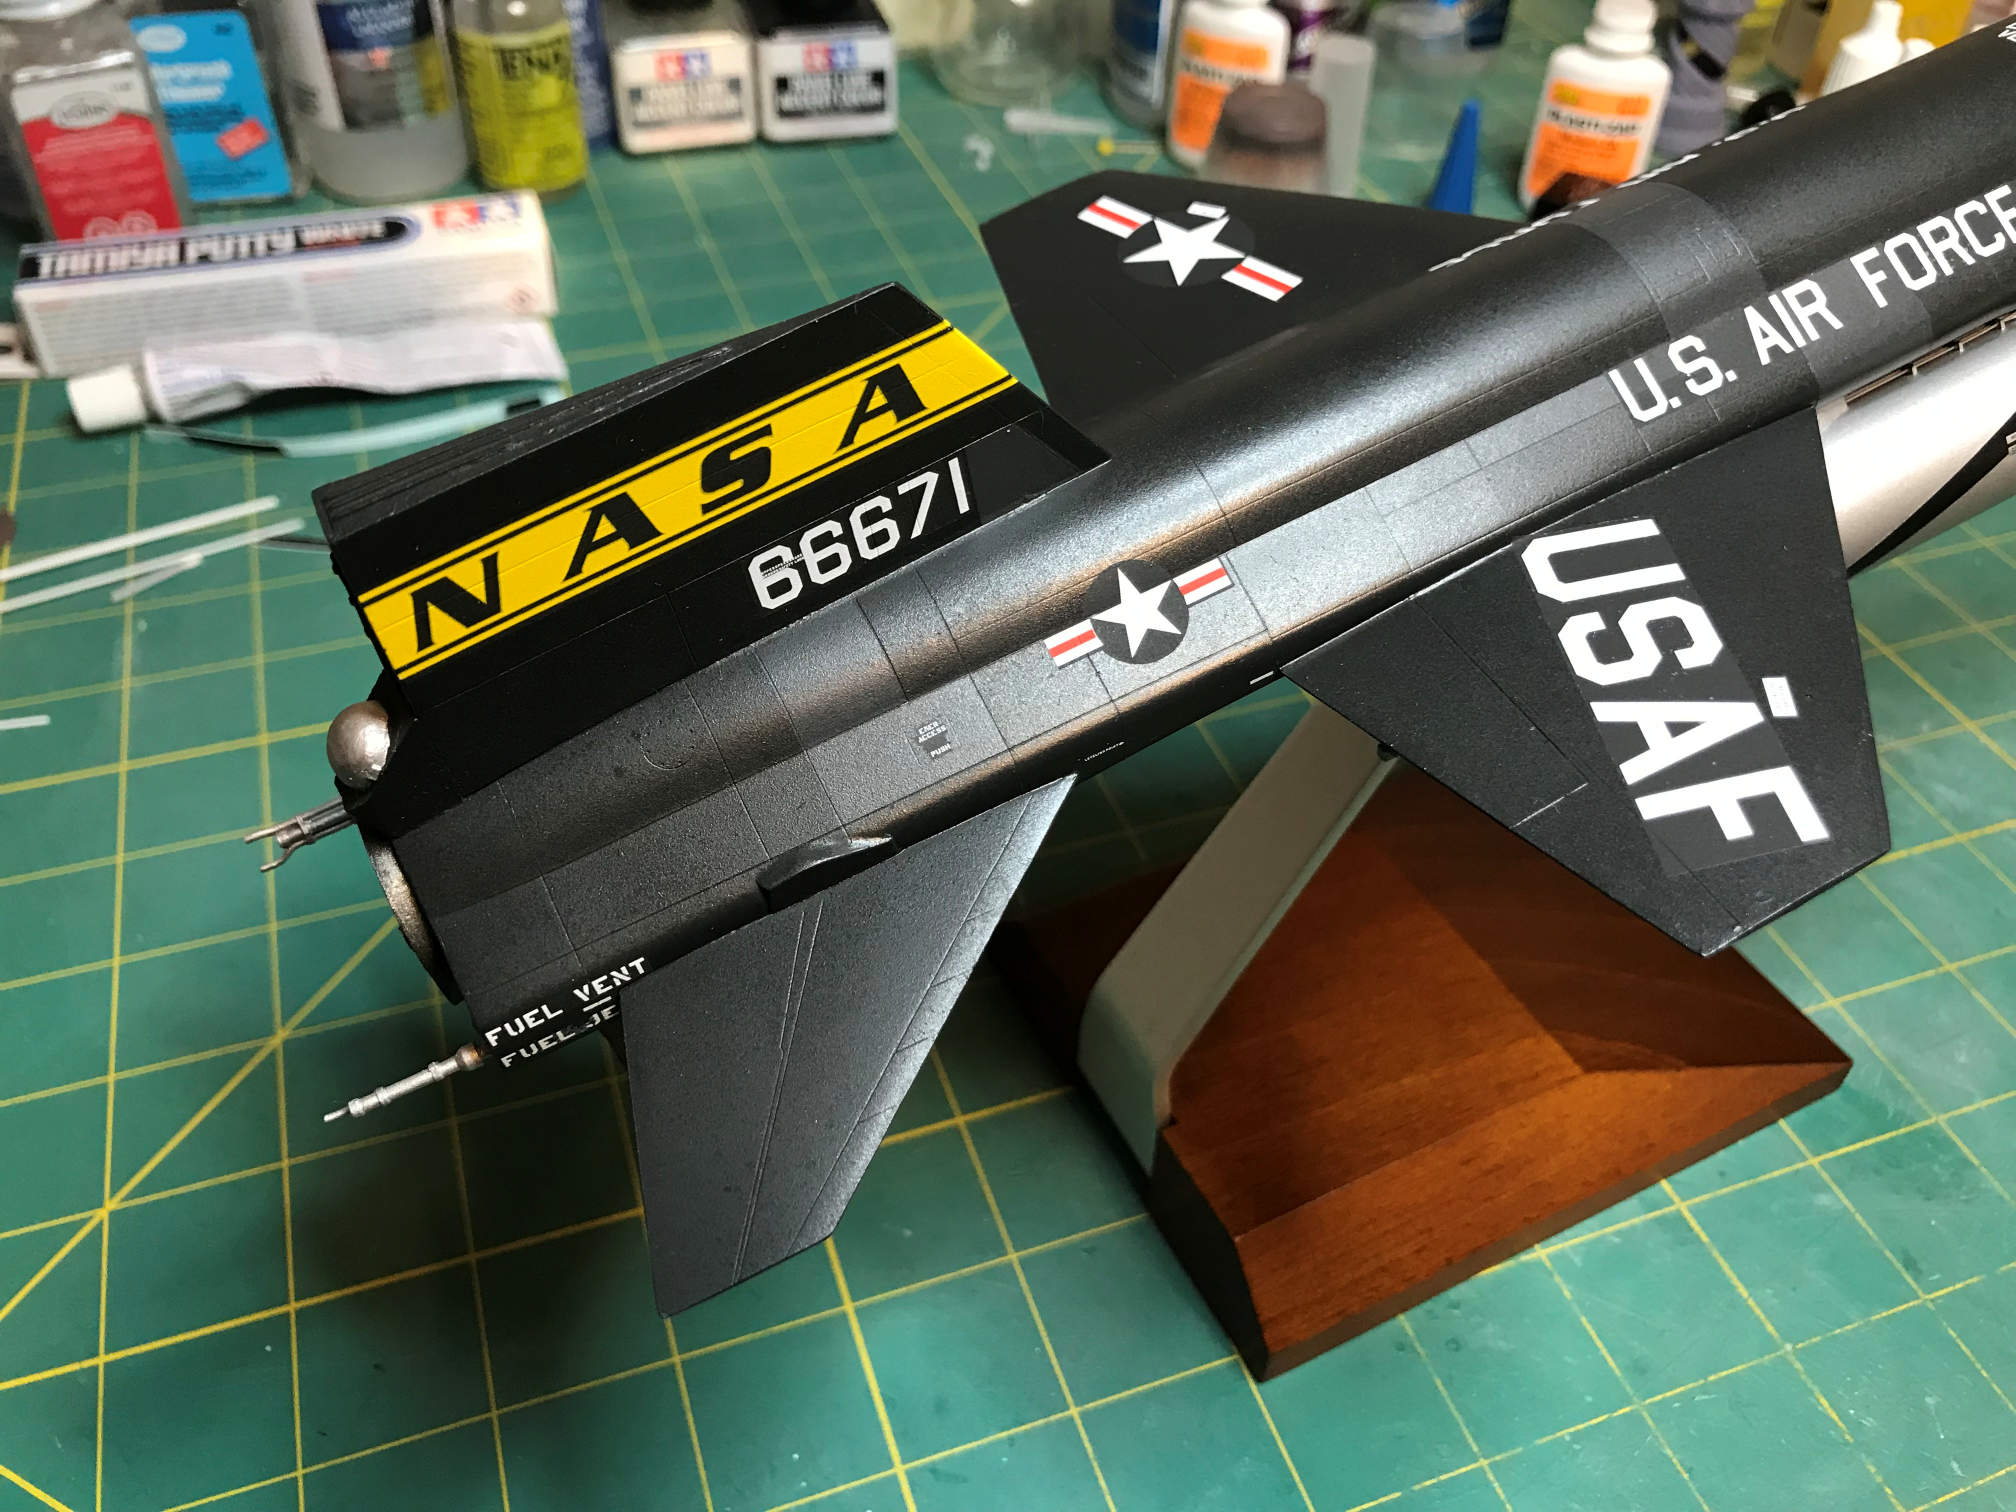
I used only a few of the kit supplied decals. Namely, the yellow NASA tail stripe, the large and small “Star and Bars”, “U.S. AIR FORCE”, and the large “USAF” decals. All the other decals came from the aftermarket Hypersonic decal sheet. This is an excellent decal sheet. I believe that there are markings for any variation of the three X-15 aircraft.
This decal sheet is meant to be used with a set of masks that they also sell. The masks are for the markings that come from the Special Hobby sheet. Those markings were originally the wrong size. Special Hobby did correct them for later runs of the kit. The kit I was working from had corrected sizes. However, I think the “USAF” markings were still just a bit large. Not a deal breaker, but still not quite right.
Anyway, after applying some MicroSol to make sure the decals settled in to any details and then giving them time to completely dry, I sprayed on a matt clear to take most of the shine off the airframe. Once that had dried, I removed the masking over the windows and the dot covering then screw hole.
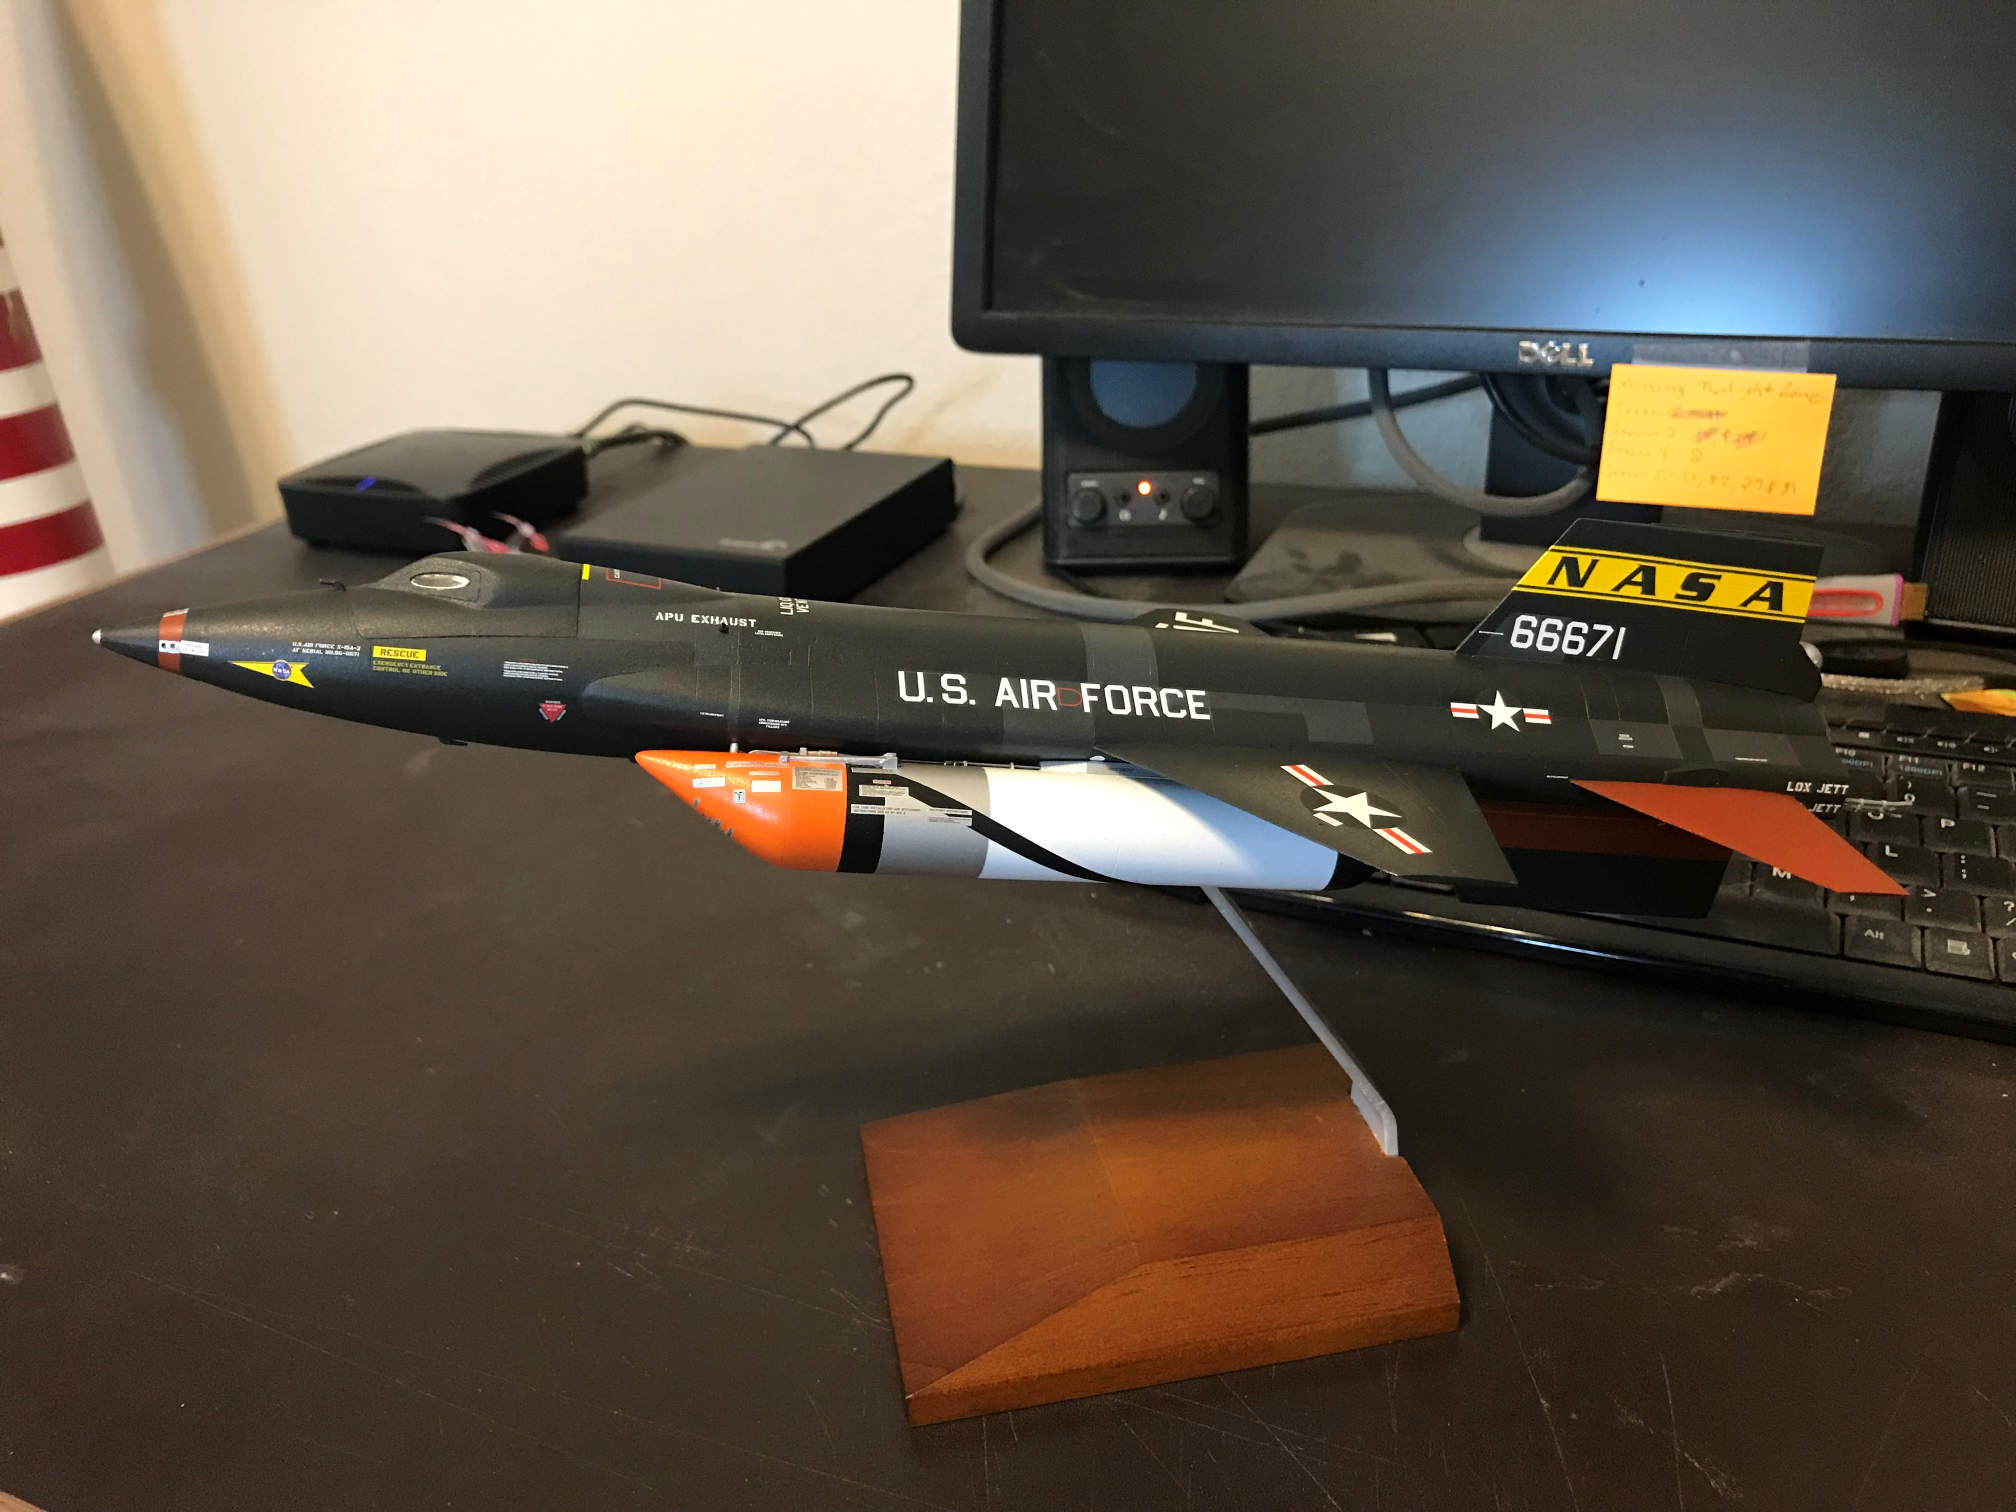
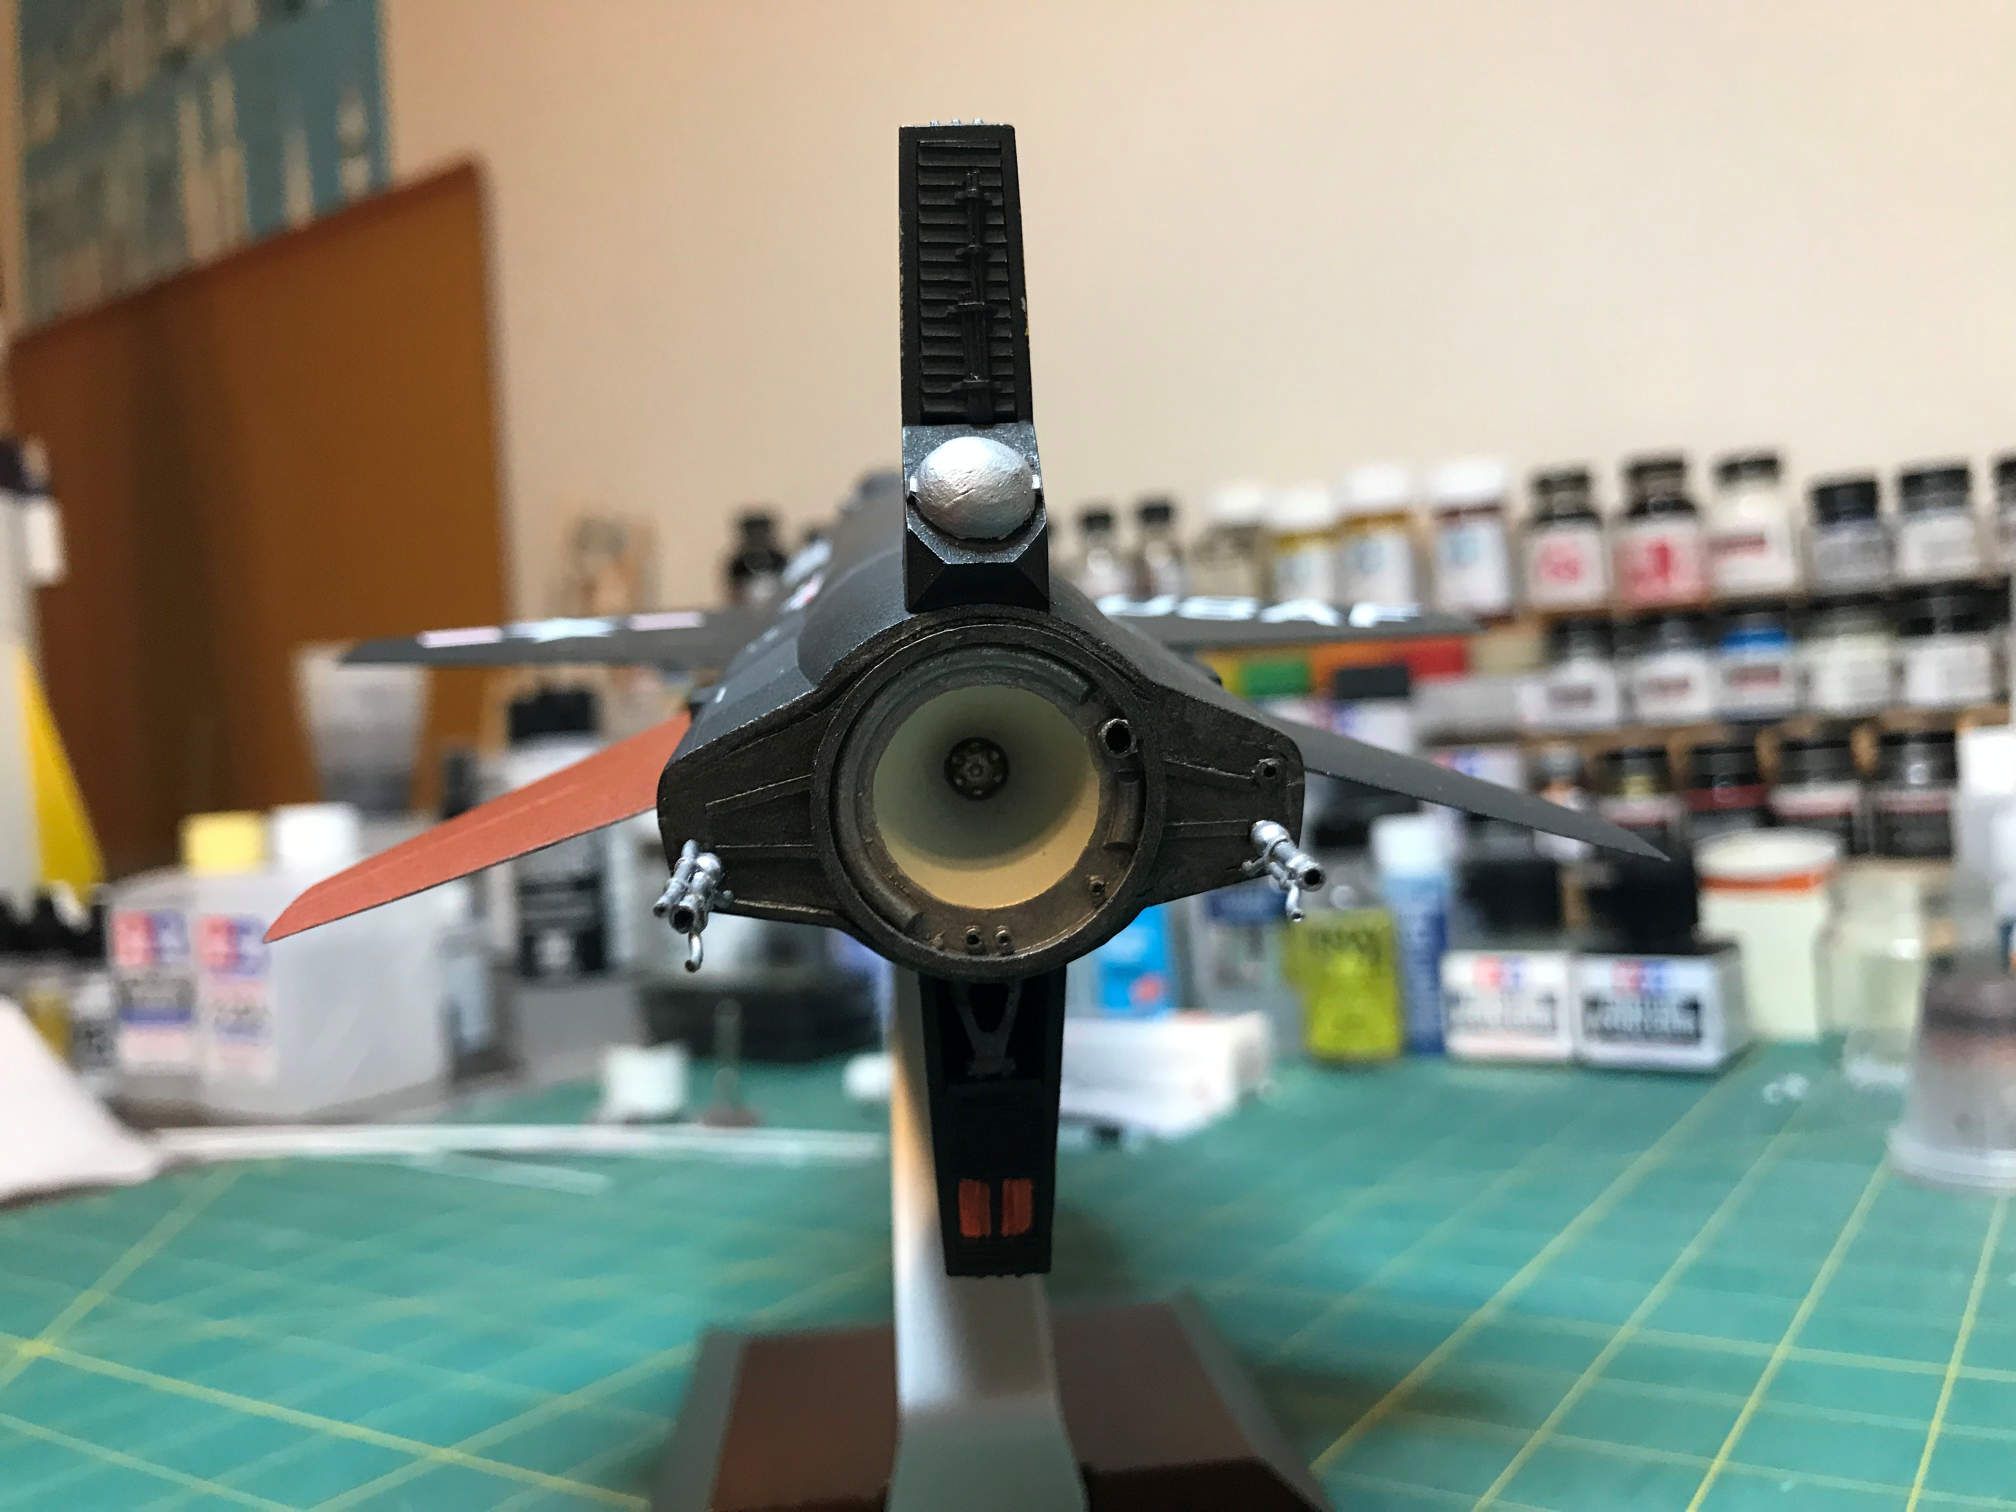
The only parts left to be added are the vent pipes at the back and the ammonia and LOX tanks. I installed them next, and then did a bit of touch up paint on the vent pipes.

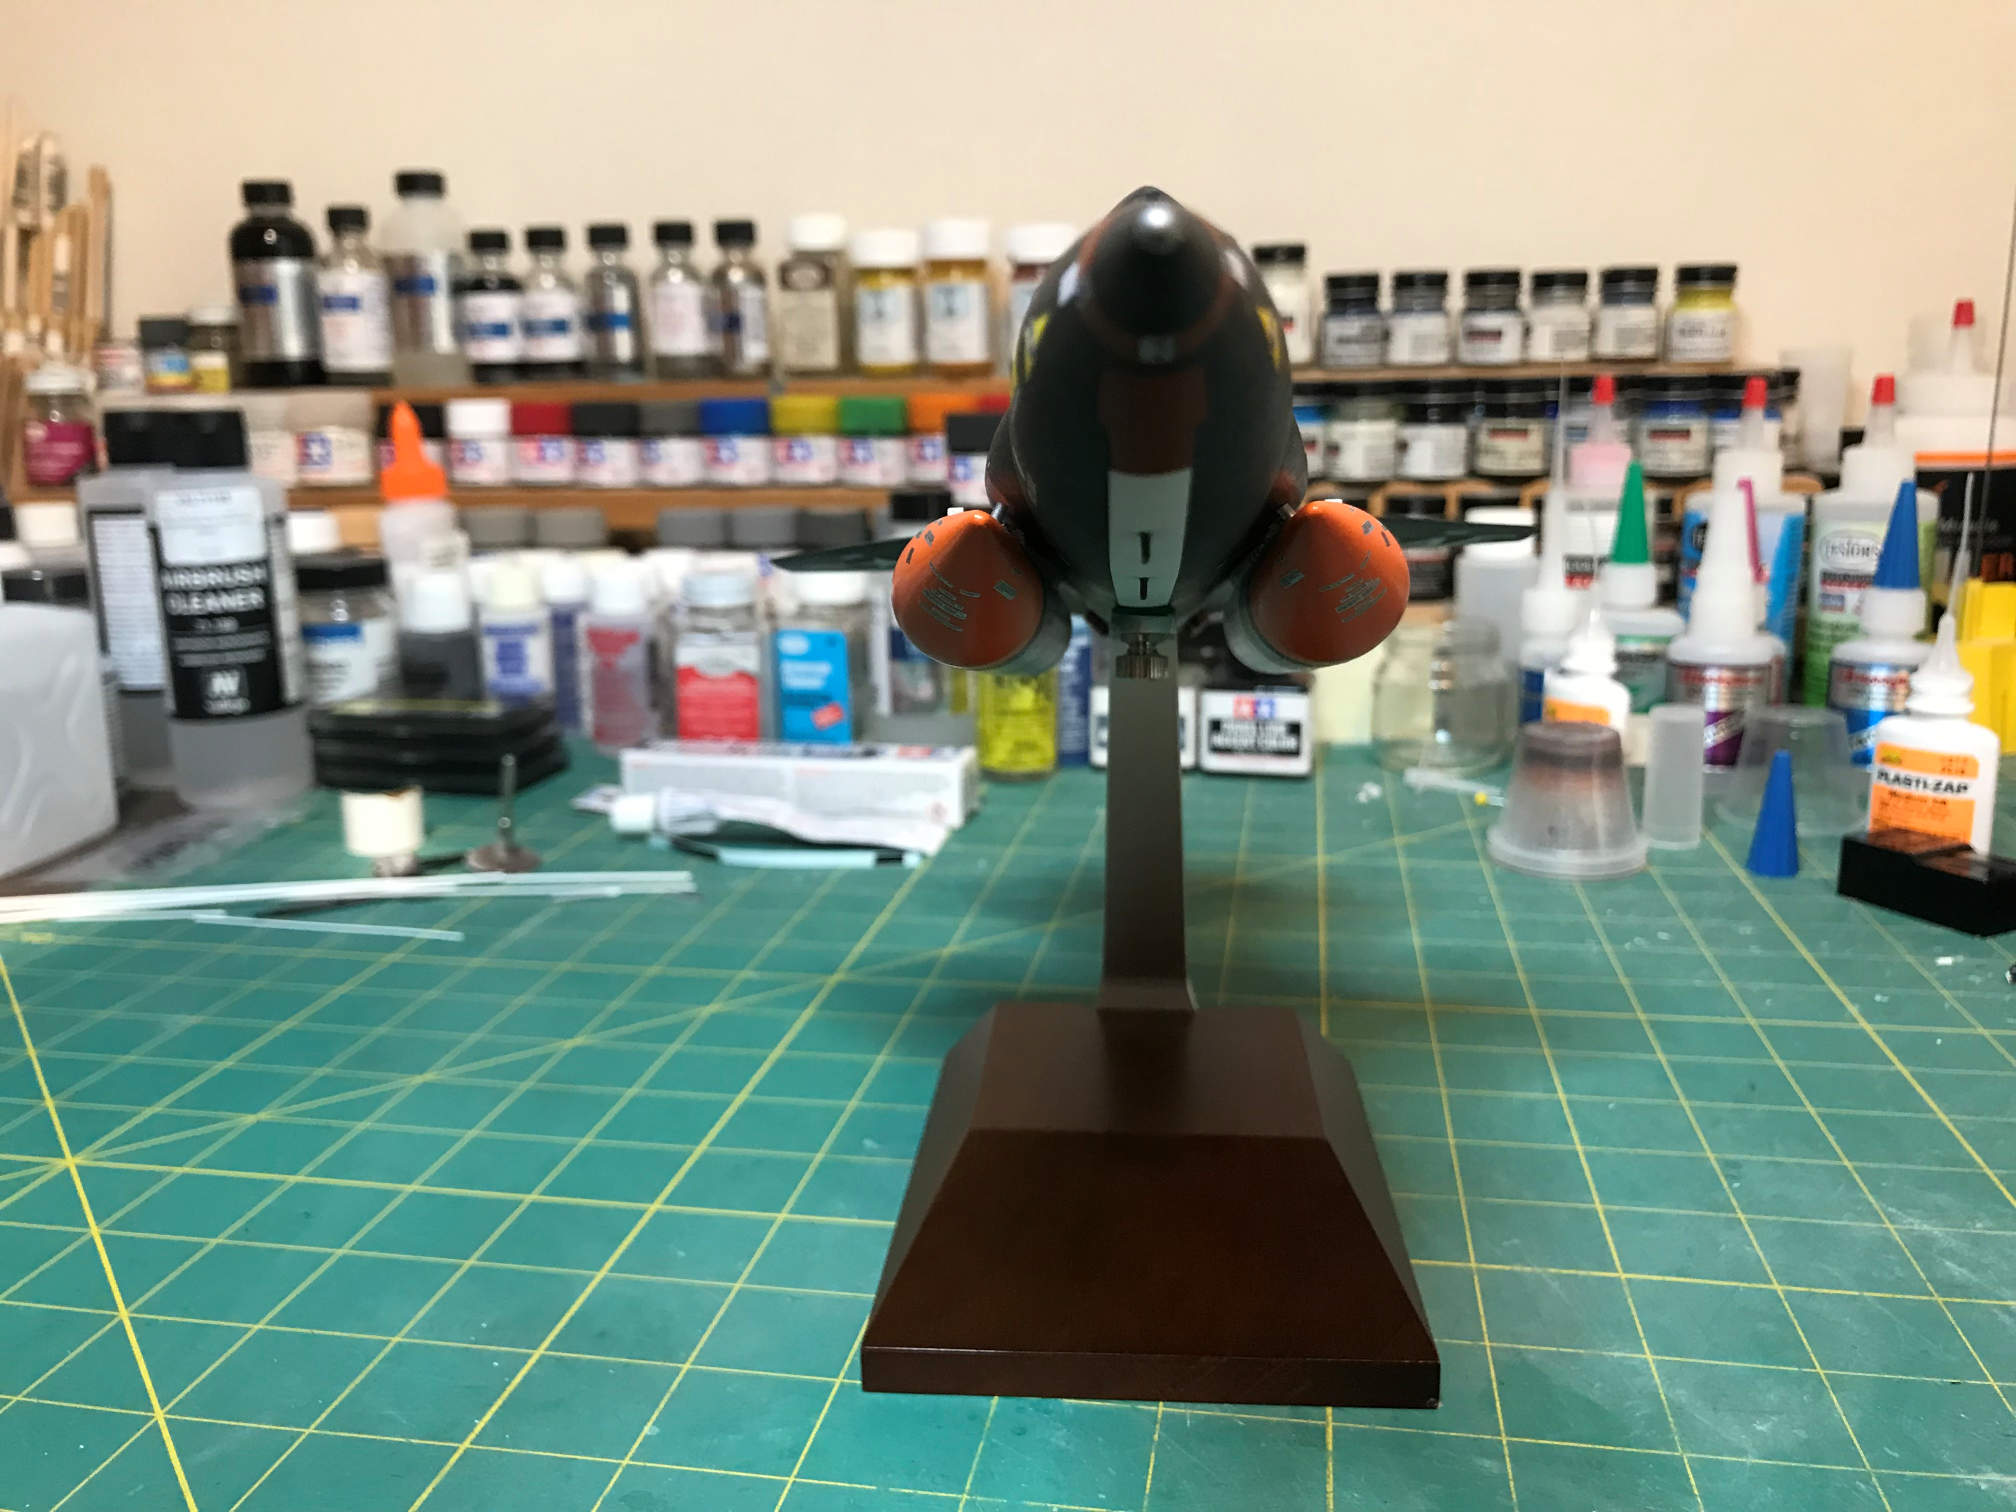
Now it’s time to put it on its stand and take some shots of the completed model before I send it to its new home.


My friend is very pleased with how it turned out and I found the whole project a fun experience. It wasn’t the easiest kit I’ve ever built, but it was enjoyable overcoming the problems along the way.
In the end this was almost an out of the box build. I looked back on the build and noted the following modifications that were made.
- Added hinge standoffs for the ejection seat stablizing wings.
- Scratch built ventral fin rear face which includes a parachute door
- Shorten the ventral fin to scale height
- Added full piping to the external tanks
- Added hardware to attach the model to the purchased stand
- Added APU exhaust pipes
That’s a pretty short list of add ons. Some of the add ons required more work than others but it is still a short list. There were also the usual amount of modifications to various parts, like thinning the antennas, drilling out pipes an other minor changes.
At first this kit made me afraid for my own Special Hobby kits that I have in my stash. But after building this one, I feel that those kits will build out just fine.
Thanks for following along. I’ll be starting a new project soon. I have no idea what it will be, I’ll just have to stare at the stash and see what jumps out at me. In the mean time I need to finish the Wild Thing and try to get in a flight before the season ends.
