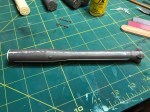
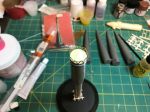
Time for a quick update on the Voskhod build. I started on the first stage. I drilled a 1/8 in hole in the first stage base part. Then I cut a piece of brass tube to length and glued on a cardboard centering ring to one end. The other end will go through the hole in the first stage base part. I then glued that assembly into one half of the first stage using epoxy. When that setup, I then glued the second half on using my Tenax substitue. I also put a dab of epoxy on the cardboard centering ring to attach it to other half of the first stage. When everything was set I tested it on my Vostok model base and it works fine.
I then started filling and sanding on the first stage and the strap on boosters. The first stage also has the booster truss completed. I was able to use the Airfix parts and I think they will look good.
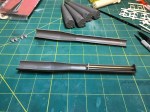
If you look at the pictures below you will see the strap-on boosters lined up behind the first stage that is being worked on. They actually are lined up in a specific order. I found out that the strap-on boosters fit better at certain positions on the truss. I test fitted all of them and noted which position worked best. Then I made a small mark on the back side of each strap-on. The mark will never be seen since it is on the back side next to the first stage. I also had to trim a bit of the first stage where the top of the strap-on meets the first stage. There is a bump at that point where the tip of the strap-on is to be mated to the first stage. All of the strap-ons were too high by just under a 16th of an inch. I trimmed each mating point according to where each strap-on would be placed. Everything now seems to fit.
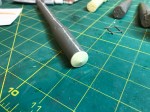
I also added the interstage truss brass to the top of the first stage. The photos I can find of Voskhod 2 are very inconclusive as to what that area is supposed to look like. I took a path that I think will make the model work and look like some of the photos. The brass interstage truss comes as a “Y” shape. The tail of the “Y” is supposed to run from the first stage body to the end of the stage at the blast plate. Then the top of the “Y” is the truss work that actually separates the stages. I think you can see in the photos what I mean. I used JB Weld epoxy to join the ends of the truss and CA to attach it to the first stage. My research photos also show that if the tails of the “Y”s are used then there is a small raised line around the bottom of the “Y”s. I added that with some 0.5mm styrene strip stock.
Next step is to primer all the parts.