
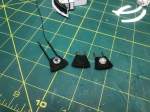
This update will show the completion of the pods, the painted pod platforms and some work on the rest of the command sphere. The pod platforms were painted flat black. I glued a pod base to the right hand pod platform to place the unlit pod. I also glued the pod base in place for the lighted pod. I put the pod platforms into the pod bay and did a test fit. I then noticed that the extended pod was resting on the pod bay door frame and would not allow the pod bay to get a proper fit into the command sphere. I had heard that before on a YouTube video a few week ago. Sure enough it didn’t fit quite right.
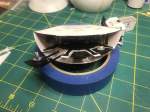
After some careful moving and fitting I decided that if I could remove a bit of the frame near the bottom I could get the pod bay to seat well. It would also mean that I would need to shim the back of the pod bay where it meets the sphere at the bottom. I then started sanding the pod door frame along just the bottom third of the frame. When I had enough removed I did another test fit and found that it should work fine. When everything is in place it will be hardly noticeable.
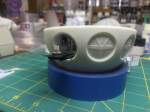
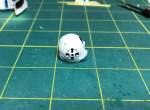
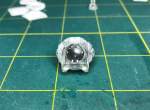
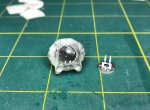
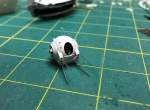
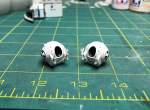
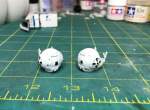
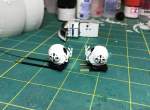
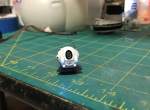
Painting the details on the pods was tricky. They are very small. The stationary pod was completed first. I added the black accents and a small red square on the back. I then put some Tamiya clear gloss where the window should be to simulate glass. Then I put some Micro Kristal Kleer where the headlights were to go. When that had dried I painted them silver, and when that was dry I painted on some Tamiya Clear Gloss. Next went on the arms. They were CA’d into place and then painted flat white. The lighted pod had a few more steps. I made sure the complete inner surface was painted chrome silver. Next, I carefully pushed the 1mm fiber optic fibers into the four headlight holes that were 3D printed in place as part of the pod. I pushed them in until about 1/4 inch was inside the pod. The fiber tunnels force the fibers to slightly bend toward the lower center of the pod so they can catch the most light from the LED. I left some extra sticking out in front to make it easier to use the Plasti-Zap to glue them in without fogging them up. After the CA set I trimmed off the extra. I then hooked up the LED to see how they looked when lit. It looks like they pickup the light well.


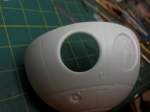
Next, I’ll be starting to mask the sphere in preparation to paint the interior for light blocking. Thanks for looking.
