
While working on the next assemblies of the Millennium Falcon, I took some time to look at all the greebles that are all over the ship. The ILM modelers used dozens and dozens of model kits to add bits here and there. It is really interesting to see what you can identify. I’m sure if I was a car or tank modeler I would recognize more bits, but here are a few that jumped out at me as it was going through the sprues.

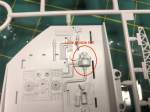


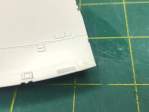
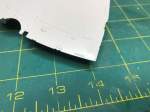
Anyway, now back to the modeling. I was going to start working on the lower hull section when I noticed that one corner was damaged. I don’t think it happened during shipping, I think it may have happened when I put all the part bags back in the box after I first looked inside. It was obvious to me that I didn’t quite get everything back exactly as it was. So there must have been some pressure put on that corner. The plastic is very thin at that point and it had been curled back a bit.
I carefully bent the piece back into place. The edge had started to crack off from the rest of the part, so I needed to glue it back in place. I used my plastic weld glue and after that dried I then used some Tamiya putty to fill the irregularities. When that had dried, I sanded it starting with a fine sanding stick and then progressing through extra fine and finally a polishing stick. It looks good and shouldn’t be noticed once the paint goes on.

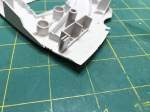
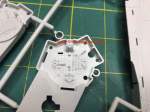
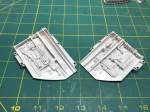
In the meantime I worked on the mandibles. First, I worked on the circular pits, adding the detail parts and then spraying them with primer. I put the primer on them first since once it is in place it would be difficult to get primer to the edges. I’m not going to worry about not getting the base color into every corner of them, as this will add some shadow depth to them.
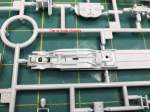
Once those were done I started assembly on the rest of the mandible. Many of the parts, particularly the piping, come from the fragile trees that came in the separate box. These are very nicely molded, but they are also very thin. You will find it difficult to use nippers on some of them. Therefore, care must be taken when removing them from the trees. Many times I used an X-acto knife with a new blade to remove the parts. So far I have only broken one part, and that was at the beginning when I foolishly tried my nippers. The nippers torqued the part and snapped a pipe. Fortunately, it was in a non-critical area and I was able to weld it back together and now looks fine.
Bandai did a very good job designing the gates on the tiny parts. (The gate is where the part attaches to the tree.) In fact most of the gates are either on areas which are internal to the kit or are hidden by other parts when assembled. Even so, on the tiny pipes and other parts, it is inevitable that a few gates will be visible after assembly. So you will have to carefully clean them after removing them from the tree.
Anyway, I got the mandibles finished and set them aside to be sprayed with primer later.

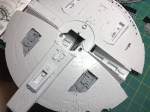
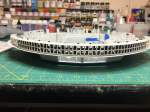
With the repair complete on the lower hull, I started work on the other parts to add to it. The maintenance bays had to be built up next. These also had many tiny parts to complete them. The amount of detail on this kit is truly amazing. There are so many tiny parts that couldn’t have been included any other way than to have been separate parts. There is no way to mold a single part that has that kind of 3D detail. This kit amazes me with each section I complete.
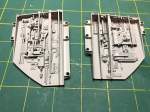
When they were done I moved on the docking ports. Once again a part that in many kits would have been just a handful of pieces was many large and small parts that end up beautiful. I primed those parts and then built the nose piece that fits between the mandibles. Then I put the LED in the front landing gear bay and attached the nose piece and maintenance bays to the lower hull. I then added the back half of the lower hull.

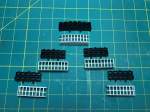
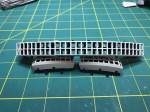
As you may have noticed, I am not exactly building this kit in the order laid out in the instructions. I’m doing this to try and facilitate painting of the kit. My plan is to get the kit assembled, with certain areas primered first, and then spray on the base coat. After the base coat, I plan on applying the decals for the different colored panels and then start to weather the kit. Because of this, I needed to paint the engine grid, then install it, mask it off and then paint the areas around the grid. That is the plan, we will see how it goes.
I painted the back area of the grid flat black and the outward facing grid the base color (white gray). Then I assembled the inner and outer grid parts and installed that in the lower hull. Then I masked it off in preparation for primer on the rest of the hull.


That is it for this update. I’ll be working on the upper hull and preparing for primer of those parts next.
Thanks for looking.
