
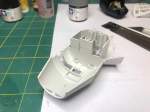
After the main console was finished, I moved on to the side walls of the cockpit. I had already given up the idea of using decals for the side walls. Instead I painted them with a clear flat and then started painting the gray areas. From there I moved on to dry brushing the lights and buttons with silver. Then used some transparent blue and red to color some of the buttons. Here are the results. I think it turned out relatively well.

In the first post on this build I indicated that I was going to try to apply my custom decal to the back wall of the cockpit.

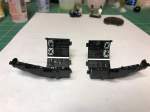
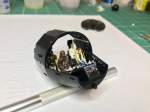
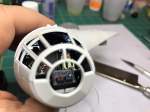
Well it didn’t turn out well. I applied the decal using MicroSet, but it became evident very quickly that there were too many raised areas on the back wall and some of them were larger than I thought. Off came the decal and I repainted the back wall with primer and matt black. I then painted the lighter panels with Tamiya NATO Black, the padding around the door with Model Air Sand Yellow and the door itself with Tamiya Dark Sea Gray. Then I started removing paint from the areas that I wanted light to come through. I also added a bit of Tamiya transparent Blue, Red and Green to add color to the lights and buttons on the wall. I used the transparent colors on both the front and the back to enhance the color. I sanded the back side of the light bars to diffuse the light at bit. I also sprayed the back side with some Matt Clear to add a bit of diffusion there as well.


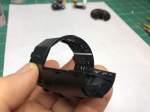
Before putting the cockpit in the hull I noticed that the way the light shines on it from behind, that Bandai has intended for only the light bars to shine. None of the buttons and lights would shine. To remedy that, I did some surgery on the hull part. This should allow some of the light to fall on the rest of the wall and not just the light bars.
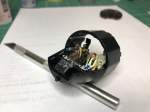
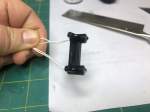
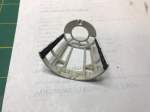
I then also saw that the LED holder had just tiny holes for the light to shine through. I used a round file to open the holes up and allow more light through.

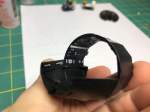
Once that was done I put the LEDs in place, turned them on and checked how it looks.


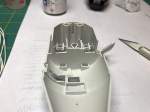
With that complete, I started on finishing the cockpit assembly. I painted the inside of the window piece. The lower section was painted black in line with the side panels and then the rest of the interior was given a black wash to show detail and give it a bit of a grimy look, then it was sprayed with Matt Clear. Next I snapped the hull halves together. I then noticed that the halves would not close completely without some pressure. Time for the plastic weld. I glued the outside section together first, followed by the side facing the rest of the ship. I was able to close all the seam lines except for the last section that would head toward the rest of the ship. There was a gap that I just couldn’t close. I pulled out some 0.05 inch plastic sheet and cut a small section to put into the gap. Then I used my plastic weld on it and when that was dry I cut off the excess. The gap is now nicely closed.
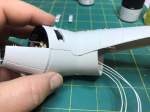


I then attached all the rest of the plastic bits that needed to go on, including an optional photoetch grill section. The cockpit window section doesn’t quite fit right. I will wait to glue that part in until I get it all painted.
On to the next section. Thanks for looking.
